By default scripting capabilities are turned off in Office 365. This will prevent the use of a set of settings and a larger number of web parts.
The administrator of the environment can enable scripting in SharePoint admin center. When scripting is turned on it takes about 24 hours for the change to take effect.
Solution
1. Sign in to Office 365.
2. Open the admin center.
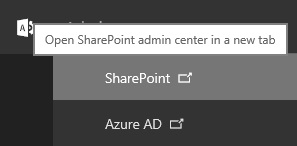
3. Open the SharePoint admin center.
4. Click on settings.
5. Set custom scripting to allow.

6. Save the changes and wait 24 hours.
The following web part, features are settings are effected by the turning scripting on/off. When scripting is disabled (off) these functions will be unavailable to administrators.
| Effect Web parts and features | |
| Web Part Category | Web Part |
| Blog | Blog Archives Blog Notifications Blog Tools |
| Business Data | Business Data Actions Business Data Item Business Data Item Builder Business Data List Business Data Related List Excel Web Access Indicator Details Status List Visio Web Access |
| Community | About This Community Join My Membership Tools What’s Happening |
| Content Rollup | Categories Project Summary Relevant Documents RSS Viewer Site Aggregator Sites in Category Term Property Timeline WSRP Viewer XML Viewer |
| Document Sets | Document Set Contents Document Set Properties |
| Forms | HTML Form Web Part |
| Media and Content | Content Editor Script Editor Silverlight Web Part |
| Search | Refinement Search Box Search Navigation Search Results |
| Search-Driven Content | Catalog-Item Reuse |
| Social Collaboration | Contact Details Note Board Organization Browser Site Feed Tag Cloud User Tasks |
| Master Page Gallery | Can’t create or edit master pages |
| Publishing Sites | Can’t create or edit master pages and page layouts |
| Effected sites settings | ||
| Site Feature | Behavior | Notes |
| Save Site as Template | No longer available in Site Settings. | You can still build sites from templates created before scripting was disabled. |
| Save document library as template | No longer available in Library Settings. | You can still build document libraries from templates created before scripting was disabled. |
| Solution Gallery | No longer available in Site Settings. | You can still use solutions created before scripting was disabled. |
| Theme Gallery | No longer available in Site Settings. | You can still use themes created before scripting was disabled. |
| Help Settings | No longer available in Site Settings. | You can still access help file collections available before scripting was disabled. |
| HTML Field Security | No longer available in Library Settings. | You can still use HTML field security that you set up before scripting was disabled. |
| Sandbox solutions | Solution Gallery will not appear in the Site Settings so you can’t add, manage, or upgrade sandbox solutions. | You can still run sandbox solutions that were deployed before scripting was disabled. |
| SharePoint Designer | Site Pages: No longer able to update web pages that are not HTML. Handling List: Create Form and Custom Action will no longer work. Subsites: New Subsite and Delete Site redirect to the Site Settings page in the browser. Data Sources: Properties button is no longer available. |
You can still open data sources. |
| Uploading files that potentially include scripts | The following file types can no longer be uploaded to a library .asmx .ascx .aspx .htc .jar .master .swf .xap .xsf |
Existing files in the library are not impacted. |