SharePoint 2013 CQWP Office Online hyperlink

With the introduction of Office Online (Office web apps) files can be opened in the browser with Office Online (Office web apps) or with the local client. If able SharePoint 2013 will open files (.pptx, docx, xslx) in office Online and other files in the related client (doc, xsl, pdf etc.) This behavior works great within the document library, however this does not work out of the box for files that are displayed using a content query webpart. With XSLT we are able to create an variable which creates per file the required hyperlink.

Solution
1. Edit the CQWP Template where the semi dynamic hyperlink is required.
2. First we need to create the variable that builds the correct office online or default hyperlink. The default hyperlink opens the files in the client software.

<xsl:variable name="DynamicURL">
   <xsl:choose>						
      <xsl:when test="contains(@FileExtension,'docx')">
         /sites/PH/OH/_layouts/WopiFrame.aspx?sourcedoc=<xsl:value-of select="@LinkUrl"/>	
      </xsl:when>
      <xsl:when test="contains(@FileExtension,'pptx ')">
         /sites/PH/OH/_layouts/WopiFrame.aspx?sourcedoc=<xsl:value-of select="@LinkUrl"/>	
      </xsl:when>
      <xsl:when test="contains(@FileExtension,'xslx')">
         /sites/PH/OH/_layouts/WopiFrame.aspx?sourcedoc=<xsl:value-of select="@LinkUrl"/>	
      </xsl:when>
      <xsl:otherwise>
         <xsl:value-of select="@LinkUrl"/>
      </xsl:otherwise>
   </xsl:choose>
</xsl:variable>

3. The choose function determines the file type and sets the correct Office Online hyperlink or the default Hyperlink based of LinkUrl field.
4. Secondly we need to use the DynamicURL variable to create the hyperlink.

<a href="{$DynamicURL}" target="_blank">
   <xsl:value-of select="@Name"/>
</a>


Result
Files with extensions docx, pptx and xslx will open in Office Online other files will open in the related client.
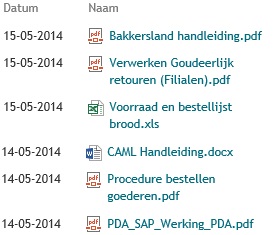
CQWP Hyperlink Office Online

Show Pictures with Slimbox in SharePoint

Pictures are an important part of a SharePoint site, it enriched the otherwise plain look and feel. With a little extra effort we can integrate Slimbox to show the pictures in a very slick and modern way.

Solution

1. Download Slimbox2 and jQuery, in this example I used jQuery 1.8.3 uncompressed.
2. Save the files in the Style Library of SharePoint. Note that not all the Slimbox files are required to be stored in SharePoint.
3. Include the jQuery javascript, the Slimbox javascript and the Slimbox CSS to the page, page-layout or the master page.

<script type="text/javascript" src="js/jquery.js"></script>
<script type="text/javascript" src="js/slimbox2.js"></script>
<link rel="stylesheet" href="css/slimbox2-rtl.css" type="text/css" media="screen" />

5. Create a picture library and save a couple of pictures to the library. The picture library will provide the necessary thumbnails without any extra effort.
6. Add a CQWP to a page and query the pictures.
7. Create a XSLT that shows the small thumbnails of the pictures, for example in a banner view.

Slimbox Result 1

8. I created two variables for the default SharePoint Thumbnails, Thumbnail_w and Thumnbail_t. And used the following code to show the small thumbnail with a Slimbox link to the bigger thumbnail.

<a href="{$Thumbnail_w}" rel="lightbox" title="{@Title}">
   <img src="{$Thumbnail_t}" alt="alt" class="PhotoAppThumbnail" />
</a>

9. Also note that the title field is added to the Slimbox link, the title will be displayed on the Slimbox overlay.

Result

Slimbox Result 1

Display related items within a page layout

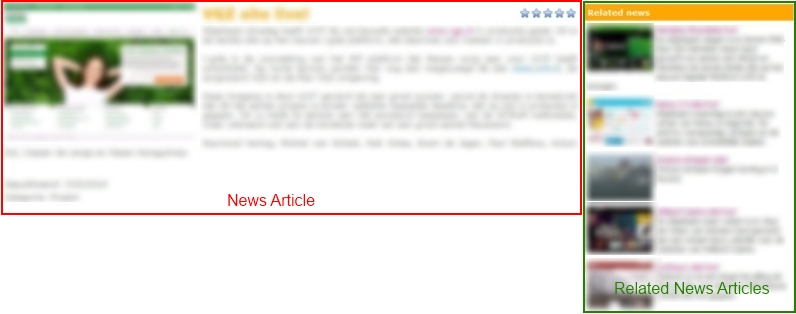
An intranet resolves around its content and the findability of the content. Providing the user with useful information is vital for a good intranet. An example of providing useful information is to show related new articles besides a news article.

Solution

The solution consist of three parts the content type, page layout and a content query web part (CQWP).

Content type configuration

1. Create a new content type with Article page as parent.
2. Create a term set named news categories.
3. Add a few terms.
4. Add a new column named News Category linked to the news categories term set.

Page layout and CQWP configuration

1. Open the site in SharePoint Designer
2. Create the news page layout
3. Link the news content type to the page layout.
4. Add a web part zone
5. Add a CQWP to a web part zone.
6. Configure the CQWP to show the news items.
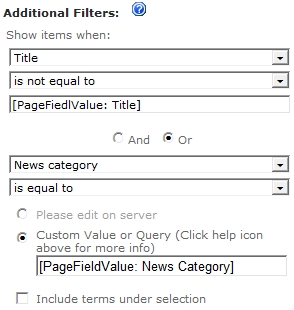
7. Configure the Additional filters.


6. Show items when: News catergory is equal to [PageFieldValue: News Category].

[PageFieldValue: News Category]

7. Or Title is not equal to [PageFiedlValue: Title].

[PageFiedlValue: Title]

7. Add the News Catergory column to the page layout.
8. Save the page layout and enjoy the result.

Result

Presence and user profile URL with XSLT

When showing a person field, the field does not show the presence and there is no link to the users My site. With XSLT it is possible to show the prensence of the user and create a URL to the users My Site.

Solution showing the presence 

1. Open the ItemStyle.xsl in SharePoint Designer.
2. Add the reference to the header of the XSLT file, if the reference is missing.

xmlns:ddwrt="http://schemas.microsoft.com/WebParts/v2/DataView/runtime"

3.  Add the following code to the XSLT template.

<xsl:variable name="UserEmail">
   <xsl:value-of select="ddwrt:UserLookup(string(@UserField) ,'EMail')" />
</xsl:variable>

<img width="12" height="12" id="{generate-id(@UserField)}" onload="IMNRC('{$UserEmail}');" alt="UserPresence" src="/_layouts/images/blank.gif" border="0" complete="complete" Sortable="1" valign="middle"/>

4. Change the @UserField to your user field.

Solution creating the user profile URL

1. Open the ItemStyle.xsl in SharePoint Designer.
2. Add the reference to the header of the XSLT file, if the reference is missing.

xmlns:ddwrt="http://schemas.microsoft.com/WebParts/v2/DataView/runtime"

3. Add the following code to the XSLT template.

<xsl:variable name="UserFieldLogin">
   <xsl:value-of select="ddwrt:UserLookup(string(@UserField) ,'Login')" />
</xsl:variable>

<a href="https://my.macaw.nl/Person.aspx?accountname={$UserFieldLogin}"> 
<xsl:value-of select="@UserField"/></a>

4. Change the @UserField to your user field.
5. Change the My Site example URL to your My Site URL.

<a href="https://my.macaw.nl/Person.aspx?accountname={$UserFieldLogin}">


Result

Remove HTML markup in Content Query Web Part

Issue
When showing a multi line or text column with Rich text or Enhanced rich text all the supporting HTML tags will be visible in the result. The tags make the result unreadable for end users.

With XSLT it is possible to remove the tags and make the result clean and readable. All the markups will be removed, also text markups.

Solution

1. Open the ItemStyle.xsl in SharePoint designer.
2. Make a the new removeMarkUp template.

<xsl:template name="removeMarkup">
   <xsl:param name="string" />
   <xsl:choose>
   <xsl:when test="contains($string, '&lt;')">
      <xsl:variable name="nextString">
	<xsl:call-template name="removeMarkup">
	   <xsl:with-param name="string" select="substring-after($string, '&gt;')" />
	</xsl:call-template>
      </xsl:variable>
         <xsl:value-of select="concat(substring-before($string, '&lt;'), $nextString)" />
   </xsl:when>
   <xsl:otherwise>
      <xsl:value-of select="$string" />
   </xsl:otherwise>
   </xsl:choose>		
</xsl:template>

3. Add the cleanBody variable to the template which renders the content query.

<xsl:variable name="cleanBody">
   <xsl:call-template name="removeMarkup">
      <xsl:with-param name="string" select="@Body"/>
   </xsl:call-template>
</xsl:variable>

4. Show the clean body with this code.

<xsl:value-of select="$cleanBody" />

5. All the HTML markup is removed!