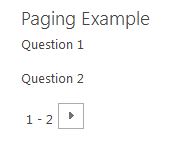
With JSLink you have the ability to quickly and easily change how a list views and forms are rendered. In this example I will explain how to change a field or fields located in the view, display, new or edit forms. The advantage of only changing the look and feel of specific fields is that all the default features and functions will remain functional. For example paging will still work and you will not need to create custom paging.
Solution
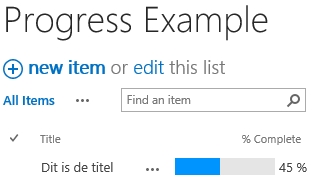
In this solution I will change the look and feel of the default % complete column.
- Create a custom SharePoint list called Progress Example.
- Add the default % complete column.
- Save the JSLink Percentage Complete to SharePoint.
- Link the JSLink to the form on new, edit, display and view web parts.
- The view and display form will be shown as a progress bar with the exact number shown.
- The edit en new forms will be shown as a progress bar that you change with the exact number shown.

Explanation
- The JSLink overrides the default rendering of the percentage complete (% complete) column.
- Each column and form that needs a different rendering needs to be linked to the new render function.
You can link multiple forms to one function. - In the following code the view and display column are linked to the same function called percentCompleteViewDisplayFiledTemplate.
- The edit and new form are linked to the function called percentCompleteEditFiledTemplate.
(function  ()
    // Create object that have the context information about the field that we want to change it's output render
   var overrideNameField  =  {};
   overrideNameField.Templates  =<  {};
   overrideNameField.Templates.Fields  =  {
        // Apply the new rendering for Priority field on List View
        "PercentComplete": {    "View": percentCompleteViewDisplayFiledTemplate,
                                "EditForm": percentCompleteEditFiledTemplate,
                                "NewForm": percentCompleteEditFiledTemplate,
                                "DisplayForm": percentCompleteViewDisplayFiledTemplate
        }
     };
     SPClientTemplates.TemplateManager.RegisterTemplateOverrides(overrideNameField);
})();
- In the functions you can rewrite how the column is rendered.
- The function percentCompleteEditFiledTemplate rewrites the rendition.
// This function provides the rendering logic for New and Edit forms for percentage complete column
function percentCompleteEditFiledTemplate(ctx) {

  var formCtx = SPClientTemplates.Utility.GetFormContextForCurrentField(ctx);

    // Register a callback just before submit.
    formCtx.registerGetValueCallback(formCtx.fieldName, function () {
        return document.getElementById('inpPercentComplete').value;
    });

    return "<input type='range' id='inpPercentComplete' name='inpPercentComplete' min='0' max='100' oninput='outPercentComplete.value=inpPercentComplete.value' value='" + formCtx.fieldValue + "' /> <output name='outPercentComplete' for='inpPercentComplete' >" + formCtx.fieldValue + "</output>%";
}
- The result is an input slide bar instead of the default text box.