Want to start a survey or poll during a meeting or in a Team channel? With Microsoft Forms, you can create a survey or poll in seconds in Microsoft Teams. Its easy, simple and extremely fast.
How to create the poll
Go to a chat, channel or meeting chat where you want to add the poll.
On the bottom of the window there is a Forms icon, click on the icon.
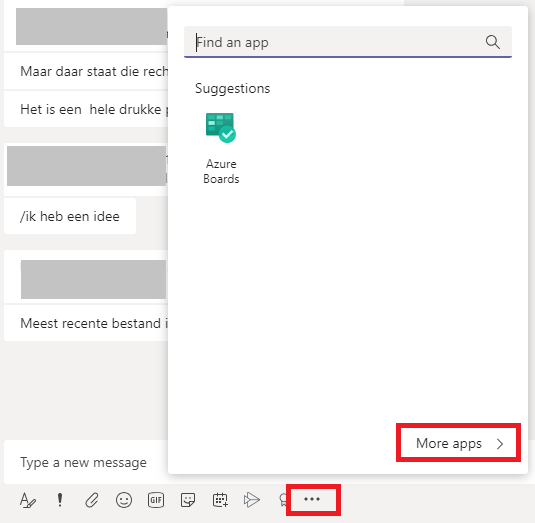
If you don’t see the Forms icon press on the more option (the three dots).
Click on More app and then on Forms.
Click on open, this will add the Forms icon to the chat and open a screen to create a new poll.
Create the poll, by adding questions and answers.
Click on save and on send.
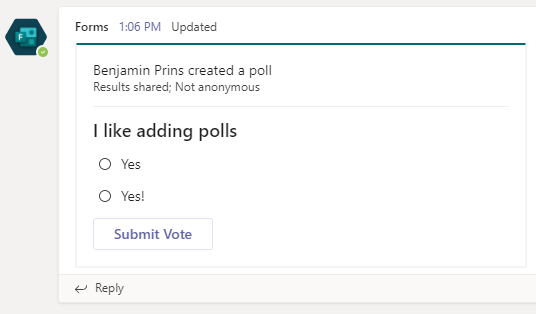
You have now created a poll that is automatically posted in the chat.
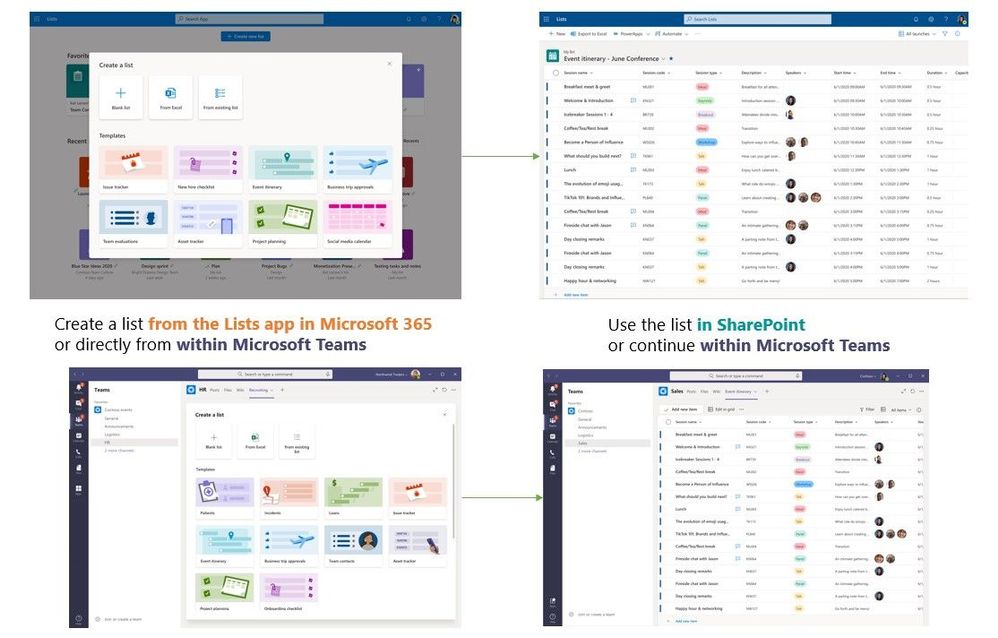
Lists in Office 365 is a powerful tool and it integrates perfectly in Teams or your personal OneDrive. You can use one of the list templates provide by Microsoft or create your own. The best way to use Lists is with Teams, then you can work together in real time with conversation and lists side by side. Track what matters most to your team using rules, reminders, and comments.
The bonus is that you can also create a Power App directly from the list. Now you can really use the list anywhere and anytime. The Power App can also be connected to the Team for easy access.
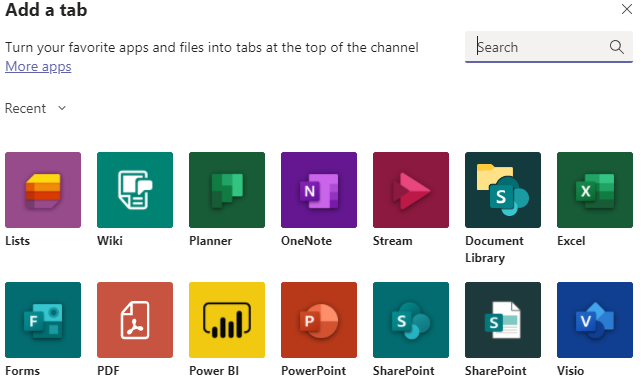
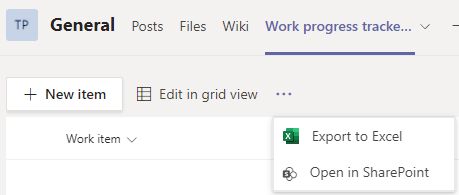
Lists in Teams
Add a Tab in Teams and select the List and click on save.
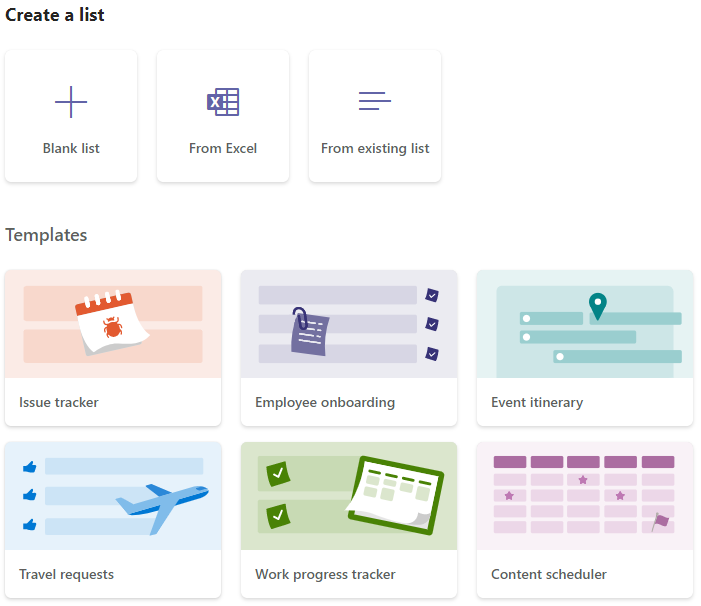
Create a new list.
You can use a template or create a blank list.
Click on the Work progress tracker template and click on Use template.
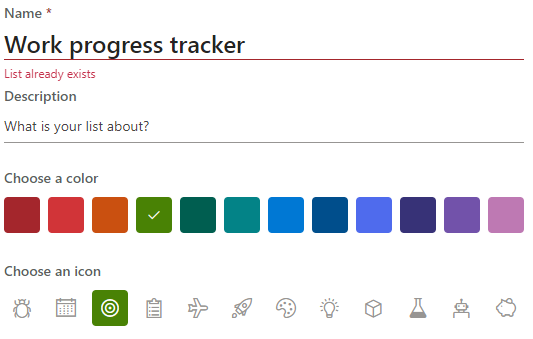
Fill in the name and description.
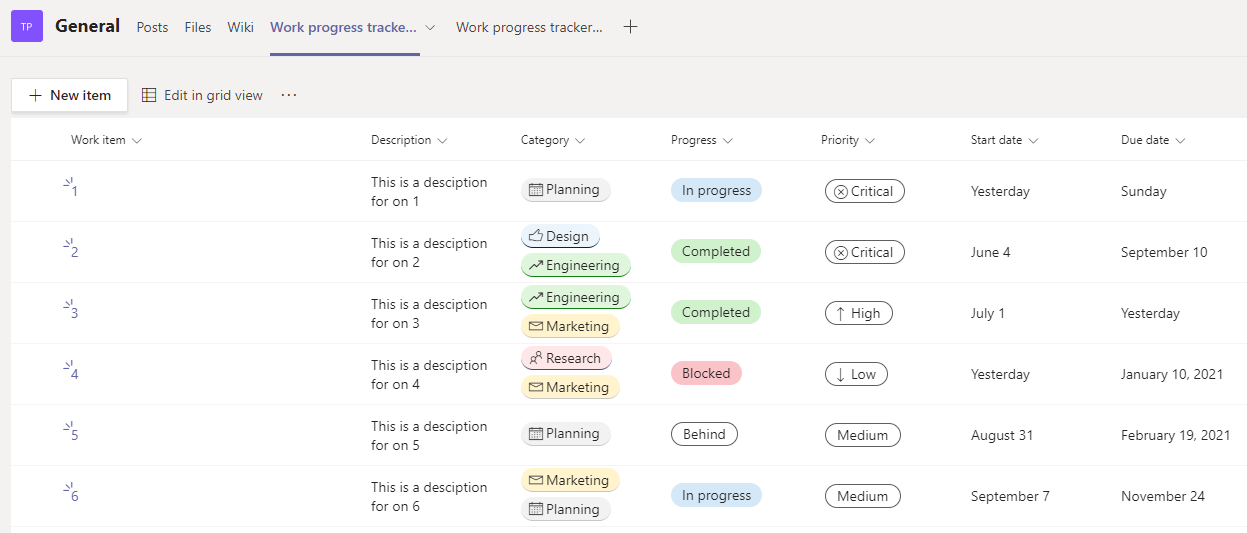
You have now create the List in Teams.
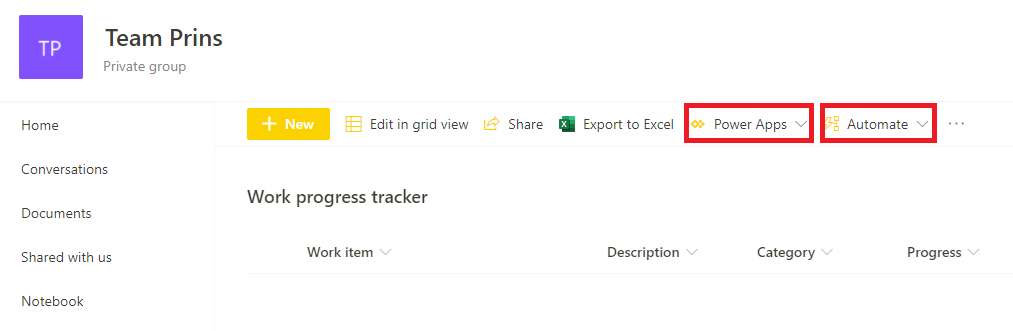
List with Power App in Teams
Its very easy to create a Power App based on a list. This Power App can also be added to Teams to be as productive as possible.
Navigate and open the Work progress tracker list.
Open the list in SharePoint, this is the SharePoint site that is connected to the Team.
Click on Power Apps and Create an app.
Note that you can also create a Power Automate Flow for the list.
Fill in the name of the Power App and click on Create.
The app will be created, this process takes a few moments.
If required, you can change the Power App.
In this example I don’t change the Power App.
Navigate to the Team and add a Tab.
Find the Power App and click on Save.
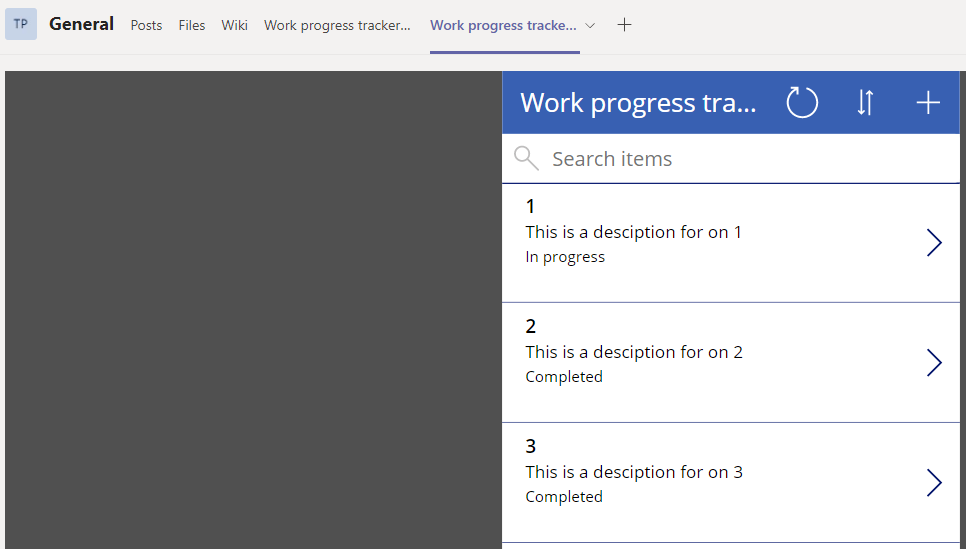
You can now use the Power App in Teams.
Lists in OneDrive
Open Lists and click on New.
Select a template or create a blank list.
3. Select the Work progress tracker and click on Use template. 4. Fill in the name and description. 5. The Save to location for your OneDrive is My lists.
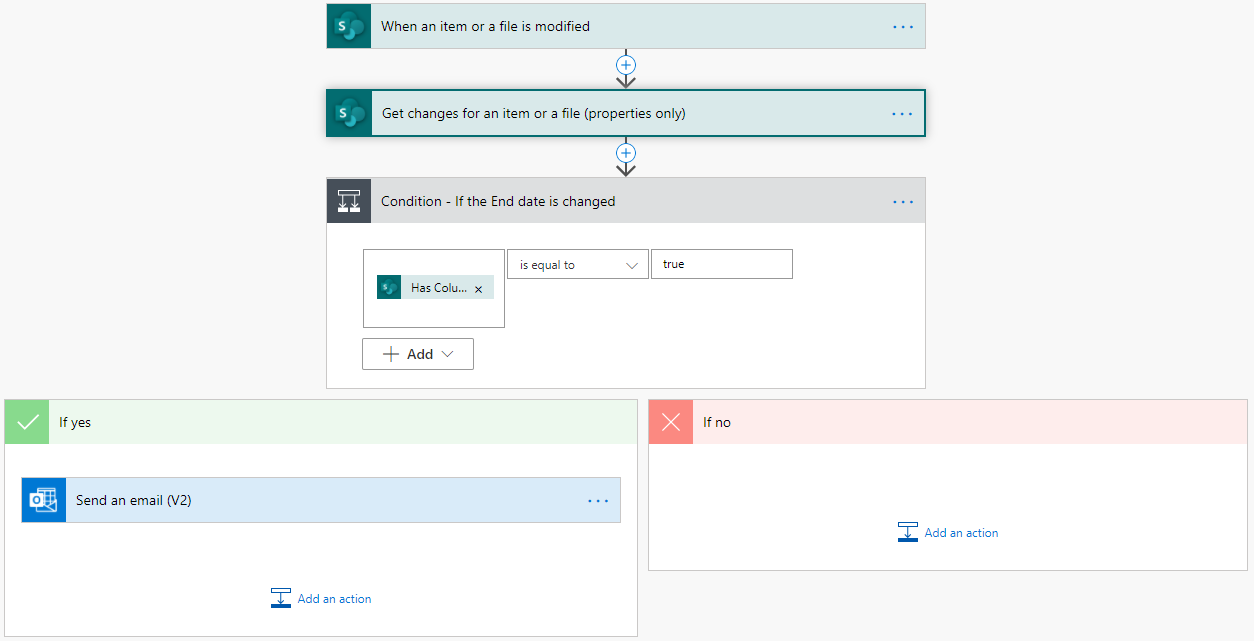
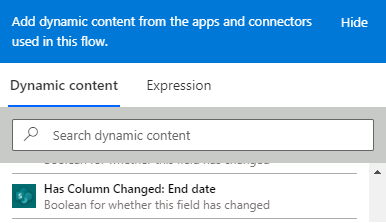
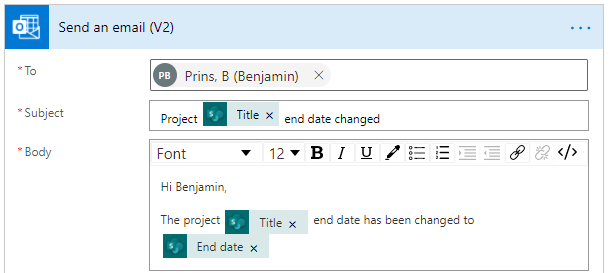
With Microsoft Power Automate we can now create flows that start based on specific columns being updated in SharePoint! This is a feature I have been waiting on for years! The action is called Get changes for an item or a file. The action returns a boolean for each field, whether it was just changed or not. Based on this boolean you know if a field was changed.
Creating the flow
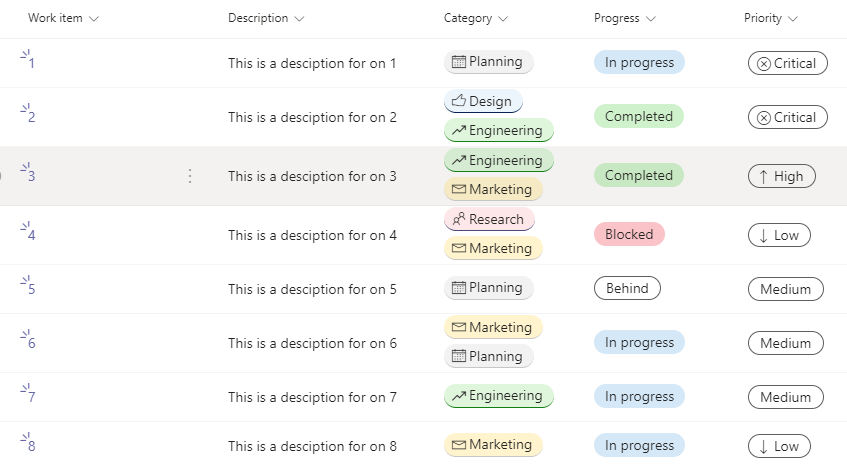
Create a SharePoint list, I created the following project list.
Enable versioning on the list.
Create a flow and use the trigger When an item or a file is modified.
Select your site and list.
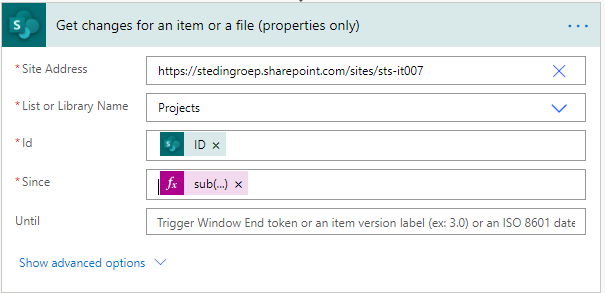
Add the action Get changes for an item or a file (properties only).
Fill in the site address, library name and the ID of the item that was triggered.
The field Since is used to get the changes we need to make a comparison. If you use 1.0 you will compare the current item version with version 1.0. But we want the latest changes so we use the following expression.
The updates for Office 365 keep coming and coming, Microsoft is not sitting still! I am very excited for the following new features. Note that some of these features are already live, being rolled out or still being developed.
Teams: New meeting experience
With the latest Teams update you can turn on the new meeting experience. Meetings and calls will than open in separate windows. Giving you the option to drag a meeting to a different screen and keep working with Teams on your second screen.
The meeting controls are moved to the top of the meeting screen and are always showing, always out of the way of the shared content and video.
The Large galleryview lets you see up to 49 video streams at once. This only works with 10 or more attendees who are sharing video.
I also want to highlight an older feature that most people don’t know about. That is the ability to zoom in on the shared content. Unable to read what the presenter is showing? Zoom into the content by pressing the Control-key and spinning the mouse scroll wheel.
With Contextual Search in Microsoft Teams you can find information very faster. You can search for content in a specific channel or chat by pressing CTRL + F. Search results will only contain messages and files found in the selected chat or channel!
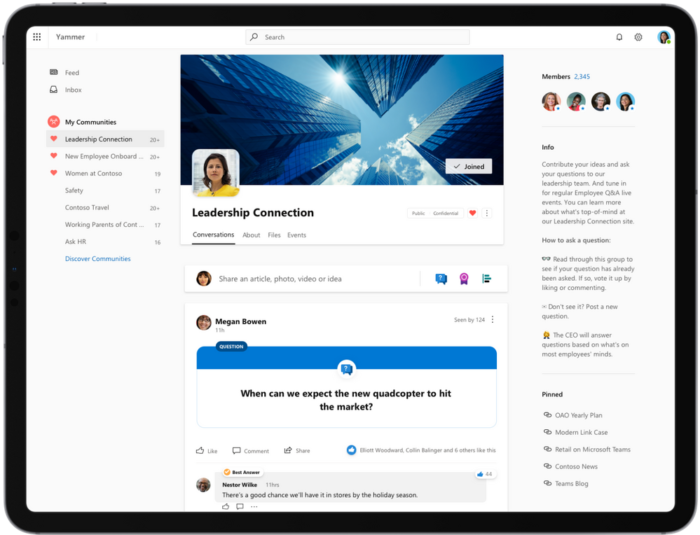
Yammer: New experience is available worldwide
The new experience for Yammer is available worldwide! In my other blog post you can read about the new features.
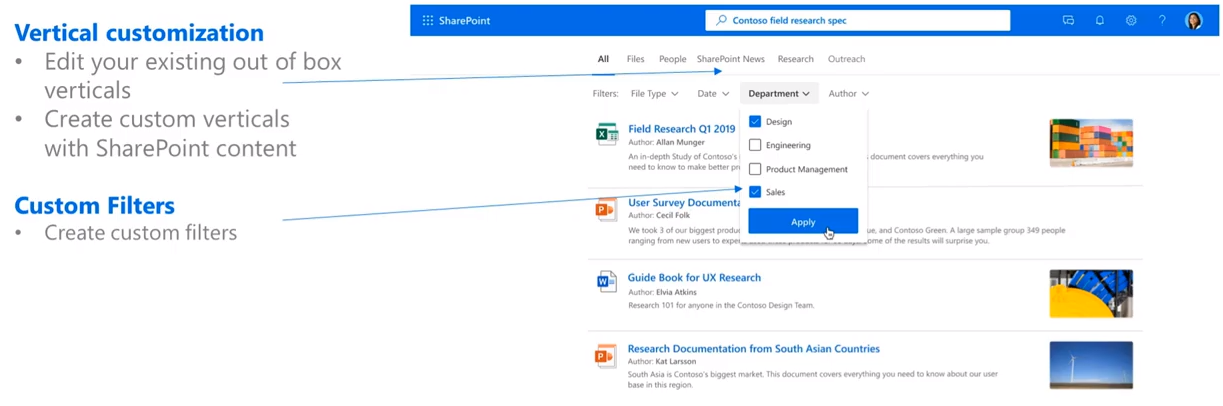
Search: New user experience
Microsoft gave a preview of the new search user experience. We will be able to create our own vertical (similar to scopes) and filters. The verticals are in preview, so you might be able to use them already.
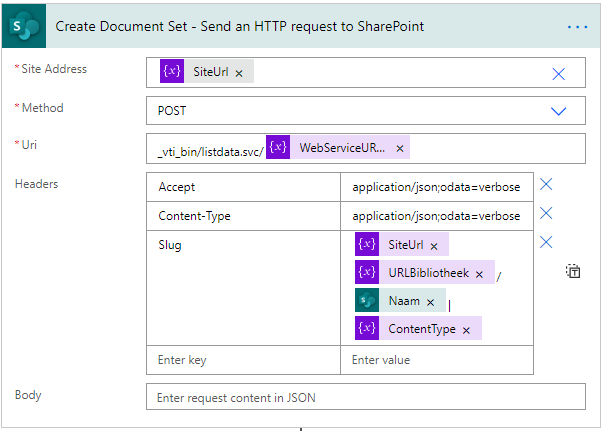
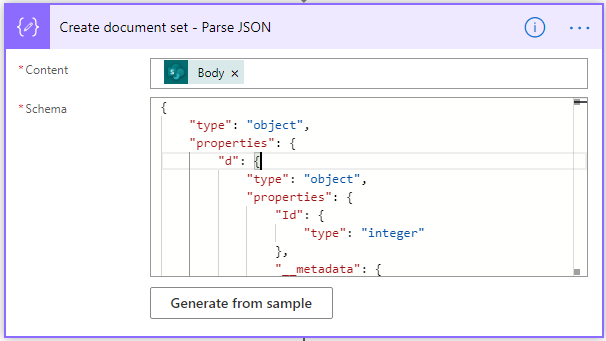
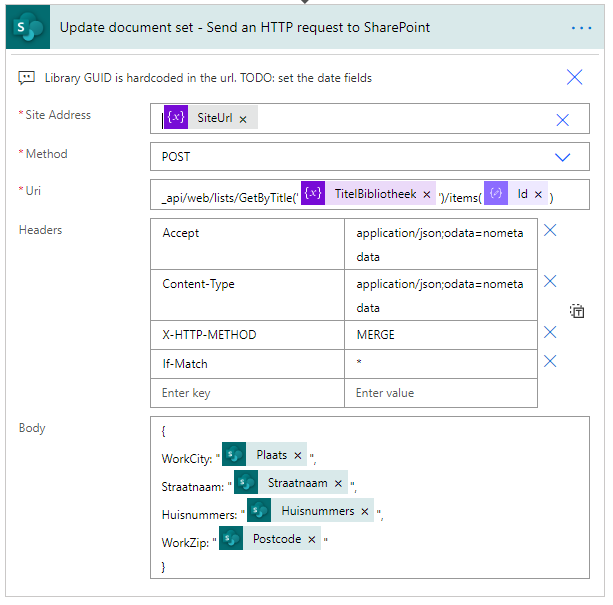
Many colleagues have asked me how to create or update document sets with Power Automate. I had never done this before so I told them to use a web service. From now on, I can point them to this blog post. The flow is created with the help of my colleague Jasper Voskuilen, because this web service is a bit more complicated to setup.
Creating the flow
Open Power Automate and create a new flow (automation).
I created a flow with the trigger, for a selected item.
In my situation I get all items from a list and then create a document set for each result.
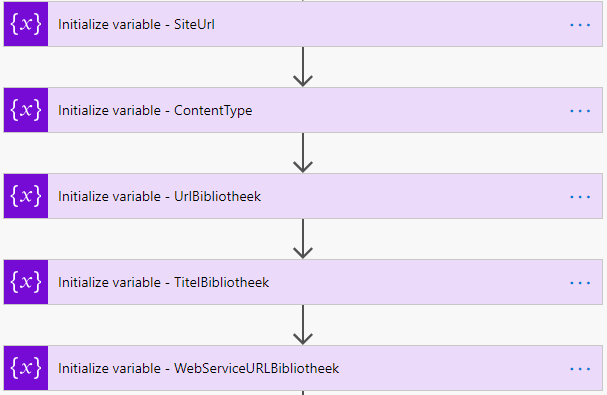
Create the following variables with the related values.
This will make the flow more dynamic for later changes.
SiteURL as a string, fill in the Site URL.
ContentType as a string, fill in the content type id.
URLLibrary as a string, fill in the library name part of the ULR. For this example it is: Library
Microsoft is working hard to update Office 365 by adding new features and improving the overall user experience. I am very excited for the following new features. Note that some of these features are already live, being rolled out or still being developed.
Teams
The number of participants who can be viewed simultaneously in a meeting is now nine. This is a great update; this will help the meetings to go smoother.
You can now raise a hand in teams. By virtual raising your hand, you can signal to the speaker or organizer that you want to speak.
During a Teams meeting go to the options bar.
Click on the hand icon.
In Teams you can now instantly pop out your chat into a separate window! But thats not all you can also, resize, reposition, or close the window as you wish. You can pop out multiple conversations at the same time.
Click on the pop out icon to pop out the chat.
Modern Lists
Modern Lists has been announced, at this moment it is unknown when it will be released. With Modern Lists the platform will reach a new level of flexibility and maturity, the possibilities seem endless.
Yammer
The new Yammer is in public preview and it looks great. I listed a few of my favorites below. You can find all the details in the Microsoft announcement.
You can now pin your favorite communities (formerly known as groups) to the navigation for quick access.
The integration with Outlook, Teams and SharePoint has been update and works smoother.
You can brand Yammer with your company logo!
Posts can now be reported to make it easier to moderate your communities.
You can now search and filter easier.
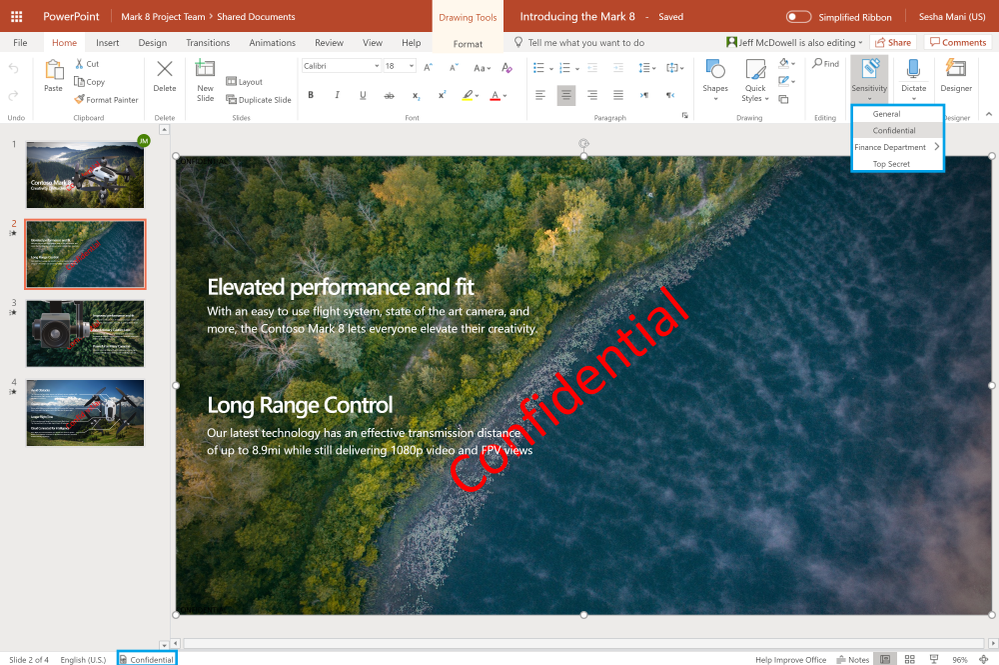
Sensitivity labels for SharePoint and OneDrive
Sensitivity labels from the Microsoft Information Protection framework let you classify and protect your organization’s data, while making sure that user productivity and their ability to collaborate is not hindered. When the sensitivity label are created and associate protection policies like encryption and visual marking, then your end users simply label their important documents and emails. You can find all the details in the Microsoft announcement.
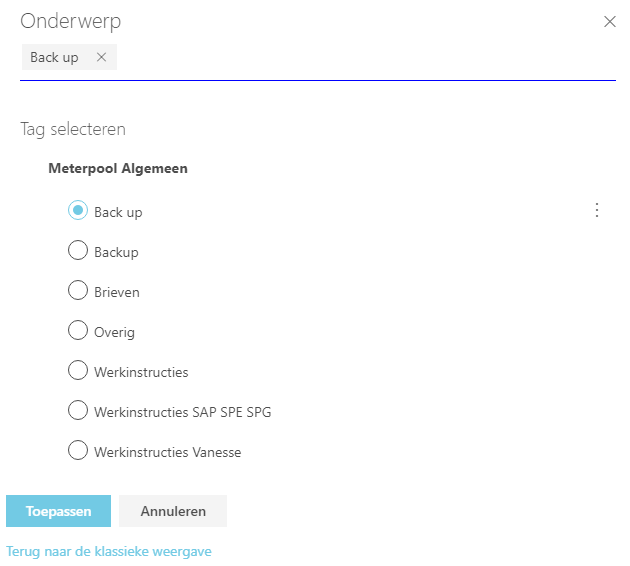
SharePoint Term Store
The SharePoint Term Store is being updated and one of the changes is now visible. The user interface has been modified to look cleaner and is easier to use. When you want to create more terms you will need to switch to the classical view. You can do this by clicking on the link called Return to classic.
This website uses cookies to improve your experience. We'll assume you're ok with this, but you can opt-out if you wish.AcceptRead More
Privacy & Cookies Policy
Privacy Overview
This website uses cookies to improve your experience while you navigate through the website. Out of these, the cookies that are categorized as necessary are stored on your browser as they are essential for the working of basic functionalities of the website. We also use third-party cookies that help us analyze and understand how you use this website. These cookies will be stored in your browser only with your consent. You also have the option to opt-out of these cookies. But opting out of some of these cookies may affect your browsing experience.
Necessary cookies are absolutely essential for the website to function properly. This category only includes cookies that ensures basic functionalities and security features of the website. These cookies do not store any personal information.
Any cookies that may not be particularly necessary for the website to function and is used specifically to collect user personal data via analytics, ads, other embedded contents are termed as non-necessary cookies. It is mandatory to procure user consent prior to running these cookies on your website.