Today, we’ll be discussing a crucial aspect of B2C account management – the creation and deletion of B2C accounts in response to changes in the Dataverse Contact. This is an important topic for businesses that deal with external Power Pages user (contacts) that want to ensure the security of their records and Power Pages. In this post I will explain how to create or delete B2C accounts that are connected to a Dataverse Contact. So, let’s dive in!
Create a B2C account when a Dataverse Contact is created
Whenever a new contact is created a new B2C account needs to be created automatically that is linked to the contact. This is done thought the email address of the contact and the Azure B2C account id. These automations will limit the amount of manual admin work.
- Create a new Power Automate flow with the name Create B2C user for Dataverse Contact.
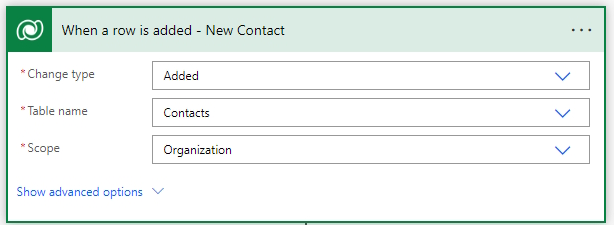
- Add the Dataverse trigger When a row is added.
- Set the Change type to Added.
- Set the Table name to Contacts.
- Set the Scope to Organization.
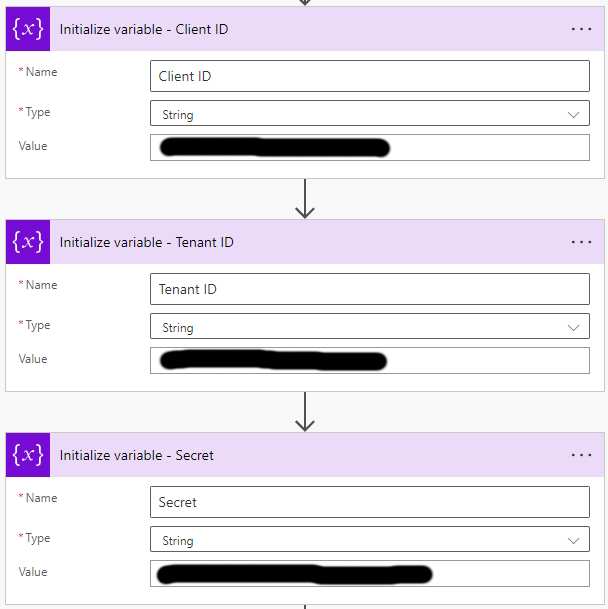
- Create the following 3 variables.
- You will need to create an Application Registration in the B2C tenant with the following permissions.
| Permission type | Permissions (from least to most privileged) |
| Delegated (work or school account) | User.ReadWrite.All, Directory.ReadWrite.All |
| Delegated (personal Microsoft account) | Not supported |
| Application | User.ReadWrite.All, Directory.ReadWrite.All |
- Store the Client ID, Tenant ID and Secrect in the corresponding variables.
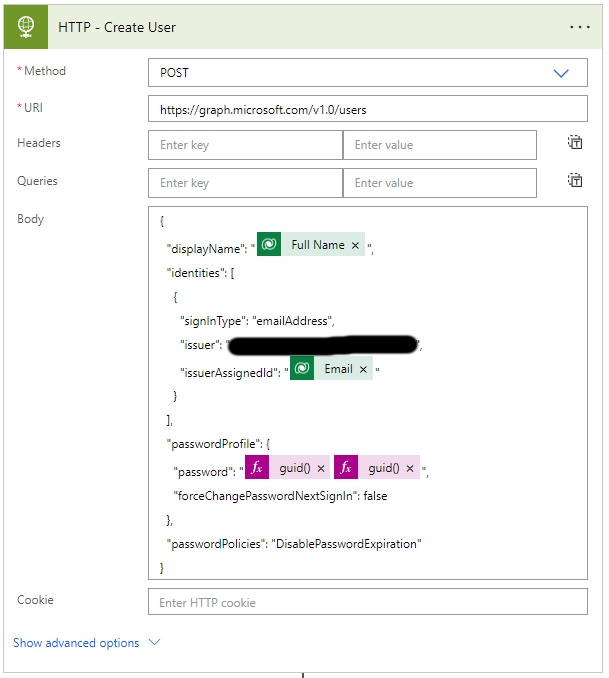
- Add a HTTP action called HTTP – Delete User to the flow.
- Set the Method to: Post.
- Set the URI to the following code.
https://graph.microsoft.com/v1.0/users- Set the body to the following code.
- In my scenario the user will not be using the password but the one-time password from B2C. That’s why I have added a guid twice as the password.
- This call will create an account of the type email address which allows for any valid email to be used. The email does not have to be part of the B2C domain.
- Parse the JSON response of the HTTP – Create User call.
- Add the Dataverse action Update a row.
- Set the Table name to Contact.
- Set the Row id to the contact id of the trigger.
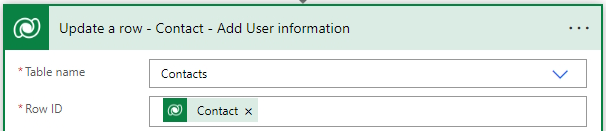
- Add the id that was returned by the HTTP call that created the B2C account.

- Save the flow.
Delete B2C account when Dataverse Contact is deleted
In my scenario I am maintaining the Power Pages contacts within a canvas app, and when a contact is deleted the associated B2C account needs to be deleted too.
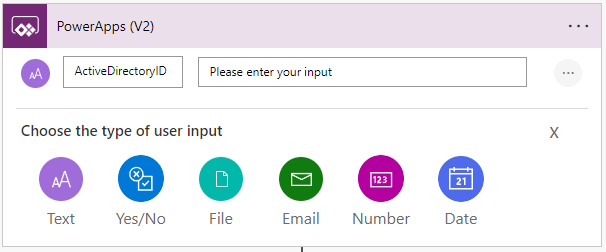
- Create a new Power Automate flow with a Power Apps (V2) trigger with the name Delete B2C users for deleted Dataverse Contact.
- Add an input Text field names ActiveDirectoryID.
- This is the Object ID of the Azure B2C Active Directory User connected to the Contact.
- Create the following 3 variables.
- You will need to create an Application Registration in the B2C tenant with the following permissions.
| Permission type | Permissions (from least to most privileged) |
| Delegated (work or school account) | User.ReadWrite.All |
| Delegated (personal Microsoft account) | Not supported |
| Application | User.ReadWrite.All |
- Store the Client ID, Tenant ID and Secret in the corresponding variables.
- Add a HTTP action called HTTP – Delete User to the flow.
- Set the Method to: Delete.
- Set the URI to the following code.
https://graph.microsoft.com/v1.0/users/- Add the PowerApp (V2) parameter ActiveDirectoryID to the end of the URI.

- Set the Tenant, Client ID and Secret fields with their corresponding variables.
- Set the Authentication to Active Directory OAuth.
- Set the Audience to the following code.
https://graph.microsoft.com- Save the Power Automate Flow.
- Open or create a canvas app (Power Apps).
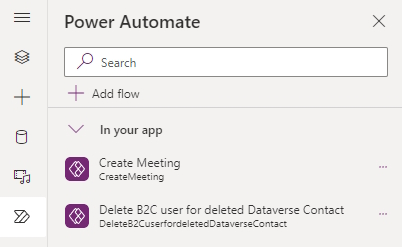
- Open the Power Automate panel in the canvas app.
- Add the Delete B2C users for deleted Dataverse Contact Power Automate flow.
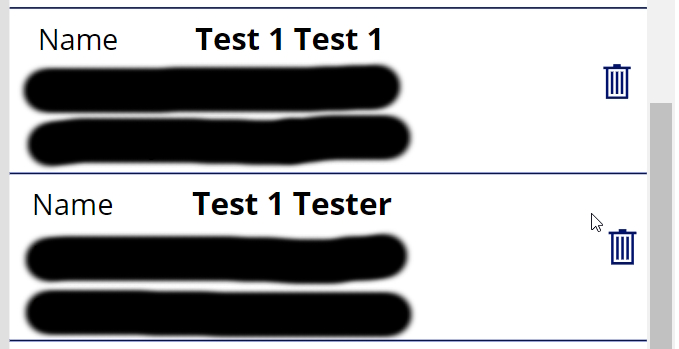
- Add a gallery with the source set to the Dataverse Contact table.
- Add a recycle bin or other delete Icon to the gallery.
- Add the following code to the recycle bin icon under OnSelect.
- This will remove the contact record.
- Starts the Power Automate Flow and sending the User Name (Users B2C object ID).
- Notifies the users.
Remove(Contacts, ThisItem);
DeleteB2CuserfordeletedDataverseContact.Run(ThisItem.'User Name');
Notify("Record deleted successfully", NotificationType.Success);- Save and publish the canvas app.