Power Platform: Enhancing SharePoint Integrated Power Apps with Post-Submit Actions

Creating a seamless user experience in a SharePoint integrated Power App (Canvas App) can be challenging, especially when performing actions after form submission. Once a form is submitted, it closes, but the OnSuccess property allows you to run code post-submission.

In this blog, I’ll show you how to use the OnSuccess property to make changes to the newly created SharePoint item. Although you can’t use ThisItem or link directly to data cards, I’ll guide you through the process to ensure your app functions smoothly.

By the end, you’ll know how to enhance your Power App’s functionality and improve user experience. Let’s dive in!

Create a SharePoint list

  • Create a SharePoint list on any SharePoint site.
  • Add 1 text column named OnSuccesData.

Create the SharePoint integrated power app.

  • Open the created SharePoint list.
  • Click on Integrate, Power Apps, Customize Forms app.
  • This will create a basic SharePoint integrated power.
  • Remove the Attachments DataCard.
  • Click on the SharePointForm1 and add a custom datacard.
  • Add a label and a Text Input objects on the datacard.
  • Rename the label to lbl_OnSuccesData.
  • Rename the Text Input to txt_OnSuccesData.
  • Set the OnChange to the following code.
    • We need to store the Text value in a variable, because when you call directly for txt_OnSuccesData.Text it will work for editing items but not for creating items.
Set(varOnSuccesData, txt_OnSuccesData.Text);
  • Set the 2 objects below each other.
  • Set the text of the label to On Succes Data.
  • Set the Default of the text input to “”.
  • Create a new blank Power Automate flow from the power app.
  • Name the flow to Actions after submission.
  • Set the following text inputs.
    • ItemID
    • OnSuccesData
  • Add the SharePoint action Update item and set it for the earlier created SharePoint list.
  • Set the Id to ItemID from the power app.
  • Set On Succes Data to OnSuccesData from the power app.
  • Save the Power Automate flow.
  • Open the Power App again.
  • Select the OnSuccess property of the SharePointForm1 object.
  • Add before the ResetForm(Self); code the following code to start the Power Automate flow.
Actionsaftersubmission.Run(SharePointForm1.LastSubmit.ID, varOnSuccesData);
  • Test your app by putting a text in the title and a text in the second On Succes Data text input object.
  • After you save the form, the flow will start and store the On Succes Data in the SharePoint on success data column.

Power Platform: Analyse email attachments with AI

In today’s fast-paced business environment, leveraging automation and artificial intelligence (AI) is crucial for maintaining efficiency and gaining insights. This blog post explores how to create a Power Automate flow that reads emails with attachments, extracts content from images or PDF documents using AI, and can perform various analyses on the extracted text. For instance, you can determine the sentiment, generate summaries, or classify emails as purchase requests or complaints and routing then accordingly. By integrating these advanced technologies, businesses can streamline their processes, enhance decision-making, and stay ahead in the competitive landscape.

AI Generated image

Create an AI model

First, we need to create a custom AI document model or AI Prompt that receives the PDF content and analyses it. But off course we can also use a default model. In this example we will be using the default AI Sentiment.

Create a Power Automate Flow

In this flow we will get all the attachments from the email and get the content ready to be sent for a sentiment analysis.

  • Create a Power Automate flow with the trigger, When a new email arrives in a shared mailbox (V2).
  • Connect this with the required email box and select the option Include Attachments to Yes.
  • Add the action Initialize variable and call it Initialize variable – Attachment Content.
  • Add a Scope action called Scope – Get PDF Content.
  • We are going to combine all the content of all the found PDF attachments into one variable. You could also send each attachment file separately.
  • First, we need to filter the attachment files to only get the PDF file.
  • Add a Filter Array action and call it Filter Array – Attachment for PDF.
  • Set the from to Attachments.
  • Set the first value to Attachment Content type.
  • Set the filter to is equal to.
  • Set the second value to application/pdf.
  • Add an Append to string variable action and name it Append to string variable – Attachment Content.
  • Set the Name to Attachment Content.
  • Set the Value to Content (from the filter array) – .
  • An apply to each will be automaticallycreated, name it Apply to each – Found PDF.
  • Add a Recognize text in an image or a PDF document below the apply to each.
  • Set the image to Attachment Content.
  • Add a Scope and name it Scope – AI Sentiment.
  • Add a Create Text with GPT using a prompt action and name it Create Text with GPT using a prompt – Get sentiment.
  • Set AI Sentiment as the Prompt.
  • Set Input Text to Attachment Content variable.
  • Your flow now looks like this.

Power Platform: Use AI to evaluate every incoming email

Leveraging AI for email management not only saves time but also reduces the risk of human error. By automating the evaluation process, businesses can ensure that important emails, such as orders, are promptly and accurately identified, allowing for quicker response times and improved customer satisfaction. Embracing AI in email workflows is a smart move towards greater productivity and operational excellence.

In this article, I explain how to create an AI prompt model using Microsoft GPT to streamline email processing. By integrating Power Automate, the flow sends the content of each new email to the AI model, which then determines if the email is an order. If identified as an order, the AI responds with a JSON output indicating a positive result. This approach enhances the efficiency and accuracy of order processing through intelligent automation.

Create an AI model

For this blog I create a simple AI prompt to evaluate if a incoming email is a request for an order. The actual prompt is more complicated but confidential.

  • Open the AI hub aka AI Builder and select the Create text with GPT using a prompt.
  • Give the prompt a name.
  • Create three input parameters.
    • Email
    • EmailSubject
    • Attachments
  • Select by Output JSON (preview) and click on Edit.
  • Add the following JSON code.
{
      "Order": "true"
}
  • Set the Model to either GPT 3.5 (cheaper but less accurate) or GPT 4 (more expensive and more accurate).
  • Set the Temperature to 0.
  • Set the Prompt as follows or make your own prompt.
  • Save the prompt.

Create a Power Automate Flow

The Power Automate flow will start for every incoming email and will send to the AI model, the email body, subject and names of the attachments. The model will return its determination in JSON form.

  • Create a new Power Automate flow with an outlook/email trigger, When a new email arrives in a shared mailbox.
  • Add an Initialize variable action to create a variable called All attachment names.
  • Add an Append to string variable and select by the name the All attachment names variable.
  • Set for the value the attachments of the email, with the following code. This will automatically add a Apply to each action.
items('Apply_to_each_-_Attachment')?['name'] - 
  • Add the Create text with GPT using a prompt action.
  • Select your created AI Prompt.
  • Set by attachments the variable All attachment names.
  • Set by Email the Body of the email.
  • Set by EmailSubject the Subject of the email.
  • This will start the AI model and it will return its results to the flow.
  • Form here on you can add in the requered steps for your specific process and test the process.

Power Automate: Set email category

In a recent AI project, I developed a solution to evaluate every incoming email in a shared mailbox using an AI model (GPT with prompt). To inform users of the shared mailbox that an email has been processed, the email is flagged with a custom Outlook category. This process leverages a special HTTP action for Outlook, simplifying the implementation. Notably, there is no need to set up any special permissions if the flow owner already has access to the shared mailbox. This example does not cover the specifics of communicating with the AI through Power Automate.

Creating custom category in Outlook

  • Open Microsoft Outlook.
  • Click on Category in the Home Ribbon.
  • Click on All Categories.
  • Click on New.
  • Set a name and select a color.
  • Click on OK followed by Clicking on OK.
  • You have now created the custom Outlook category.

Setting the category with Power Automate

  • Create a new Power Automate flow with an outlook/email trigger. For example: When a new email arrives in a shared mailbox.
  • Add the Send an HTTP request action.
  • Set the URI to be following code.
https://graph.microsoft.com/v1.0/me/mailFolders/Inbox/messages/triggerOutputs()?['body/id']
  • Set the method to PATCH
  • Use the following JSON code for the body
{
"categories": ["AI Finished"]
}
  • Set the Content-Type to application/json.
  • Save the flow.

From Bing Maps to Azure Maps

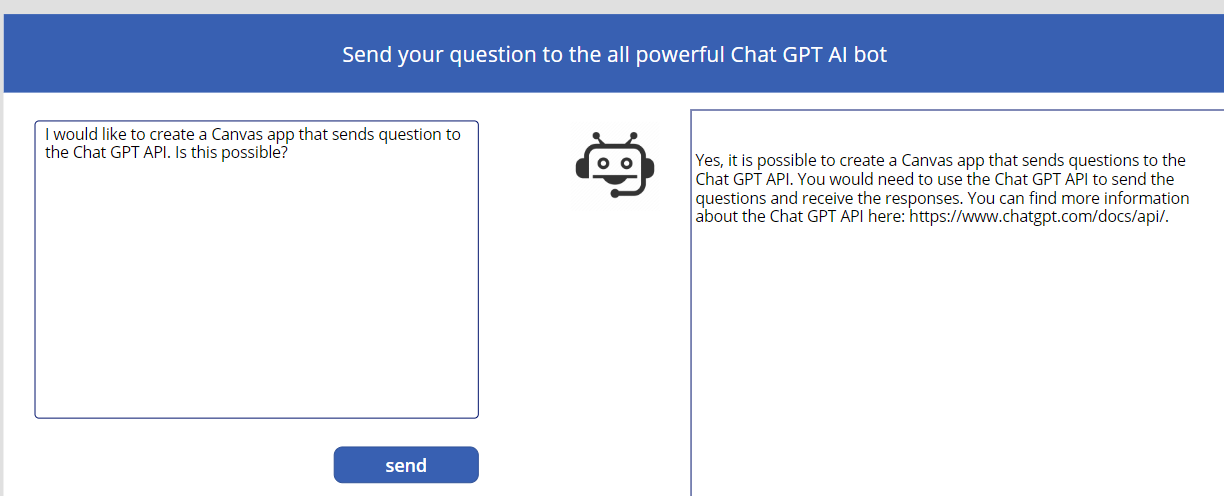
Bing maps has been an easy-to-use solution for getting location information in canvas apps, but this offering will be placed under the Azure Maps umbrella. While Bing Maps will continue to function for now, it’s essential to prepare for the transition. In this blog post I will explain how to use Azure Maps in a Canvas App. Please note that the locations shown in this post are not my actual location.

Azure Maps Services

  • First, we need to create a Azure Maps Account in a resource group (I will presume you know how to create a resource group).
  • Open your resource group.
  • Click on Create and search for and click on Azure Maps.
  • Click on Create.
  • Give the Azure Maps Account resource a name.
  • Select the correct Region and Pricing tier.
  • Agree with the terms and click on Review + Create.
  • Click on Create and wait for the deployment to be ready.
  • Click on Go to resource.
  • Click on Authentication and copy the Primary Key. You will need this in the Power Automate Flow.

The Power Automate Flow

  • Create a new Power Automate Flow and name it Azure maps get Postal Code.
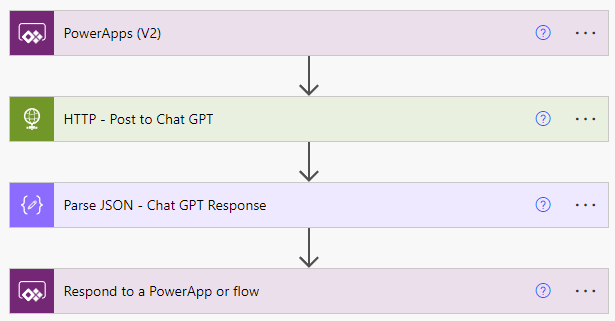
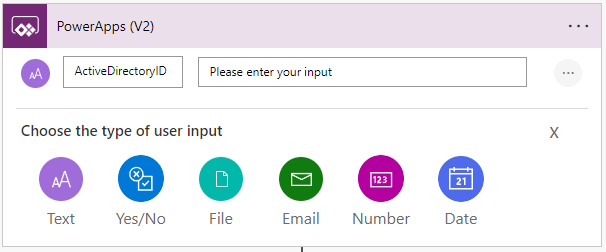
  • Add as the trigger Power Apps (V2), with two text inputs called Longtitude and Latitude.
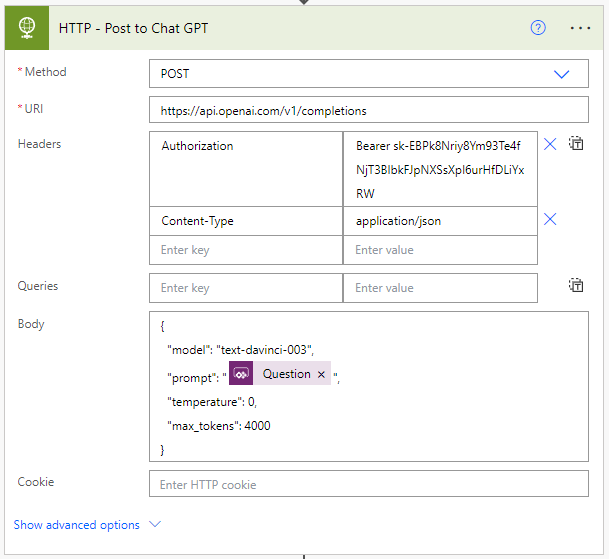
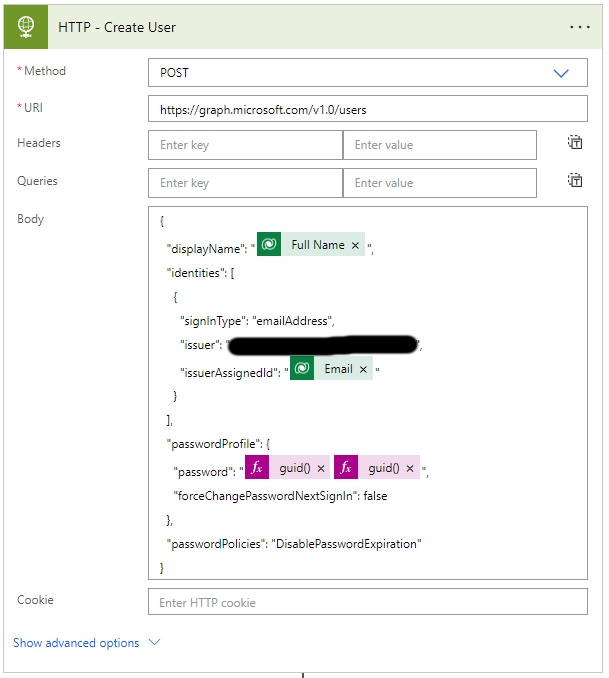
  • Next, we will add a HTTP action, this will call Azure Maps to get the location details based on the provided GPS location.
  • Set the method to Get.
  • Set the URI to the following code, make sure to put in your subscription-key (that is the primary key from the Azure Maps Account resource).
  • Set the Latitude and Longitude with the input fields form the trigger.
https://atlas.microsoft.com/search/address/reverse/json?api-version=1.0&subscription-key={YOUR KEY}&query={Latitude},{Longitude}
  • Add the action Parse JSON and give it the name Parse JSON – Location information.
  • Set the Content to the body of the HTTP call and set the schema as detailed in the linked file.
  • Add a compose action (if you want to only return the first found postal code).
  • The code for the input is as follows if you have named the Parse JSON action the same as I did.
first(body('Parse_JSON_-_Location_information')?['addresses'])?['address']?['postalCode']
  • Add the Respond to a Power App or flow action.
  • Add an output text called postalcode and add the compose as its value.
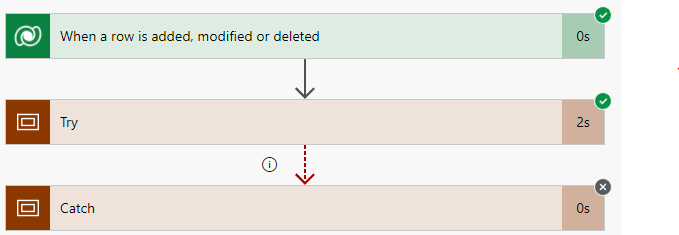
  • Your flow will now look like this.

The canvas app

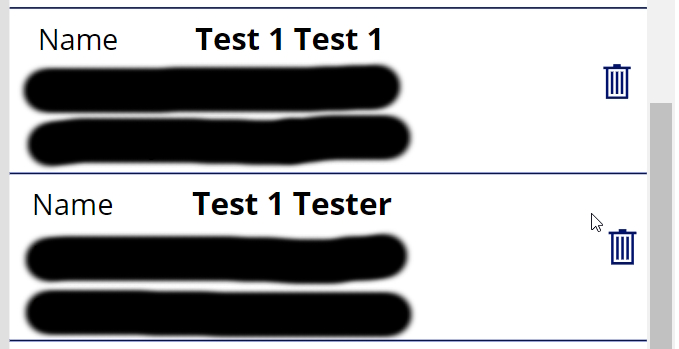
We will now create the canvas app with a map that shows the user’s current location on a map, and a button to get the postal code of that location and a reset button. Please note this is not my actual location.

  • Create a new canvas app, I blank Phone canvas.
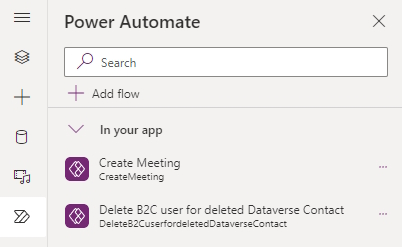
  • Click on Power Automate followed by Add flow to add the earlier created flow.
  • Add the map element to the canvas app.
  • Set the DefaultLatitude property with the following code.
Location.Latitude
  • Set the Location.Latitude property with the following code.
 Location.Longitude
  • Set DefaultLocation property with the following code.
true
  • If you want to see your Latitude and Logitude you can add labels to display the values.
  • Add a Label and set the Text property with the following code.
"Latitude: " & Location.Latitude
  • Add a Label and set the Text property with the following code.
"Longitude: " & Location.Longitude
  • Add a button and set the Text property with the following code.
"Get postal code"
  • Set following code on the OnSelect property. If needed update the code with your flow name, I used AzuremapsgetPostalCode.
Set(varPostalCode,AzuremapsgetPostalCode.Run(Location.Longitude, Location.Latitude));
  • Add a button and set the Text property with the following code.
"Reset"
  • Set following code on the OnSelect property.
Set(varPostalCode, Blank())
  • Add a label and set the Text property with the following code.
"Postal Code: " & varPostalCode.postalcode

Power Platform and Chat GPT

In today’s digital age, businesses are constantly looking for ways to streamline their processes and improve their customer experience. One way to do this is by leveraging the power of chatbots, which can quickly and efficiently answer customer inquiries. In this blog post, we will explore how to create a canvas app that uses Power Automate flow to ask ChatGPT API questions and display the response in the canvas app. By the end of this tutorial, you will have the tools and knowledge to build your own chatbot app that can answer your customers’ questions in real-time, enhancing their overall experience and increasing your operational efficiency. So, let’s get started!

Create a Chat GPT Api secret

  • Open the ChatGPT API site.
  • Login or create an account.
  • Click on Personal, followed by View API keys.
  • Click on Create new secret key and save the key in a password vault.

Creating the Power Automate Flow

  • Create a new Power Automate flow with the name Canvas app – Chat GPT.
  • Add as the trigger a PowerApps V2.
  • Add a text input with the name Question.
  • Add a HTTP action with the name Post to Chat GPT.
  • Set the Method to POST.
  • Set the URI to https://api.openai.com/v1/completions.
  • Set the header to Content-Type with value application/json.
  • Set a second header to Authorization with the value Bearer [API Secret].
  • Set the body to the following json code.
{
  "model": "text-davinci-003",
  "prompt": "triggerBody()['text']",
  "temperature": 0,
  "max_tokens": 4000
}
  • Add a Parse JSON action with the name Chat GPT Response.
  • Set the Content to Body (response of the HTTP call).
  • Set the following schema (update the schema is the response is different).
{
    "type": "object",
    "properties": {
        "id": {
            "type": "string"
        },
        "object": {
            "type": "string"
        },
        "created": {
            "type": "integer"
        },
        "model": {
            "type": "string"
        },
        "choices": {
            "type": "array",
            "items": {
                "type": "object",
                "properties": {
                    "text": {
                        "type": "string"
                    },
                    "index": {
                        "type": "integer"
                    },
                    "logprobs": {},
                    "finish_reason": {
                        "type": "string"
                    }
                },
                "required": [
                    "text",
                    "index",
                    "logprobs",
                    "finish_reason"
                ]
            }
        },
        "usage": {
            "type": "object",
            "properties": {
                "prompt_tokens": {
                    "type": "integer"
                },
                "completion_tokens": {
                    "type": "integer"
                },
                "total_tokens": {
                    "type": "integer"
                }
            }
        }
    }
}
  • Add the Respond to a PowerApp or Flow action.
  • Add a text output called ChatGPTRepsonse and add the response from Chat GPT with the following code.
first(body('HTTP_-_Post_to_Chat_GPT')?['choices'])?['text']
  • The overall Power Automate flow will look like this.

Creating the Canvas app

  • Open the Power Apps Studio and create a new canvas app.
  • Rename Screen1 to Home.
  • Add the Canvas app – Chat GPT Power Automate flow to the canvas app.
  • Add a Rectange Shape to the top of the canvas app with the name RectTitle.
  • Add a label over the RectTitle with the name lblChatGPT.
  • Set the Text to “Send your question to the all powerful Chat GPT AI bot”.
  • Add a label with the name lblGPTRepsonse.
  • Place the lblGPTRepsonse on the right side of the screen.
  • Add a text input with the name txtQuestion.
  • Place the txtQuestion on the left side of the screen.
  • Set the txtQuestion Default to “What is your question?”.
  • If you like add an Image with the name imgRobot and add an image of a robot in the Image property.
  • Place the imgRobot left and next to the lblGPTRepsonse.
  • Add a button with the name btnSendQuestion.
  • Set the following code on the Onselect of the btnSendQuestion.
    • This will save the response in the variable repsonsegpt.
    • Start the flow with the text provided in the textQuestion text input box.
Set(responsegpt, 'Canvasapp-ChatGPT'.Run(txtQuestion.Text).chatgptrespondse)