Add Power Fx buttons to model-driven apps

Model-driven apps, a fundamental component of the Power Apps suite, provide a robust framework for designing data-driven solutions. While they offer a wealth of functionality out of the box, adding customized actions and automations can greatly enhance the user experience and boost operational efficiency. This is where low-code Power Fx buttons come into play, providing a simple yet effective way to empower users to take control of their apps and automate routine tasks.

In this blog post, we will delve into the world of low-code development and explore how you can leverage Power Fx buttons to supercharge your model-driven apps. We’ll walk you through the process of adding a button that when pressed will save data in Dataverse.

Creating a Power Fx Button (command bar button)

  • Open your Model-driven app in edit modus.
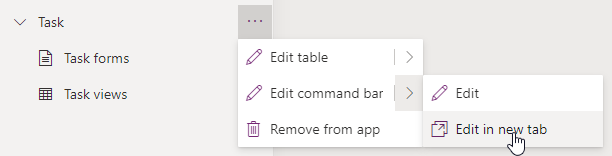
  • Select … of the table (entity) where you need to add the button.
  • Click on Edit or Edit in new tab under Edit command bar.
  • Select the command bar that where the button needs to be added, in my case that is the Main form.
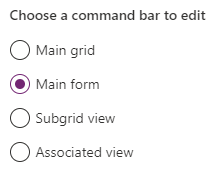
  • Click on Edit and the command bar will be loaded.
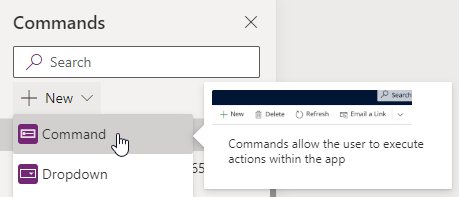
  • Click on New followed by Command to add a new button.
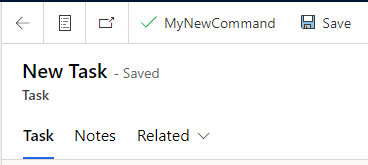
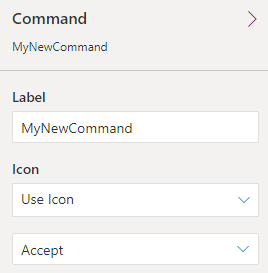
  • Change the label (name) of the button and place (drag) it to the correct location on the command bar.
  • If required select an Icon, selecting an icon help the user with recognizing the button and its function.
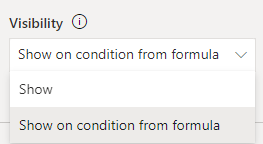
  • With the help of Power Fx code we can add when the button will be displayed (visible). For example; Only show the button when the the color field has the value Green.
  • Select the Show on condition from formula on the Visibility property.
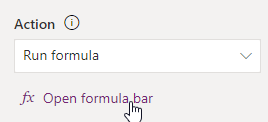
  • Click on the Open formula bar, that appears below the property.
  • Add your Power Fx command that dictates when the button needs to be displayed.
If(Self.Selected.Item.color = "Green", true, false)
  • Click on Open formula bar under the Action property to add the Power Fx code that needs to be executed when the button is pressed.
  • Add your Power Fx command that needs to be executed, in my example it set the color field value to Purple.
Patch(Tasks,Self.Selected.Item, {color:"Purple"});
  • Click on Save and Publish when the button is ready.
  • Play the Model-driven app to see if the button is working correctly.

Retrieve Dataverse records with JavaScript

When validations or manipulations in a model-driven app are too complex for a business rule you can use JavaScript instead. With JavaScript you can use the Dynamics API to gather information and/or update records. JavaScript only runs on the interface; this means that the validation or manipulation only happen when a user is interacting with the model-driven app.

retrieveRecord

With retrieveRecord you can retrieve a records form a table if you know the ID.

Xrm.WebApi.retrieveRecord("account", "a8a19cdd-88df-e311-b8e5-6c3be5a8b200", "?$select=name,revenue")

Xrm.WebApi.retrieveRecord("TABLE", "ID", "?$select=COLUMN,COLUMN")

In this example a record from the table accounts is retrieved and the columns name and revenue are returned. If it was successful the results are displayed in the console, if an error occurred then the error message is displayed in the console.

Xrm.WebApi.retrieveRecord("account", "a8a19cdd-88df-e311-b8e5-6c3be5a8b200", "?$select=name,revenue").then(
    function success(result) {
        console.log("Retrieved values: Name: " + result.name + ", Revenue: " + result.revenue);
        // perform operations on record retrieval
    },
    function (error) {
        console.log(error.message);
        // handle error conditions
    }
);

retrieveMultipleRecords

With retrieveMultipleRecords you can retrieve multiple records from a table based on a filtering.

Xrm.WebApi.retrieveMultipleRecords("account", "?$select=name,primarycontactid&$filter=primarycontactid eq a0dbf27c-8efb-e511-80d2-00155db07c77")

Xrm.WebApi.retrieveMultipleRecords("[TABLE]", "?$select=[COLUMN],[COLUMN]&$filter=[COLUMN] eq ID")

In this example three records from the table accounts are retrieved and the columns name is returned. If it was successful the results are displayed in the console, if an error occurred then the error message is displayed in the console.

Xrm.WebApi.retrieveMultipleRecords("account", "?$select=name", 3).then(
    function success(result) {
        for (var i = 0; i < result.entities.length; i++) {
            console.log(result.entities[i]);
        }
        console.log("Next page link: " + result.nextLink);
        // perform additional operations on retrieved records
    },
    function (error) {
        console.log(error.message);
        // handle error conditions
    }
);

Expand query to get related records

With the $expand options we can retrieve related records of the record that was returned, this works for both retrieveRecord and retrieveMultipleRecords. Expand uses navigation columns (relationship/lookup) to retrieve the related records.

Xrm.WebApi.retrieveRecord("account", "a8a19cdd-88df-e311-b8e5-6c3be5a8b200", "?$select=name&$expand=primarycontactid($select=contactid,fullname)")
Xrm.WebApi.retrieveRecord("[TABLE]", "ID", "?$select=[COLUMN]&$expand=[NAVIGATION COLUMN]($select=[COLUMN],[COLUMN])")

Xrm.WebApi.retrieveMultipleRecords("account", "?$select=name&$top=3&$expand=primarycontactid($select=contactid,fullname)", 3)
Xrm.WebApi.retrieveMultipleRecords("[TABLE]", "?$select=[COLUMN]&$top=3&$expand=[NAVIGATION COLUMN]($select=[COLUMN],[COLUMN])", 3)

Asynchronous function to wait on the return

When using retrieveMultipleRecords you might need to use an asynchronous function. The function needs to wait on retrieveMultipleRecords to return the values before continuing with the function. You do this by making two async functions, one with the main logic and the second one which retrieves the records.

async function xseption(formContext) {
    var xseptions = await getXseptions(companyProfileId);
    //Do something with the return
}
async function getXseptions(guid) {
    var query = "?$select=rc_categorytypeid,rc_xseptionsid&$filter=_rc_related_companyprofile_value eq " + guid + "&$expand=rc_categorytypeid($select=rc_value)";
    var result = await Xrm.WebApi.retrieveMultipleRecords("rc_xseptions", query);

    return result;
}

Embed a canvas app in a model-driven app

Did you know that you can embed (add) a canvas app in a model-driven app? With the embedded canvas app, you can fully use the power of the canvas app inside a model-driven app. In my project I used it to provide the user with the capability to search an Oracle database and select a specific company.

It is very easy to add a canvas app, but I recommend to use it only when no other options are viable. The reason for this is that the embedded canvas app needs to be reconnected every time you transfer the solution form one environment to another.

Embed the canvas app

  • Create / add a canvas app in the same environment as the model-driven app.
  • Open the form of the entity where the canvas app needs to be embedded.
  • Click on +Component and select the Canvas app.
  • Fill in the App ID Static value with the unique ID of the canvas app and click on Done.
  • You can find the App ID by right clicking on an app and clicking on Details.

Solution deployments

The canvas app is now part of the model-driven app and needs to be in the same solution. When you transfer the solution from the development environment to the test environment, you will need to update the model-driven form manually. The reason for this is that the model-driven app is still connected to the canvas app on development. You will need to change the reference / GUID to the canvass app on production. And do not forget to share the canvas app with the users.