PowerApps: Use a SharePoint list for PowerApps Styling

When developing with PowerApps​​ we often want to store information in a SharePoint list and access the information in the PowerApp. The three main reasons are to store the styling code, settings or just for data storage. In this post I will explain how to connect a SharePoint list to PowerApp and use it for the styling of the PowerApp. You will have a central location to maintain the styling of one or multiple PowerApps.

Connect​​​​ to PowerApp

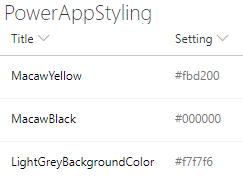
  1. Create a SharePoint list called PowerAppStyling ​with the following columns.
    • ​​Title (single line of text)
    • Setting (single line of text)
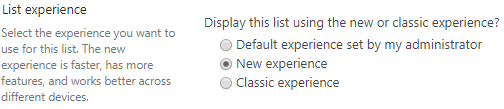
  2. Activate versioning on the SharePoint list.
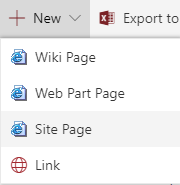
  3. ​Create a PowerApp.
    • ​In my example I created a PowerApp from a SharePoint list.
  4. ​Click on the tab View followed by Data sources.
  5. Click on Add data source.
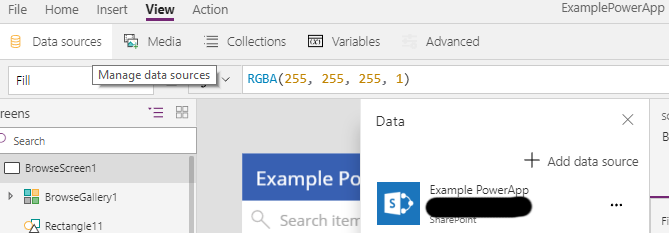
  6. Click on SharePoint (for me the last option).
  7. Select the correct site or provide the URL and Click on Go.
  8. Select the the list and click on Connect.
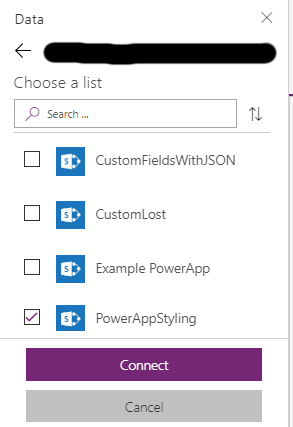
  9. The list is now connected and can be used in the PowerApp.

Use for SharePoint list for s​tyling

We need the styling as soon as the PowerApp starts, so we need to store the styling in a collection when the PowerApp launches. If you can avoid creating collection on startup do so. You want the PowerApp to laod as quickly as possible. ​In the SharePoint list add the required styling code. You can use the following example.
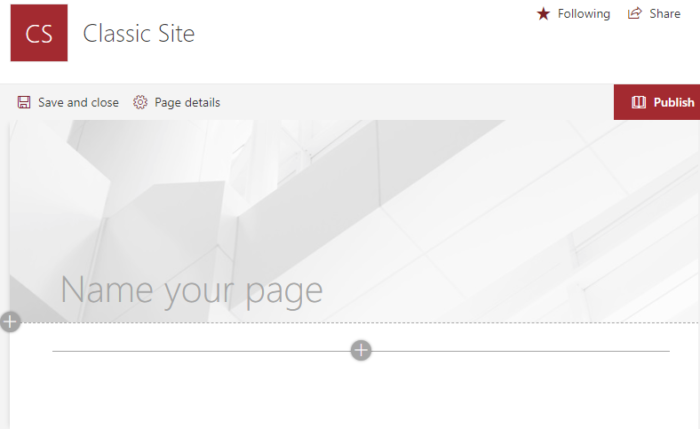
  1. Open the PowerApp.
  2. On the first screen, find the OnStart action.
  3. Create a collection called Collection_Styling to store the PowerAppStyling​ datasource.
  4. When accessing the styling code, always get it from the collection. This is faster than accessing the SharePoint list.
  5. Create a label called Label_Style_Example.
  6. Set the Text to This is my style.
  7. Set the font color of the label.
  8. Set the fill (background) color of the label.
  9. Set the border color of the label.
  10. Set the border color of the label.
  11. The label will now look all black because the Collection_Styling is still empty, the PowerApp has not been started yet.
  12. Run the PowerApp and see the result, sometimes you need to restart the PowerApp multiple times.

SharePoint: New experience page in classic site

A customer wanted to use a web part, on a classic site page, that is only available for new experience (modern) site pages. This is not possible to do, we can however create new experience (modern) site pages in a classic site. I don’t recommend this often because the design of the pages are not equal and might confuse the users. In this post I will explain how you can do this.

Solution

  • Open the site pages library of your site.
  • Open the advanced settings of the library.
  • Select by List experience the option New experience
  • Open the site pages library and create a new site page in the library.
  • The page will be a new experience page.
  • If required set the List experience the option  back to Classic experience.

SharePoint: Add a web part to a page layout

When customizing SharePoint we often create our own page layouts for solutions like news, events or information pages. In some cases I add a web part to the page layout. Adding web parts to a page layout when you use your own editor (not SharePoint Designer) can be a bit difficult if you don’t know all the coding details. To make live a bit more easy I use the following steps.

Solution

The solution consist of two parts creating the required web part and adding it to a page layout, three if you us another editor than SharePoint Designer.

Creating the web part

  • Add the required web part to a test page
  • Configure the web part as required
  • Export the web part to your local computer
  • Upload the web part into the web part (galery), located on the site collection settings

Page layout

  • Open SharePoint Designer and open the site collection where you uploaded the web part
  • Create a new page layout or edit an existing page layout
  • Go to the location where you want to add the web part
  • Click on Insert, then web parts and select the required web part

Another editor

  • Open the page layout in your editor
  • Copy the web part code from SharePoint Designer and paste it into your editor of choice

User experience: Hyperlink redirection

A customer had an issue with the accessibility of an important centralized reporting list. The list contains the status of different knowledge sites, but the list was not directly accessible from those sites. Users that needed to update the list often where unable to find it. We added a hyperlink to the centralized list (the specific item) with a ‘redirect’ back to the related knowledge site. This changed the user experience from a centralized, semi hidden list, to an easy to find and easy to use list.

Solution

  1. Create a normal hyperlink, for example.
    https://myintranet.sharepoint.com/sites/planner/Lists/Tasks/EditForm.aspx?ID=1
    
  2. Add the source parameter after the hyperlink.
    https://myintranet.sharepoint.com/sites/planner/Lists/Tasks/EditForm.aspx?ID=1&Source=
    
  3. Add after the source parameter the redirect hyperlink.
    https://myintranet.sharepoint.com/sites/planner/Lists/Tasks/EditForm.aspx?ID=1&Source=https://myintranet.sharepoint.com/sites/otherlocation
    
  4. When the user clicks on the hyperlink the target location will be openend.
  5. When the users clicks a button (ok, save or cancel) the source hyperlink will be openend


SharePoint Online: Managed Properties User information not available

During the development of a reporting solution that depends heavily on search, I encountered an issue with the crawled and managed properties on SharePoint Online.
The problem was narrowed down to two issues.

  • Not all the fields where showing up as crawled properties.
  • The crawled/mapped property for the user fields only contains the display name.

When a user field is added normally there are multiple crawled properties that will appear, the ows_[field name] and the ows_q_USER_[field name]. Only the ows_[field name] was showing up.
The ows_[field name] only contains the display name, but I needed the display name and e-mail. The the ows_q_USER_[field name] was required, which contains all the available user information. Both issues were resolved using by following the steps below.

Solution: User field

  1. Make sure the field is added to an item and contains a value, otherwise it will not be crawled.
  2. Determine the required managed property type, for a people field that is a string.
  3. Add the crawled property to a preset managed property, the name will be similar to ows_[field name].
  4. Map ows_[field name] to  RefinableString00.
  5. After about 15 minutes more crawled and managed properties will be available.
  6. For an user field we need the crawled property ows_q_USER_[field name].
  7. Connect this crawled property to a new mapped property or use the one that was automatically created.
  8. I recommend not to remove the mapping of the crawled property (ows_[field name]) to the preset managed property. In some cases, this causes the problem to reappear.

Solution: No crawled property availible

This solution works a little bit different.

  1. Determine the required managed property type, for a text field that is a string.
  2. Make sure the field is added to an item and contains a value, otherwise it will not be crawled.
  3. Force a reindex.
  4. Go to the advanced settings of the list or library
  5. Reindex the list
  6. Wait 15-30 minutes and see if the field has been crawled, the name will be similar to ows_[field name].
  7. If this did not work try the following steps.
  8. Add a (random) text field to a preset managed property, for example to RefinableString01.
  9. Wait 15-30 minutes and see if your field has been crawled, the name will be similar to ows_[field name].
  10. If so add the crawled property to your custom managed property.
  11. So far, these steps have always fixed my missing properties problem.