SharePoint: Add a web part to a page layout

When customizing SharePoint we often create our own page layouts for solutions like news, events or information pages. In some cases I add a web part to the page layout. Adding web parts to a page layout when you use your own editor (not SharePoint Designer) can be a bit difficult if you don’t know all the coding details. To make live a bit more easy I use the following steps.

Solution

The solution consist of two parts creating the required web part and adding it to a page layout, three if you us another editor than SharePoint Designer.

Creating the web part

  • Add the required web part to a test page
  • Configure the web part as required
  • Export the web part to your local computer
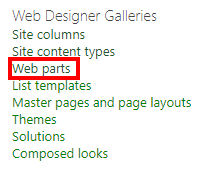
  • Upload the web part into the web part (galery), located on the site collection settings

Page layout

  • Open SharePoint Designer and open the site collection where you uploaded the web part
  • Create a new page layout or edit an existing page layout
  • Go to the location where you want to add the web part
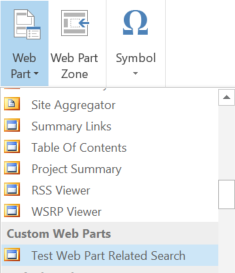
  • Click on Insert, then web parts and select the required web part

Another editor

  • Open the page layout in your editor
  • Copy the web part code from SharePoint Designer and paste it into your editor of choice

SharePoint Online: Document dropdown navigation

An international customer needed a good looking and user friendly navigation solution for a large set of documents. Users search for documents related to the region and country they work in. So we created an easy and good looking navigation focused on the regions and countries. The navigation element is added to the 5 region views and on the country view, allowing the users to easily navigate between regions and countries. The user hovers over a regions and the related countries will be shown.
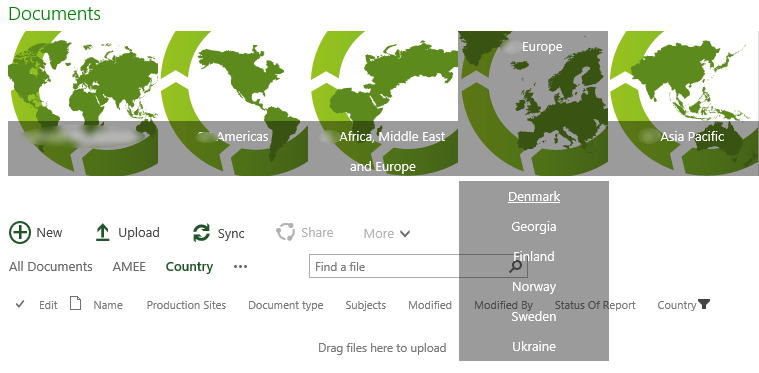
Solution

The solution consists of two main parts, the country view with filter and the navigation element. First I will explain how the country view works, followed by the navigation element.

Country view

The country view uses an query string (URL) filter that is added to the view page. This filter takes the value of the parameter Country out of the URL and filters the document based on this parameter.

  • Add the Query String (URL) Filter to the page.
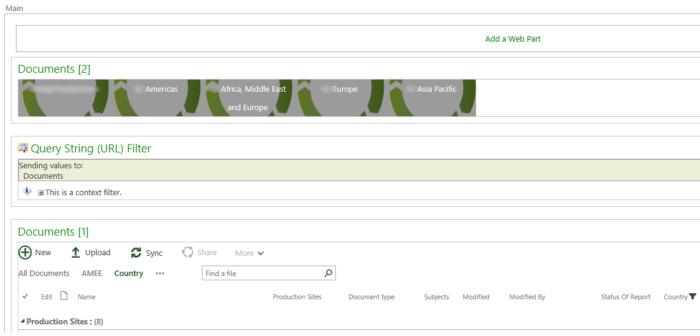
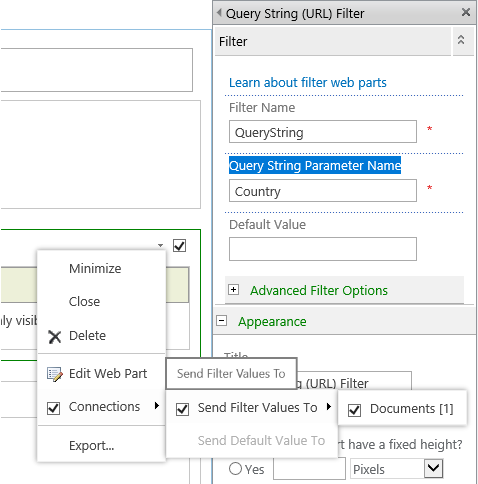
  • Set the Query String Parameter Name to Country.
  • Configure the Web part connection to send filter values to the document library.
  • The documents will be filtered when you add the parameter with a value to the URL
    ?country=Denmark+(DK)
    

Navigation element

The navigation element consists of three parts, JavaScript, CSS and the HTML.

  • Store the JavaScript, CSS and the HTML file on SharePoint.
  • Add a Content Editor Web Part to the country view page.
  • Link the HTML file in the Content Link Setting
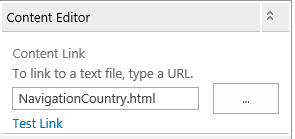
  • The HTML page show the structure of the navigation, the pictures, links etc.
  • The CSS file provided the looks.
  • The JavaScript is used to activate the hover.

JavaScript and CSS working together

JavaScript controls the hover function (mouseenter and mouseleave), the hover is active on all elements (div) with the class top.
Only div’s with a region picture have the class top set.

  • When the mouse enters the div, JS will add the class active to the div. 
  • When the mouse leaves the div, JS will remove the class active from to div.
$(document).on({
    mouseenter: function () {
        console.log('mouse-in');
        $(this).addClass('active');
    },

    mouseleave: function () {
        console.log('mouse-out');
        $('.top').removeClass('active');
    }
}, '.top');

When the class active is added the corresponding CSS is applied to the div, resulting in:

  • The dropdown (div with URLs) will be shown.
    • The div is hidden by default.
      display: none;
      
  • The overlay on the region div will be set to full.

.top.active .bottom-container { 
	display: block;
}

.active.top > a > .title {
	height:150px;
	top: 0;	
}


SharePoint 2013 Workflow: Copy files with REST API

For a meeting solution on SharePoint Online (Office 365) we needed to copy files from one location to another. The solution we decided on was a workflow that asks the user for feedback and then copies the file to the desired library. This was done by creating a workflow with a web service using the CopyTo methode. Be aware that the CopyTo methode can only copy files within the same site. The methode cannot copy files between sites or site collections.

On the MSDN page you can find the details of the CopyTo methode.

Solution

  1. Create a SharePoint 2013 workflow
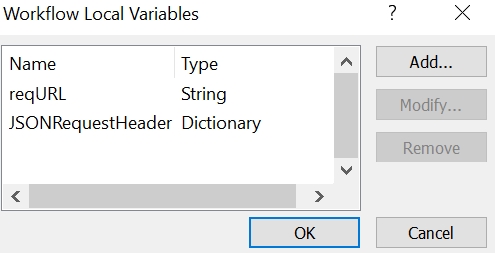
  2. Create a dictionary variable called JSONRequestHeader
  3. Create a string variable called regURL
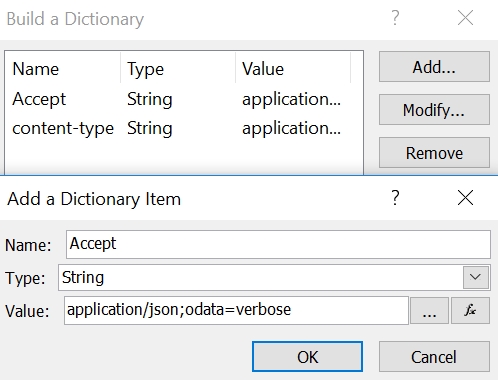
  4. Add the action Build Directory, select JSONRequestHeader as the variable.
  5. Add Accept and content-type to the directory with the following code:
    application/json;odata=verbose
    

  6. Then store the following URL to the variable regURL:
    [%Workflow Context:Current Site URL%]_api/web/folders/GetByUrl('Original Document Location')/Files/getbyurl('Test.pdf')/CopyTo(strNewUrl='/sites/Meetingsite/DocumentNewLocation/Test.pdf',bOverWrite=true)
    
  7. You can change file names to variable to the workflow can run on every item within the library
  8. Create a string variable called currentItemName
  9. Add the action Set variable, set the following code for the currentItemName variable
  10. Change the regURL to:
    [%Workflow Context:Current Site URL%]_api/web/folders/GetByUrl('Original Document Location')/Files/getbyurl('[%Variable:currentItemName%]')/CopyTo(strNewUrl='/sites/Meetingsite/DocumentNewLocation/[%Variable:currentItemName%]',bOverWrite=true)
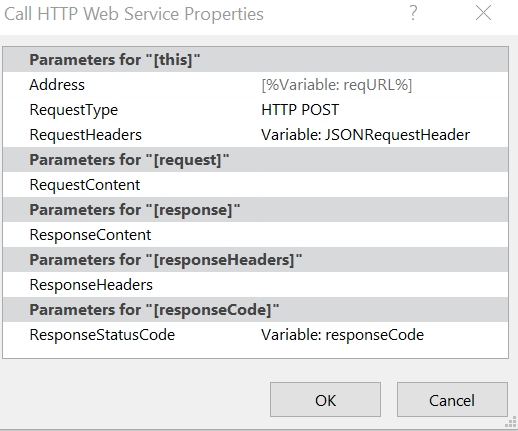
  11. Add the Call HTTP web service action to the workflow and set the “this” to the regURL
  12. Set RequestHeaders to Variable: JSONRequestHeader
  13. Set RequestType to HTTP Post

SharePoint 2013 Workflow: Check if list item exists

For a customer we are building a complex approval process on Office 365 with SharePoint 2013 workflows. During the process we need to check if an list item (in an other list) existed. There is no default action that lets you do this. You can however us the set variable and if statement action to figure out if the item you are looking for exists or not. This is a useful trick to know when working with SharePoint 2013 workflows.

Solution

  1. Create a SharePoint 2013 workflow.
  2. Create a  variable called ContractItemID, here we will try to store the ID of the list item we are trying to find.
  3. Set the variable to 0 (zero).
  4. Then we need to try and set the ContractItemID variable with the ContractID of the item we are searching. This can be from the same list or a different list.
  5. I am trying to find the ID of a list item with a specific Contract Number.
  6. If the workflow finds an ID the ID will be stored in the variable, if no item is found then the ContractItemID value will remain 0 (zero)
  7. Use an if statement to determine if the list item exists.


SharePoint 2010 Workflow: Capture document set versions

When a user changes a document set the version is not automatically capture, the user can capture the version by manually . Capturing a version manually is down with the Capture Version button located in the Document Set Tab in the ribbon. This is not the a secure way to make sure all versions are captured. With a SharePoint 2010 workflow (not workflow 2013) you can capture all the versions automatically. The solution has been tested on SharePoint 2013 On Premise and SharePoint Online (Office 365).

Solution

There is a small bug with the action Capture a version of the Document Set, the action runs multiple time (equal to the number of columns) and captures multiple versions. To prevent this from happening add a wait action to the workflow, this will make sure that only one version will be captured.

  1. Create a SharePoint 2010 workflow
  2. Configure the workflow to Start Workflow automatically when an item is Changed
  3. Add the action Wait for Field Change in Current Item
  4. Set the action to: Wait for Modified by (column) to equal Current Item: Modified By (column)
  5. Add the action Capture a version of the Document Set, with comment: Version Captured by Workflow.
  6. The full workflow looks like this

SharePoint 2013 Workflow: Changing Permissions with REST Calls

SharePoint 2013 workflows do not have a default action to change item or list permissions. With the help of the call http web service action I was able to create multiple REST calls that can interact with the permission. In this blog post describes multiple workflows for specific interactions involving permissions. The solutions where build on SharePoint Online (Office 365) using SharePoint 2013 workflows.

Breaking the inheritance on current item

This workflow will break the inheritance of the item the workflow is running on. It is possible to change the regURL to break the inheritance of different items. If needed set the actions within an App step to make sure the workflow has the required permissions, see the blog post SharePoint 2013 Workflow: App step and App Permissions.

  1. Create a SharePoint 2013 workflow
  2. Create a dictionary variable called JSONRequestHeader
  3. Create a string variable called regURL
  4. Add the action Build Directory, select JSONRequestHeader as the variable
  5. Add Accept and content-type to the directory with the following code:
    application/json;odata=verbose
    

  6. Then store the following URL to the variable regURL

    [%Workflow Context:Current Site URL%]_api/lists/getbytitle('[%Worklfow Context:List Name%]')/items([%CurrentItem:ID%])/breakroleinheritance(true)
    

  7. Add the Call HTTP web service action to the workflow and set the “this” to the regURL
  8. Set RequestHeaders to Variable: JSONRequestHeader
  9. Set RequestType to HTTP Post
  10. The full workflow looks like this

Set permissions on current item

This workflow will set permissions on the item the workflow is running on. It is possible to change the regURL to set permission on different items. If needed set the actions within an App step to make sure the workflow has the required permissions, see the blog post SharePoint 2013 Workflow: App step and App Permissions.

  1. Create a SharePoint 2013 workflow
  2. Create a dictionary variable called JSONRequestHeader
  3. Create a string variable called regURL
  4. Add the action Build dictionary, select JSONRequestHeader as the variable
  5. Add Accept and content-type to the directory with the following code:
    application/json;odata=verbose
    

  6. In this example we will grant the default members group contribute permissions.
  7. Add an step in the workflow called: Set Role Members
  8. Then store the following URL to the variable regURL
    [%Workflow Context:Current Site URL%]_api/lists/getbytitle('[%Worklfow Context:List Name%]')/items([%CurrentItem:ID%])/roleassignments/addroleassignment(principalid='769',roleDefId=1073741826)
    
  9. The roleDefID sets the type off permissions
  10. The principalId is the ID of the permissions group, this is an unique id. You will need to find the principalId for your SharePoint Group, see the chapter Get SharePoint Groups principalId to learn how to find the principalId.
  11. Add the Call HTTP web service action to the workflow and set the “this” to the regURL
  12. Set RequestHeaders to Variable: JSONRequestHeader
  13. Set RequestType to HTTP Post
  14. The full workflow looks like this

Get SharePoint Groups principalId

  1. Open the SharePoint site where the SharePoint Groups are present
  2. Create the following URL
    [Current Site URL]/_api/lists/getbytitle('[List Name]')/items([Item ID])/roleassignments/
    
  3. In the source of the page you can find the principalId’s
  4. The principalId’s are located between the following tag
    <d:PrincipalId m:type="Edm.Int32">769</d:PrincipalId>

Remove all permissions on current item

This workflow will remove all permissions on the item the workflow is running on. It is possible to change the regURL to remove all permission on different items. If needed set the actions within an App step to make sure the workflow has the required permissions, see the blog post SharePoint 2013 Workflow: App step and App Permissions. With this workflow we will first break the inheritance, then get all permissions/roles on the item and then remove the roles. Only site collection administrator and farm admins will be able to access the item when the workflow has run.

  1. Create a SharePoint 2013 workflow
  2. Create a dictionary variable called JSONRequestHeader
  3. Create a dictionary variable called JSONDeleteHeader
  4. Create a dictionary variable called JSONResponse
  5. Create a dictionary called AllRoles
  6. Create a dictionary called RoleItem
  7. Create a string variable called regURL
  8. Create a integer called principalId
  9. Create a integer called Index
  10. Create a integer called countRoles
  11. Create a number called calc
  12. Add the action Build Dictionary, select JSONRequestHeader as the variable
  13. Add Accept and content-type to the directory with the following code:
    application/json;odata=verbose
    

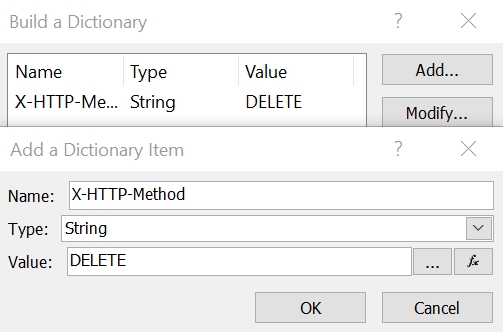
  14. Add the action Build Dictionary, select JSONDeleteHeader as the variable
  15. Add X-HTTP-Method to the directory with the following code:
    DELETE
    

  16. The first step is to break the inheritance of the items, see above the chapter breaking the inheritance on current item for the steps.
  17. The second step is to get all SharePoint Groups (Roles) that have permissions on the item.
  18. Store the following URL to the variable regURL
    [%Workflow Context:Current Site URL%]_api/lists/getbytitle('[%Worklfow Context:List Name%]')/items([%CurrentItem:ID%])/roleassignments
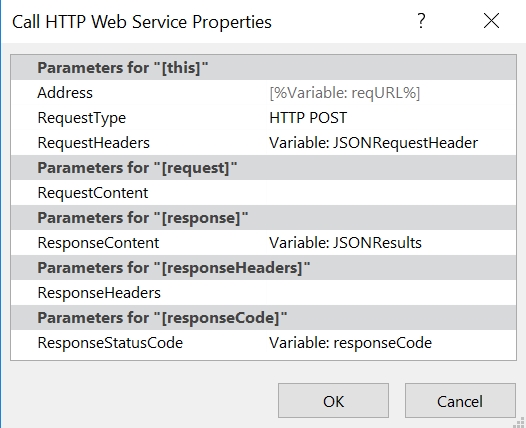
  19. Add the Call HTTP web service to the workflow and set the “this” to the regURL
  20. Set RequestHeaders to Variable: JSONRequestHeader
  21. Set RequestType to HTTP Post
  22. Set ResponseContent to JSONResults
  23. Add the action Get an Item from a Dictionary, select from Variable: JSONResults, with output to Variable:AllRoles and the following code
    d/results

  24. Then add the action Count Items in a Dictionary, select from Variable:AllRoles with output Variable: countRoles
  25. The third step is to remove all the Roles
  26. Add a loop that runs repeatedly while: Variable:Index is less then Variable:countRoles
  27. Add the action Get an Item from a Dictionary, select from Variable: JSONResults, with output to Variable:roleItems and the following code
    d/results([%Variable:Index%])
  28. Add the action Get an Item from a Dictionary, select from Variable: roleItem, with output to Variable:principalId and the following code
    PrincipalId

  29. Then store the following URL to the variable regURL
    [%Workflow Context:Current Site URL%]_api/lists/getbytitle('[%Worklfow Context:List Name%]')/items([%CurrentItem:ID%])/roleassignments([%Variable:principalId%])
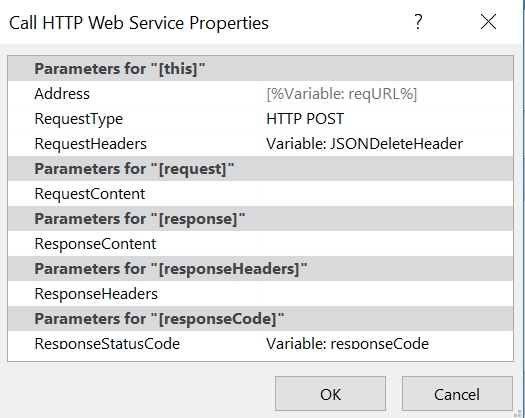
  30. Add the Call HTTP web service to the workflow and set the “this” to the regURL
  31. Set RequestHeaders to Variable: JSONDeletedHeader
  32. Set RequestType to HTTP Post
  33. Add the action Do Calculation select Variable:Index plus 1 and store the outcome in Variable: Calc
  34. Then Set Variable:Index to Variable:Calc
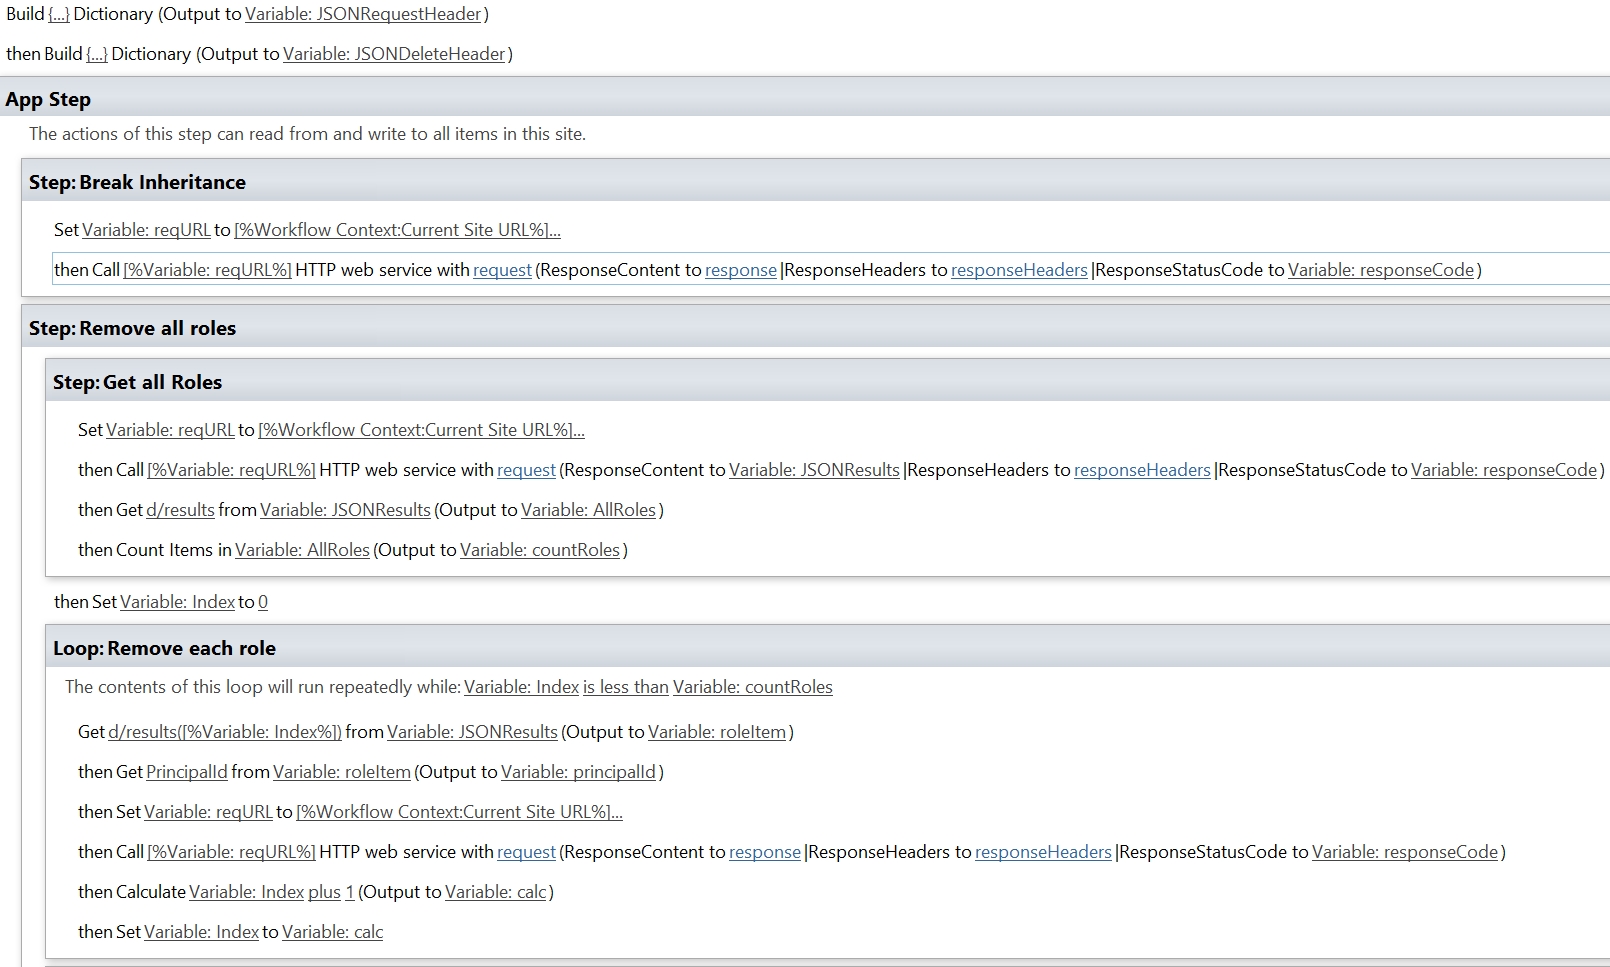
  35. The full workflow looks like this