When sharing information or sending out a notification on teams I like to use the adaptive card feature. Adaptive Cards are the Teams method of sharing and displaying blocks of information in an easy-to-read manor without the complexity of customizing CSS or HTML to render them. With adaptive cards you can even create polls, show weather information, and create hyperlinks.
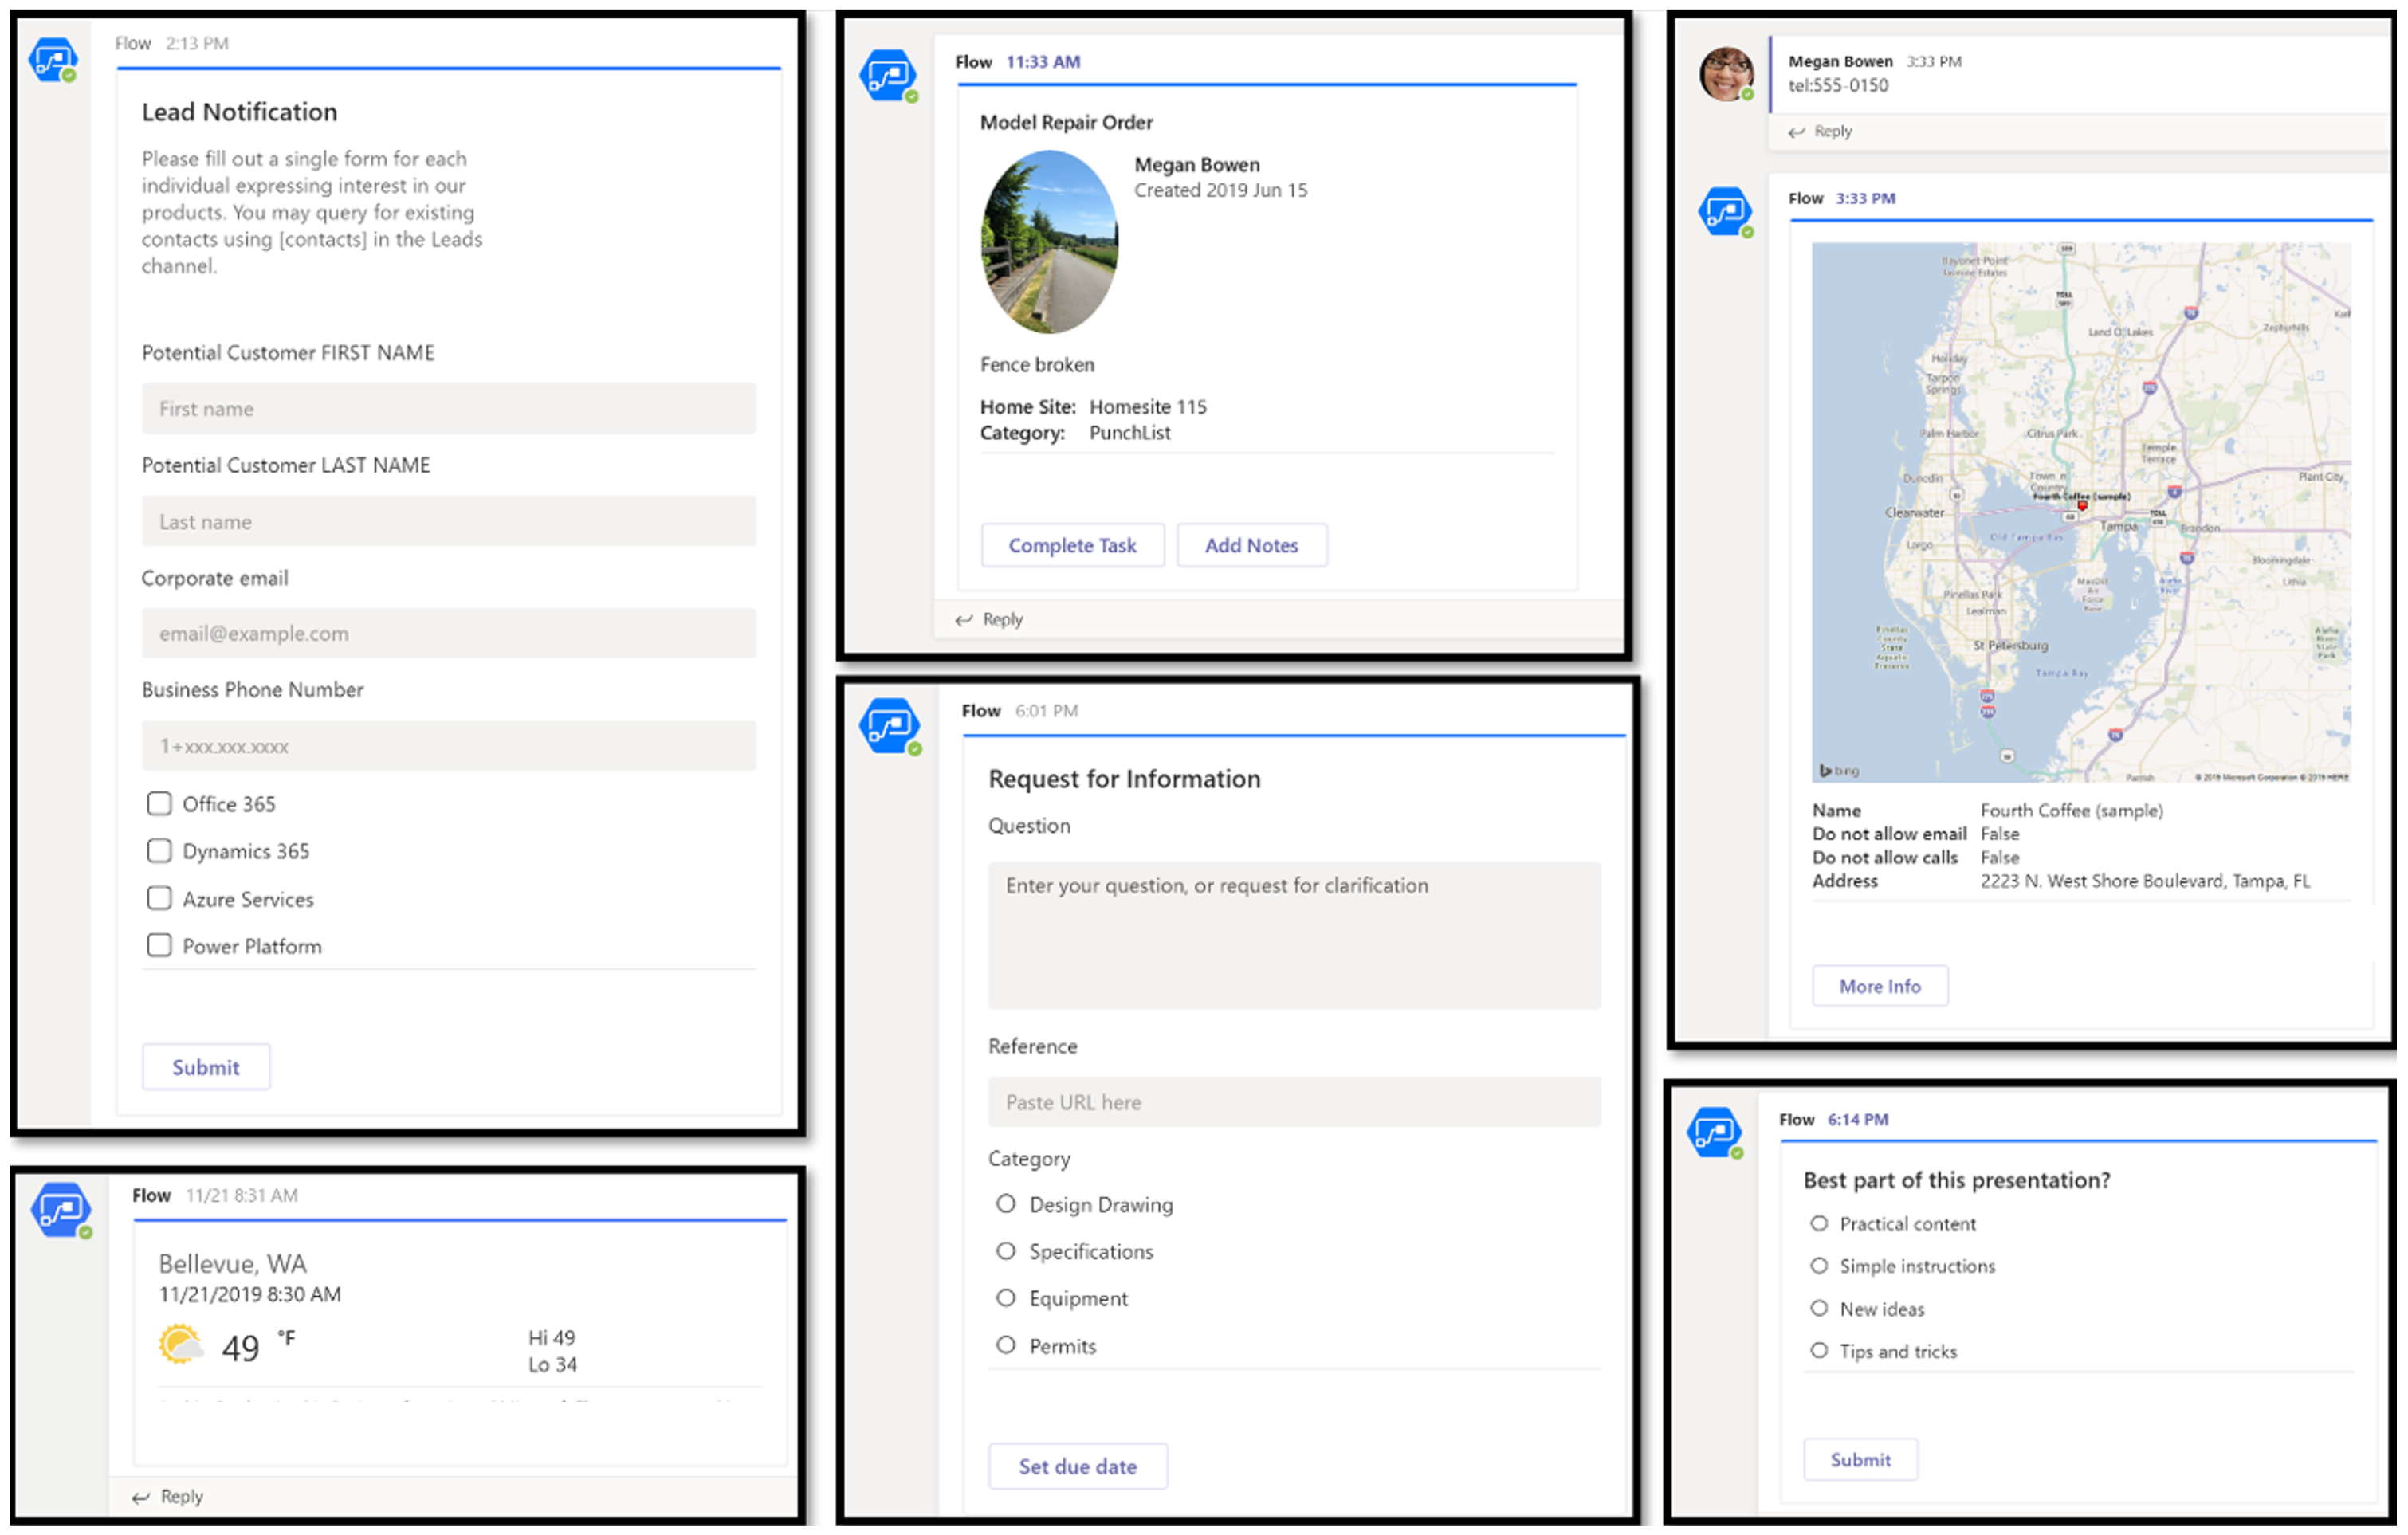
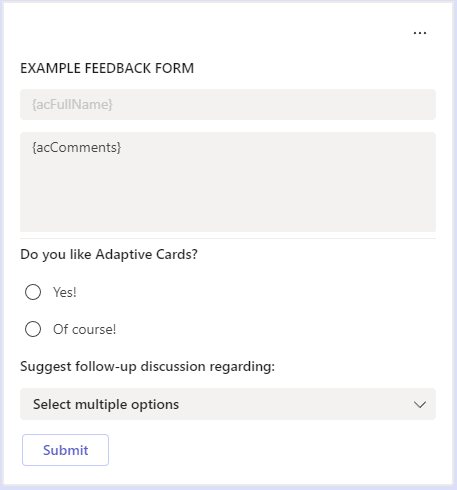
Creating a feedback form
- Create a Power Automate flow with the required trigger.
- Add the Post adaptive card in a chat or channel Teams action.
- Select the Group chat (Channel or Group Chat) or provide the chat ID.
- Add the following JSON code for an example feedback form with a title, single line, and multi-line text input fields and two types of choice list.
{
  "$schema": "http://adaptivecards.io/schemas/adaptive-card.json",
  "type": "AdaptiveCard",
  "version": "1.0",
  "body": [
    {
      "type": "TextBlock",
      "size": "Medium",
      "weight": "Bolder",
      "id": "Title",
      "text": "EXAMPLE FEEDBACK FORM",
      "horizontalAlignment": "Left"
    },
    {
      "type": "Input.Text",
      "placeholder": "{acFullName}",
      "style": "text",
      "isMultiline": false,
      "maxLength": 75,
      "id": "acFullName"
    },
    {
      "type": "Input.Text",
      "placeholder": "{acComments}",
      "style": "text",
      "isMultiline": true,
      "maxLength": 200,
      "id": "acComments"
    },
    {
      "type": "TextBlock",
      "size": "Medium",
      "weight": "Bolder",
      "text": "Do you like Adaptive Cards?",
      "horizontalAlignment": "Left",
      "separator": true
    },
    {
      "type": "Input.ChoiceSet",
      "id": "acDecision",
      "value": "1",
      "choices": [
        {
          "title": "Yes!",
          "value": "Yes"
        },
        {
          "title": "Of course!",
          "value": "Of course"
        }
      ],
      "style": "expanded"
    },
    {
      "type": "TextBlock",
      "text": "Suggest follow-up discussion regarding:",
      "weight": "Bolder"
    },
    {
      "type": "Input.ChoiceSet",
      "id": "acFollowUp",
      "isMultiSelect": true,
      "value": "",
      "choices": [
        {
          "title": "Everything",
          "value": "Everything"
        },
        {
          "title": "Always",
          "value": "Always"
        }
      ]
    }
  ],
  "actions": [
    {
      "type": "Action.Submit",
      "title": "Submit"
    }
  ]
}
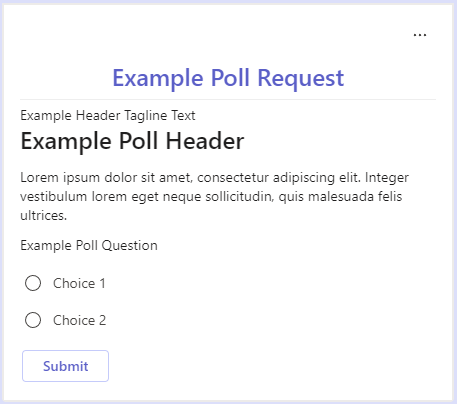
Creating a Poll
- Create a Power Automate flow with the required trigger.
- Add the Post adaptive card in a chat or channel Teams action.
- Select the Group chat (Channel or Group Chat) or provide the chat ID.
- Add the following JSON code for an example Poll with a title, header line, header, text, and a short poll.
{
    "$schema": "http://adaptivecards.io/schemas/adaptive-card.json",
    "type": "AdaptiveCard",
    "version": "1.0",
    "body": [
        {
            "type": "TextBlock",
            "text": "Example Poll Request",
            "id": "Title",
            "spacing": "Medium",
            "horizontalAlignment": "Center",
            "size": "ExtraLarge",
            "weight": "Bolder",
            "color": "Accent"
        },
        {
            "type": "TextBlock",
            "text": "Example Header Tagline Text",
            "id": "acHeaderTagLine",
            "separator": true
        },
        {
            "type": "TextBlock",
            "text": "Example  Poll Header",
            "weight": "Bolder",
            "size": "ExtraLarge",
            "spacing": "None",
            "id": "acHeader"
        },
        {
            "type": "TextBlock",
            "text": "Lorem ipsum dolor sit amet, consectetur adipiscing elit. Integer vestibulum lorem eget neque sollicitudin, quis malesuada felis ultrices. ",
            "id": "acInstructions",
            "wrap": true
        },
        {
            "type": "TextBlock",
            "text": "Example Poll Question",
            "id": "acPollQuestion"
        },
        {
            "type": "Input.ChoiceSet",
            "placeholder": "Select from these choices",
            "choices": [
                {
                    "title": "Choice 1",
                    "value": "Choice 1"
                },
                {
                    "title": "Choice 2",
                    "value": "Choice 2"
                }
            ],
            "id": "acPollChoices",
            "style": "expanded"
        }
    ],
    "actions": [
        {
            "type": "Action.Submit",
            "title": "Submit",
            "id": "btnSubmit"
        }
    ]
}
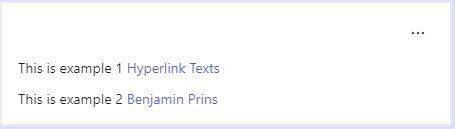
Creating a hyperlink
- Create a Power Automate flow with the required trigger.
- Add the Post adaptive card in a chat or channel Teams action.
- Select the Group chat (Channel or Group Chat) or provide the chat ID.
- You can use dynamics content for the hyperlink text and the hyperlink itself.
{
    "$schema": "http://adaptivecards.io/schemas/adaptive-card.json",
    "type": "AdaptiveCard",
    "version": "1.0",
    "body": [
       {
            "type": "TextBlock",
            "text": "This is example 1 [Hyperlink Texts](https://powerautomate.microsoft.com/)",
            "id": "acHeader",
            "wrap": true
        },
       {
            "type": "TextBlock",
            "text": "This is example 2 [@{triggerOutputs()['headers']['x-ms-user-name-encoded']}](https://powerautomate.microsoft.com/)",
            "id": "acHeader",
            "wrap": true
        }
    ]
}
Finding the chat ID
- There are multiple ways to find the chat ID, I like to use the following way.
- Open teams in the browser and open the chat
- In the URL you can see the ID of the chat. You need to copy the code after conversations including the @ and that is after the @.
- In my first example the ID is: 19:de13fe3a9cae407ba31abc84421e9ab4@thread.v2
- In my second example the ID is: 19:95b0d2cb-aa0c-4e0c-8fcf-2f7b77c5afdb_d523c084-0c04-41d0-81d2-943ad42abe9a@unq.gbl.spaces
- The action in Power Automate with find the chat and show the name of that chat.
https://teams.microsoft.com/_#/conversations/19:de13fe3a9cae407ba31abc84421e9ab4@thread.v2?ctx=chat
https://teams.microsoft.com/_#/conversations/19:95b0d2cb-aa0c-4e0c-8fcf-2f7b77c5afdb_d523c084-0c04-41d0-81d2-943ad42abe9a@unq.gbl.spaces?ctx=chat