The Refinement Panel is a solid part of almost every classic search solution. In most cases we can configure the selected refiner perfectly by changing the settings, but not always. Fortunately we are also able to change the display template per selected refiner and create our own custom Refiner Display Templates. In this example I created a custom display template with the following customizations.
- Removed the first two characters of the filter option.
- Made the refinement panel wider.
More information about display templates in general can be found on MSDN Display Templates.
Create a custom Refinement display template
First we need to make a copy of the default refinement display template, the name of the display template is Filter_Default.
- Navigate to the filter display templates: Master Page Gallery / Display Templates / Filters.
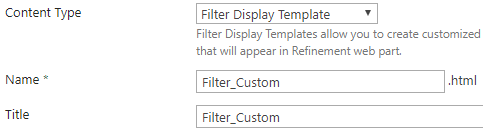
(http://your-site/_catalogs/masterpage/Display Templates/Filters) - Copy the HTML file Filter_Default and give it a new name for example: Filter_Custom.html
- Remember not to copy the JS file, this will be created automatically.
- Update the Title field of the display template.
- Open Filter_Custom.html in your favorite editor.
- Remove the code which is not needed.
- I removed rows 33-201 and 209-229
- Note that this might be different for you
Solution for removing characters
- Find the following code.
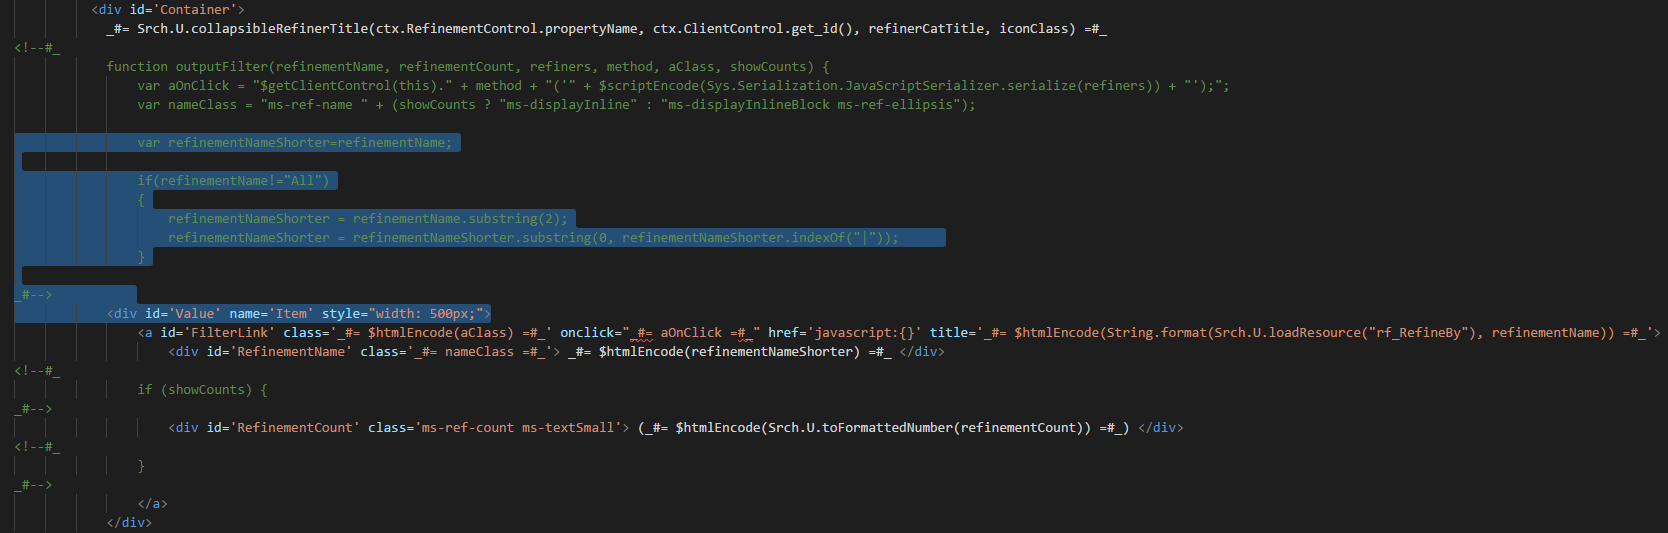
<div id='Container'>
- Find the following div located below the previous one.
<div id='Value' name='Item'>
- Between these divs add the if statement that shortens the shown filter options.
- Note that is does not remove the show all items feature.
- In my example I remove the first 2 characters.
var refinementNameShorter=refinementName;

if(refinementName!="All")
{
    refinementNameShorter = refinementName.substring(2);
    refinementNameShorter = refinementNameShorter.substring(0, refinementNameShorter.indexOf("|"))
}
Solution for wider refinement panel
- Find the following code.
<div id='Container'>
- Inside this div is the following div located.
<div id='Value' name='Item'>
- Change this into the following code.
<div id='Value' name='Item' style="width: 500px;">
Configure the refinement panel
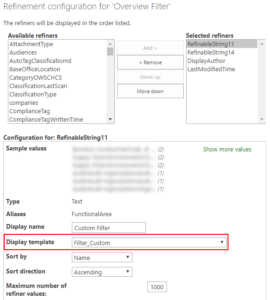
- Open the page with the refinement panel
- Select by Display template the newly created Filter_Custom

Code result