Many colleagues have asked me how to create or update document sets with Power Automate. I had never done this before so I told them to use a web service. From now on, I can point them to this blog post. The flow is created with the help of my colleague Jasper Voskuilen, because this web service is a bit more complicated to setup.
Creating the flow
- Open Power Automate and create a new flow (automation).
- I created a flow with the trigger, for a selected item.
- In my situation I get all items from a list and then create a document set for each result.
- Create the following variables with the related values.
- This will make the flow more dynamic for later changes.
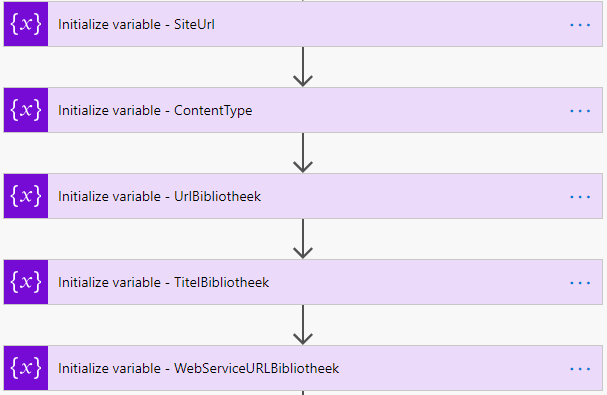
- SiteURL as a string, fill in the Site URL.
- ContentType as a string, fill in the content type id.
- URLLibrary as a string, fill in the library name part of the ULR.
For this example it is: Library
https://domein.sharepoint.com/sites/ExampleSite/Library/Forms/allitems.aspx
- TitleLibrary as a string, fill in the title (name) of the library.
- WebServiceURLBibliotheek as a string, fill in the Library URL used by the web service.
- You can find the web service url by using the following URL
https://domein.sharepoint.com/sites/ExampleSite/_vti_bin/listdata.svc/
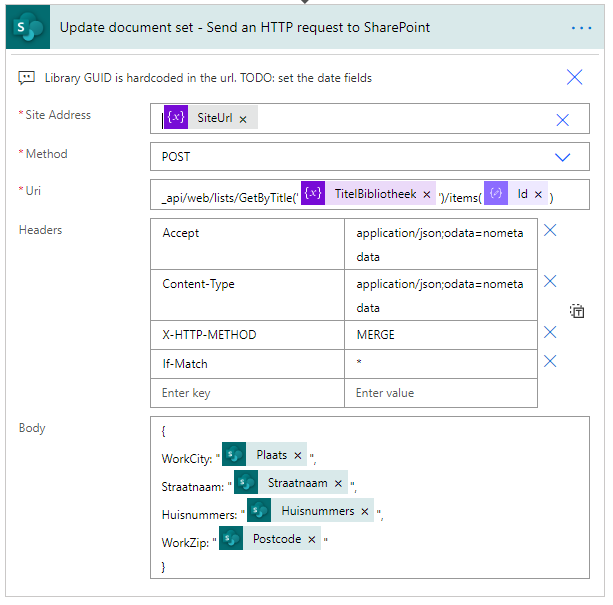
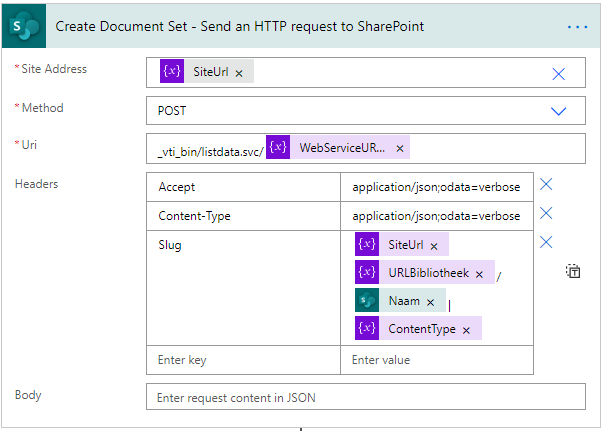
- Add the action Send an HTTP request to SharePoint
- Use the varibles to configure the web service.
- The name of the document set needs to be unique. I used a value from my list item, your situation might be different.
- If required you can update the newly created document set.
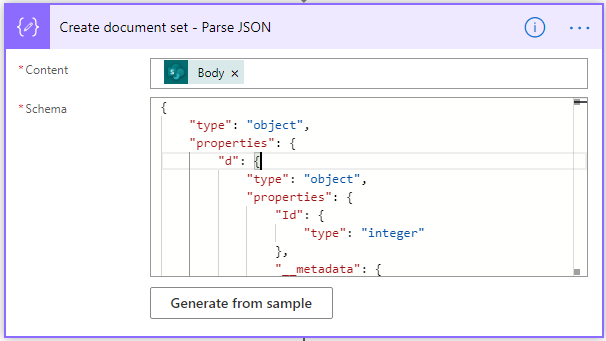
- Add the action Parse JSON and parse the Body of the Create Document set HTTP request.
- Add the action Send an HTTP request to SharePoint
- Use the variables to configure the web service.
- The properties you need to set might be different than mine. I used values from my list item but your situation might be different.