Most of use have been working from home for months and use Teams on a daily basis. Working remotely can be challenging especially if you just started working with Teams. The following 20 tips and tricks should help you get more out of Teams even if you are an experience user.
This blog post is an extension of the older Teams: Tips and tricks post.
The tips and tricks
- Pin favorite chats
- Pop out chat
- Pop out list
- Use mentions in chat messages
- Turn on do not disturb
- Create rich-text messages
- Send urgent chat message
- Save / bookmark a post for later
- Mute a chat
- Slash commands
- Shortcuts
- Expand tabs
- Send an email to a channel
- Change the order of the teams
- Hide teams or channels
- Pin a channel
- Record meetings
- Mark messages as read
- Mark messages as unread
- Change channel notifications
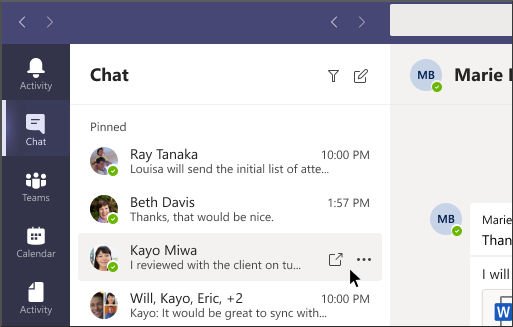
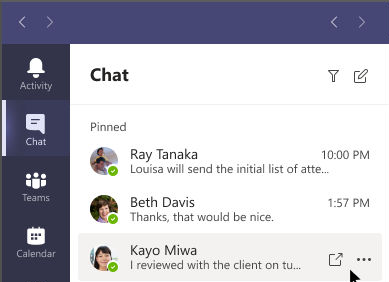
Pin favorite chats
By default, the most recent chats are shown under chats. This means that all the chats with users and your meetings are mixed together. This can be a bit confusing since is changes all the time. You can pin frequent conversations to the top of your chat list, to create a clear and use full overview.
- Open the chats in Teams.
- Click on the … or right click on the chat you want to pin.
- Click on Pin.
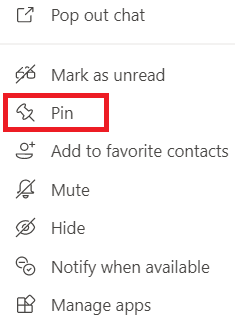
- The pinned chats will be grouped above the recent chats.

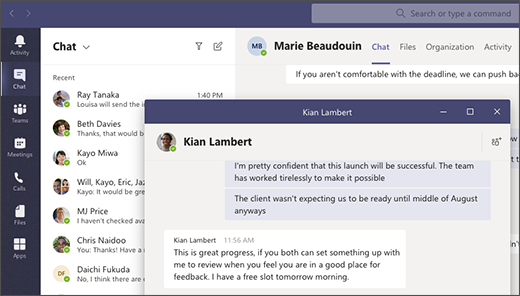
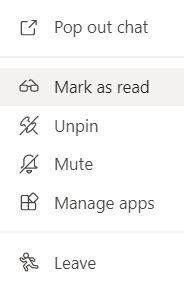
Pop out chat
When working with Teams you might feel stuck with one screen, but this is not the case. When you hover over one of your chats, you’ll see the Pop out icon. Choose that option and the chat will be opened in a new pop out window.
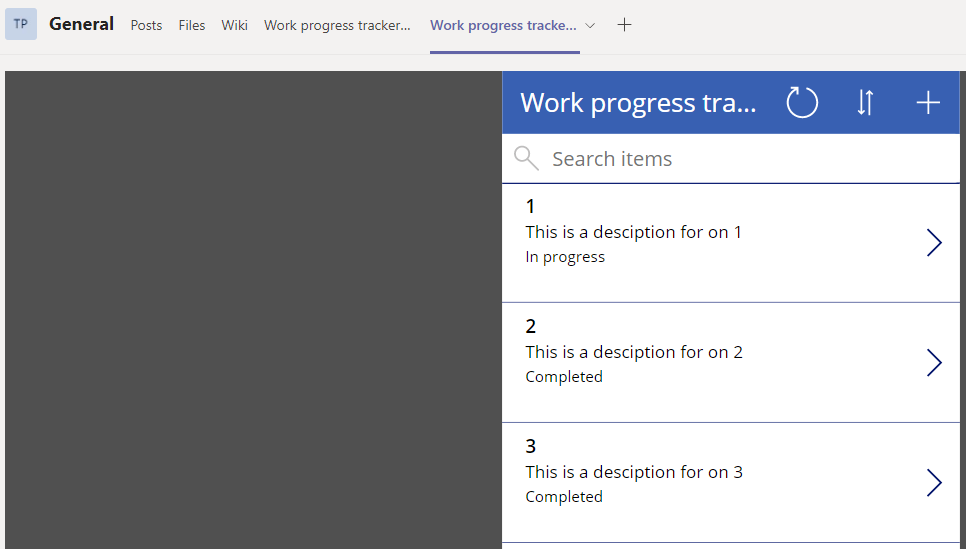
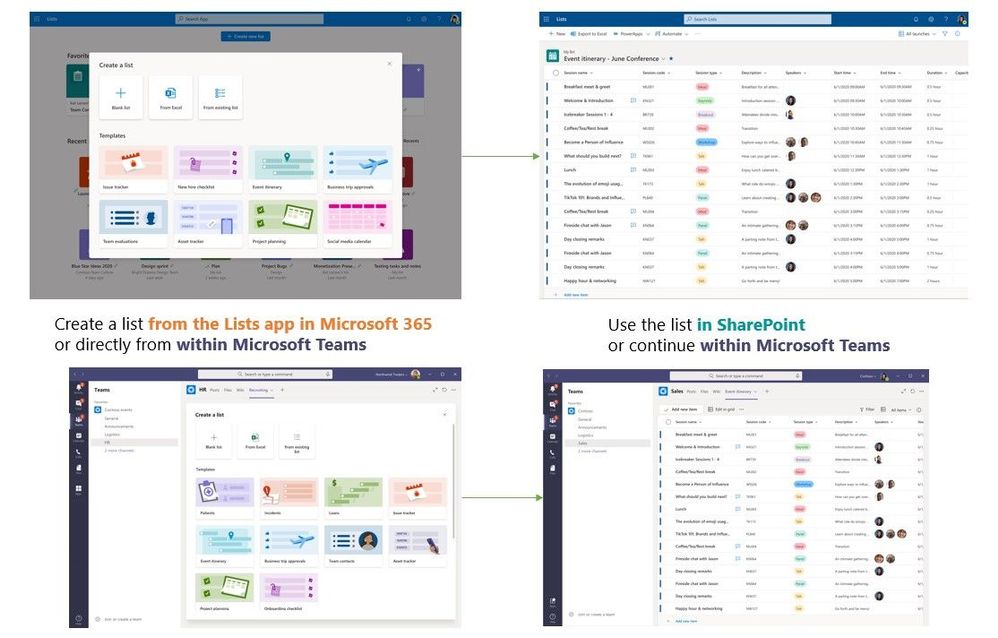
Pop out list
When working in Teams you might feel stuck with one screen, but this is not the case. You can pop out a connected SharePoint list.

- Select the pop out icon.

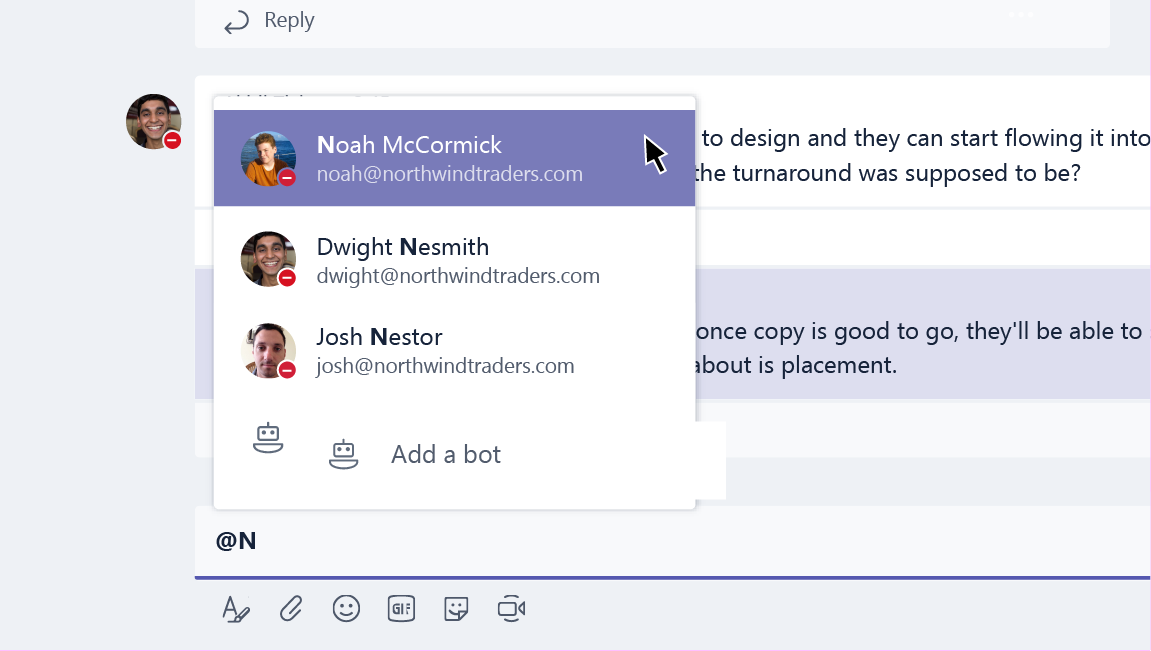
Use mentions in chat messages
To make sure a specific colleague in a group chat or channel reads your message, use the mention option.
- In a chat window type @ and fill in or select the correct colleague.
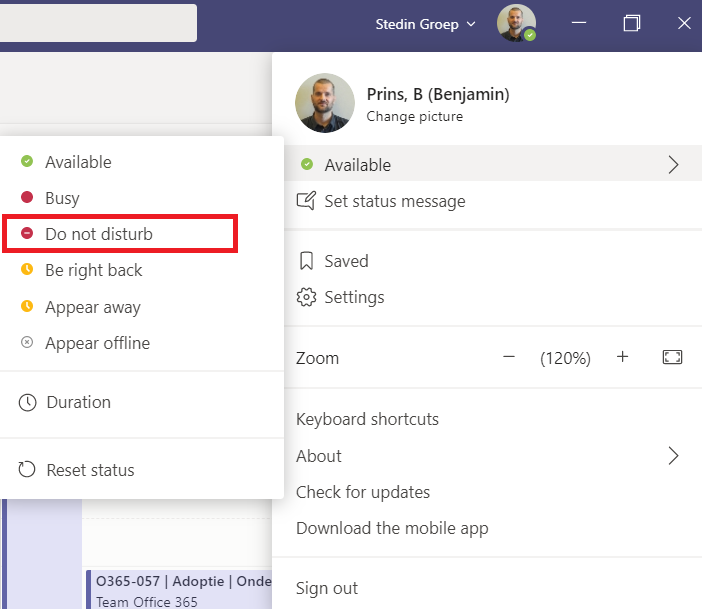
Turn on do not disturb
Constant messages and alerts are a productivity killer when you’re trying to focus. You can turn off those messages by enabling the do not disturb mode.
- Click in teams on your profile picture.
- Click on the > next to the current availability.
- Select Do not disturb.
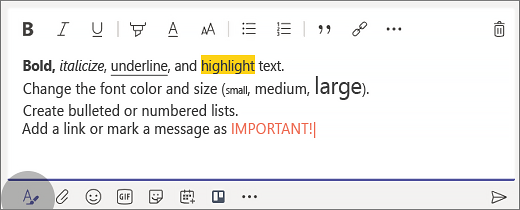
Create rich-text messages
Some messages need rich formatting to be more effective. In a chat message click on the format icon for all the options.
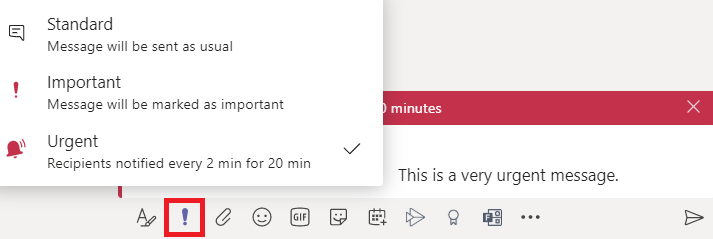
Send urgent chat message
If you need an immediate reply on a message, tag the message as urgent.
The recipient will get notifications every two minutes for the next 20 minutes or until it’s read.
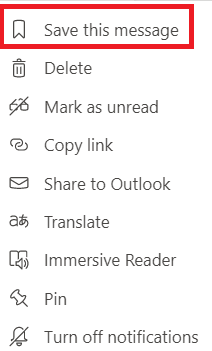
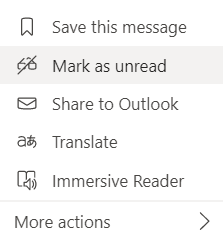
Save / bookmark a post for later
No time to read an important post? Save the message to make sure it does not get lost. Use the slash command /saved to access all the saved messages.
- Click on the … of a message and select Save this message.
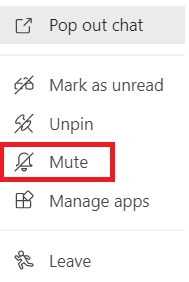
Mute a chat
Chat messages from meetings can be a bit noisy, mute them if you are not involved in the conversation. When you mute a chat, you’ll still be included in the conversation, but won’t get notifications from it.
- Click on the … of the chat and select Mute.
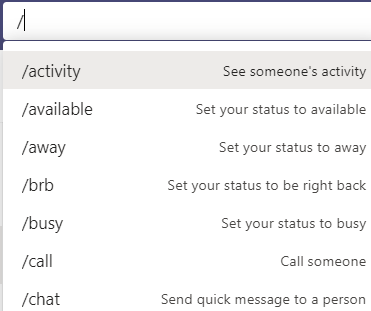
Slash commands
Slash commands are command you use in the search bar and all start with you quested it a / (slash). These commands will help you be as efficiency as possible.
- Type / in the search box to see all the available commands.
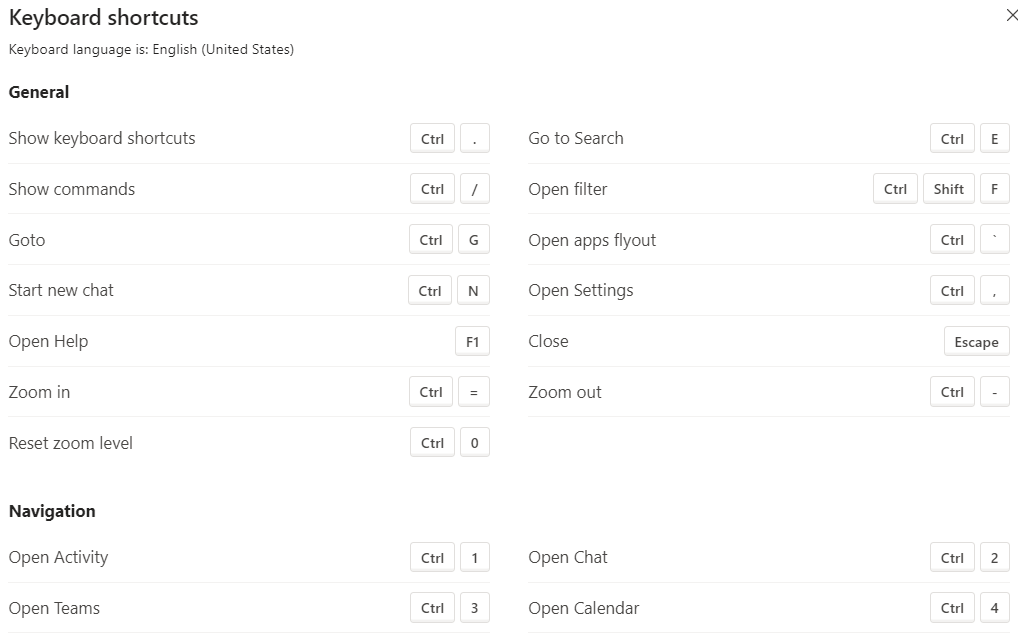
Shortcuts
Microsoft Teams has a lot of useful shortcuts. Use the slash command /keys to see all the options.
Expand tabs
Most tabs can be expanded to focus on the content and hide the navigation.

- Click on the expand icon, the two arrows.

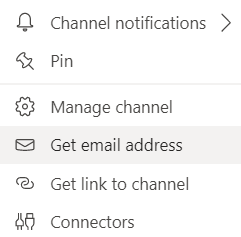
Send an email to a channel
If you want to send an email to a channel in Teams, you can use the channel email address. Once an email is part of a channel, anyone can reply to it to start a conversation.
- Click on the … of the channel and select Get email address.
- Click on copy in the popup window.
Change the order of the teams
The order of the teams can be changed, simply drag and drop the teams in the preferred order.

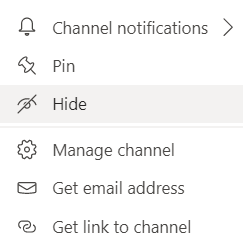
Hide teams or channels
If you don’t want a team or channel to show in your teams list, because you almost never use it you can hide it.
- Click on the … of the channel or team and select Hide.
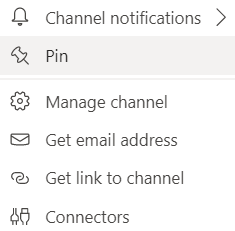
Pin a channel
Pin your favorite channels for fast and easy access. Pinned channels stay at the top of the list so you don’t have to hunt them down.
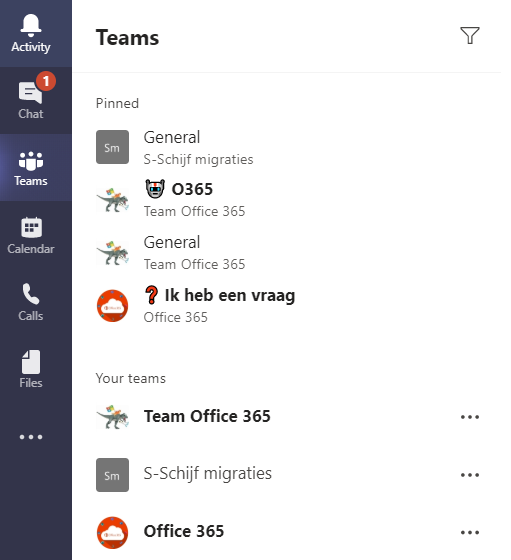
- Click on the … of the channel and select Pin.
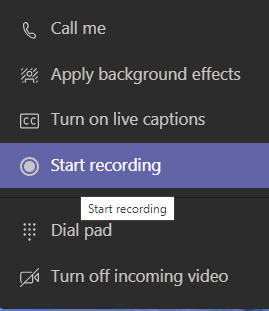
Record meetings
Recording meetings can be incredibly helpful. You can watch the discussions, find out what the decisions where, listen to the training again or watch a meeting you missed (recorded by someone else).
- During a meeting click on the … followed by Start recording.
Mark messages as read
Chat messages from meetings or chat conversions you did not take part in or from a while back might not be that interesting. You can simply mark them all as read and ignore them.
- Click on the … of the chat and select Mark as unread.
Mark messages as unread
In Teams you can mark a message as unread so you can come back to it later. Use the slash command /unread to see all the unread messages.
- Click on the … of the channel and select Mark as unread.
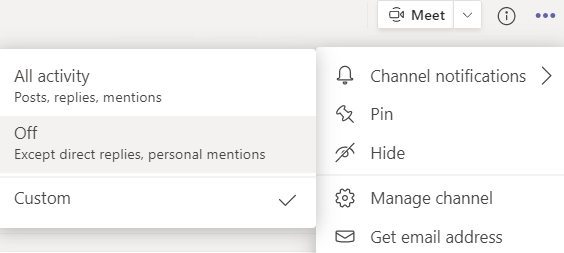
Change channel notifications
Not all channels are equally important. Reduce the notification noise by customizing the notifications for specific channels.
- Click on the … of a channel.
- Click on the > next to the Channel notifications.
- Select the preferred option.