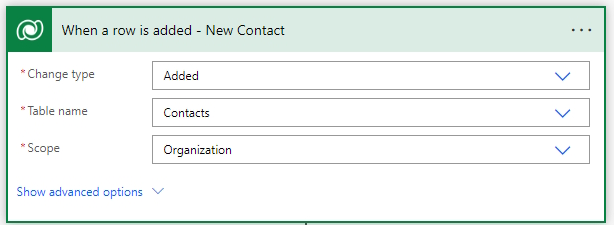
In my previouse blog post I explained how to automatically create and delete B2C account for Dataverse Contacts. In this post, I will dive deeper into the process by automating the redemption of an invitation code process. By default, new contacts need to redeem an inventation code before they can access the Power Pages. I am using the one-time-password setup for access to the Power Pages and for ease of use I don’t want the contact (external users) to have to redeem an inventation code.
To achieve this, we will automate the process by granting the contact a web role, connecting the B2C account ID, and adding the external identity. This will allow the contact to access the Power Pages without having to redeem an invitation code.
Creating the automated redemption process
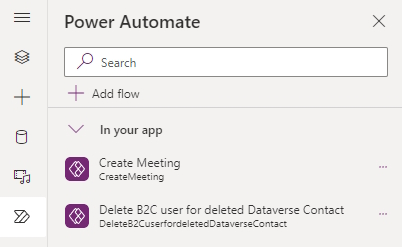
- Open the Power Automate Flow created in the create B2C account for Dataverse Contact blog post or create a new flow by following the steps.
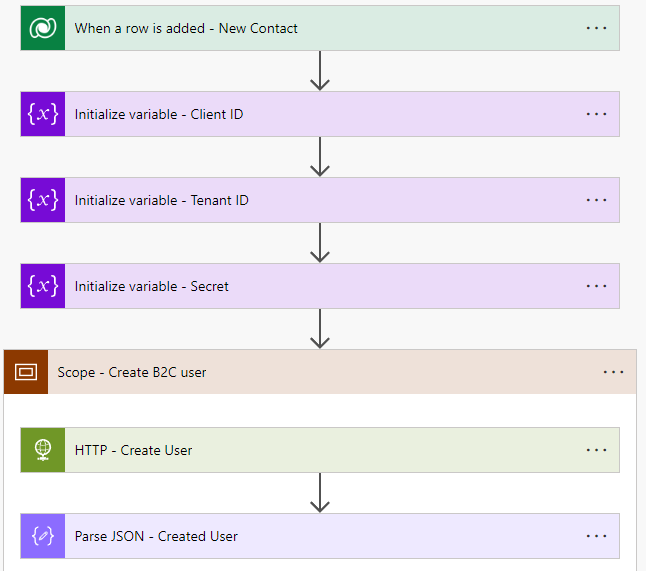
- Add the following actions below the Scope – Create B2C Users.
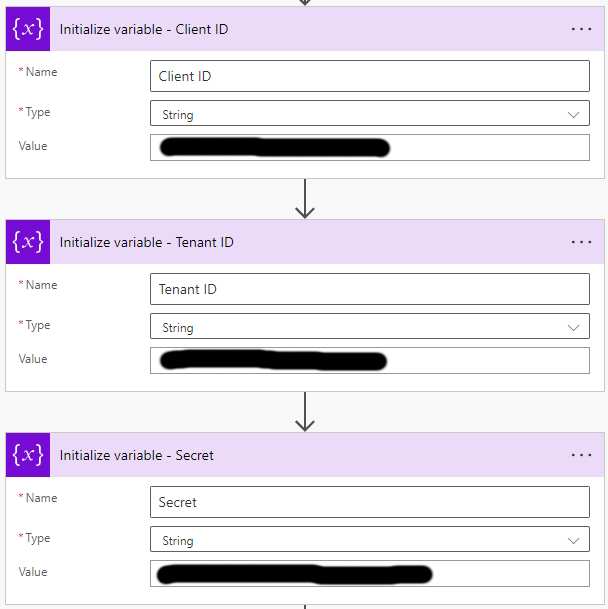
- Initialize a variable called Role URL as a string.
- Open the required web role in the Portal management tool, the ID is in the end of the URL.
https://[environment].crm4.dynamics.com/main.aspx?appid=39b012bd-1234-1234-1234-0022489fd314&pagetype=entityrecord&etn=adx_webrole&id=04ae7aa4-1234-1234-1234-0022489b74da- Add the following URL as the value, with your own unique web role id.
https://[environment].crm4.dynamics.com/api/data/v9.1/adx_webroles(04ae7aa4-1234-1234-1234-0022489b74da)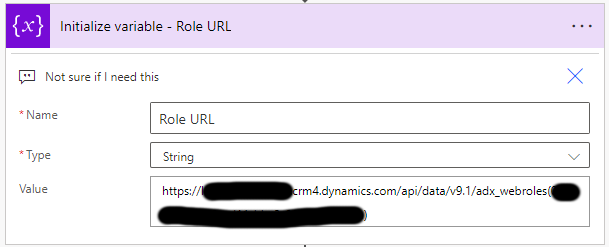
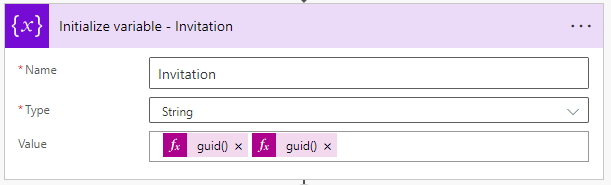
- Initialize a variable called Invitation as a string.
- Add as a value two guid()
- Initialize a variable called External Identity URL as a String.
- Add the following URL (with your environment name).
https://[environment].crm4.dynamics.com/api/data/v9.1/adx_externalidentities
- Add a scope called Add Role to new contact and add the following actions.
- Add the Dataverse Relate rows action called Add Role to Contact.
- Set the Table name as Contacts.
- Set the Row ID to Contact (the contact id of the contact where the flow was triggert on).
- Set the Relationship to adx_webrole_contact.
- Set the Relate with to the variable Role URL.

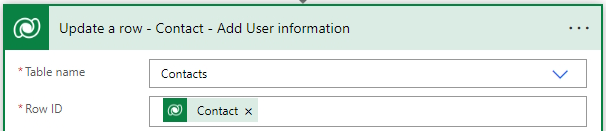
- We are going to update the existing Dataverse Update a row action called Contact – Add User information.
- Drag this action into the scope Add Role to new contact.
- Set the Table name to Contacts.
- Set the Row ID to Contact (the contact id of the contact where the flow was triggert on).
- Set the Email Confirmed to Yes.
- Set the Lockout Enabled to Yes.
- Set the Login Enabled to Yes.
- Set the Security Stamp to the guid() expression.
- Set the Time Zone Rule Version Number to 0.
- Set the User Name to the ID of the B2C account.
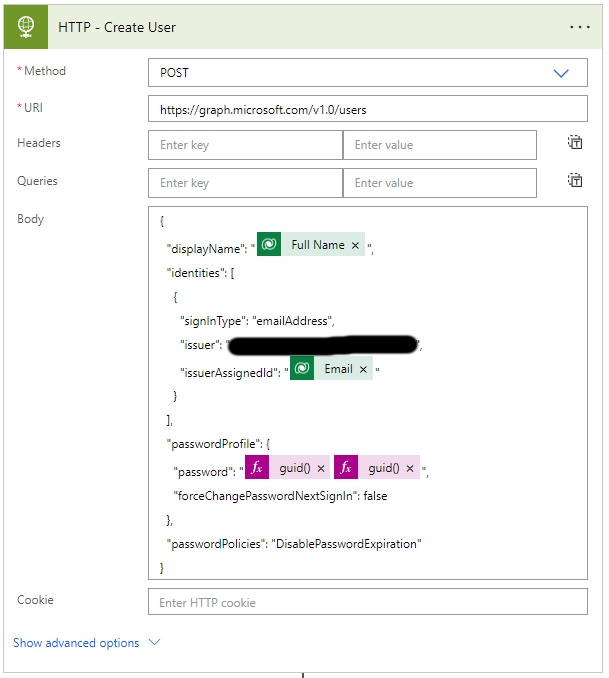
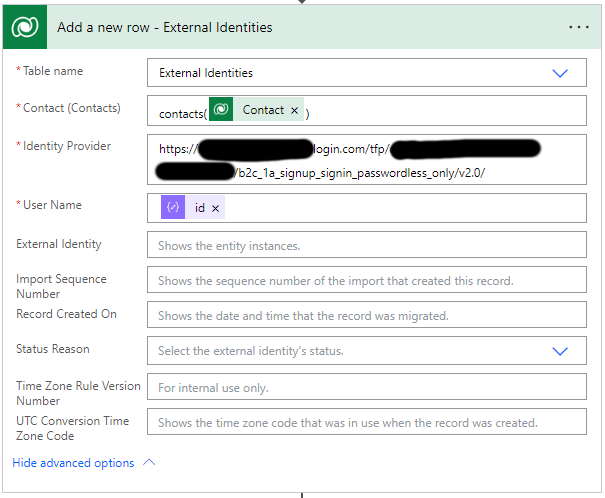
- Add the Dataverse Add a new row action called External Identities.
- Set the Table name to External Identities.
- Set the Contact (Contacts) to Contacts(Contact) (the contact id of the contact where the flow was triggert on).
- Set the Identity Provider to your Identity Provider URL
- Set the User Name to the ID of the B2C account.
- Add the Dataverse Relate rows action called Add External Identity to Contact.
- Set the Table name to Contacts.
- Set the Row ID to Contact (the contact id of the contact where the flow was triggert on).
- Set the Relationship to adx_contact_externalidentity.
- Set the Relate with the following code, the External Identity is the ID of the newly created External Identity.
https://[environment].crm4.dynamics.com/api/data/v9.1/adx_externalidentities()
- The flow will now create a new B2C account when a new contact is created, link them together and automatically redeem the invitation.