During Microsoft Ignite many innovations that transform the workplace communications have been announced. Its impossible to name them all, so instead I will share with you my favorite innovations. Note that some of these features are already live, being rolled out or still being developed.
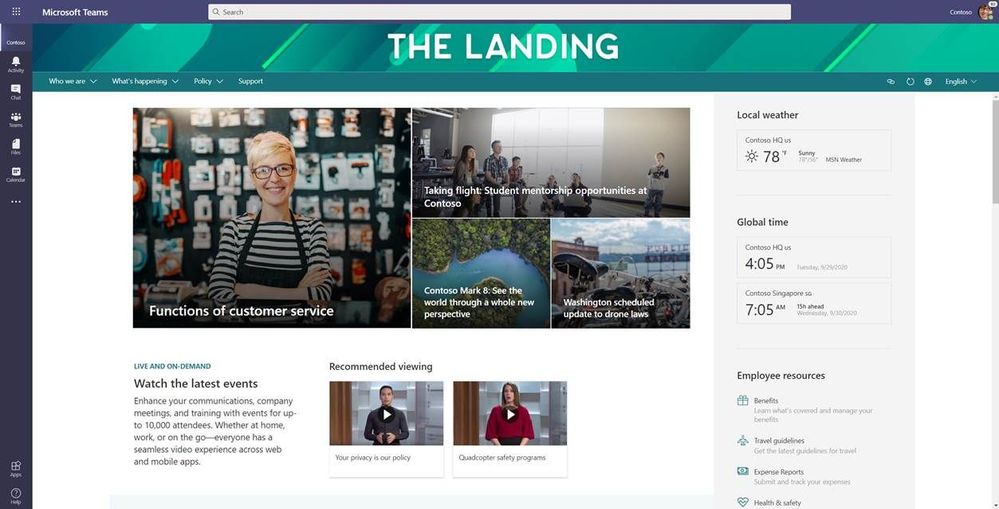
SharePoint app bar
The SharePoint app bar might even be my favorite announcement from Ignite. The app bar will be visible on every site on your intranet providing a consistent navigation experience. But it’s not only for navigation, that is just the beginning. The app bar also shows personal relevant sites, news feed and the files. The SharePoint app bar will appear after you set a SharePoint site as a home site.
Home site in Teams
Your intranet (home site) is coming to Microsoft Teams. With the home site app for Microsoft Teams users gain direct access to the SharePoint Home site in Teams. The home site app in Teams gives your users global navigation across sites, communities, and teams; quick access to sites they use regularly; and a personalized news feed.
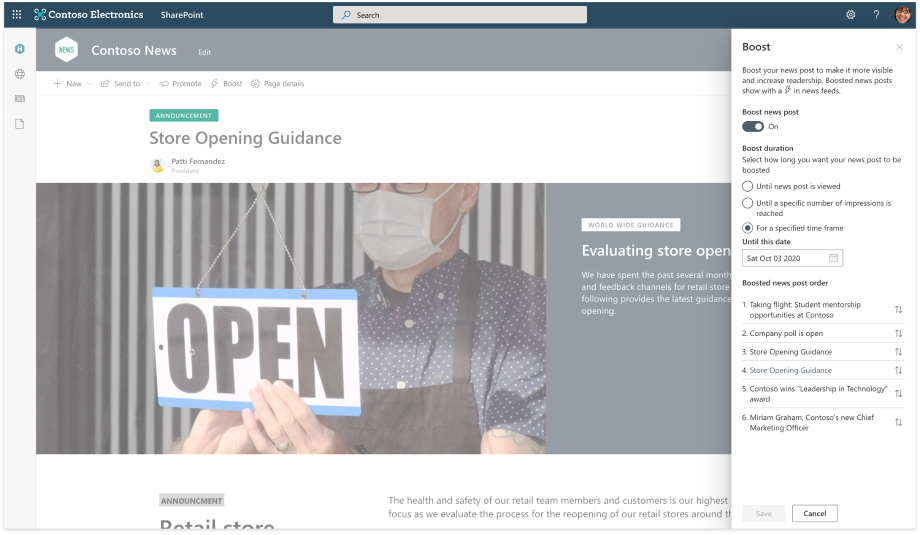
SharePoint: News boost
Microsoft listened to our request; we are getting the ability to boost news! With this feature you wil be able to boost the visibility of your important news articles. You can boost a news post until it has been read, for a set number of impressions, or until a given date.
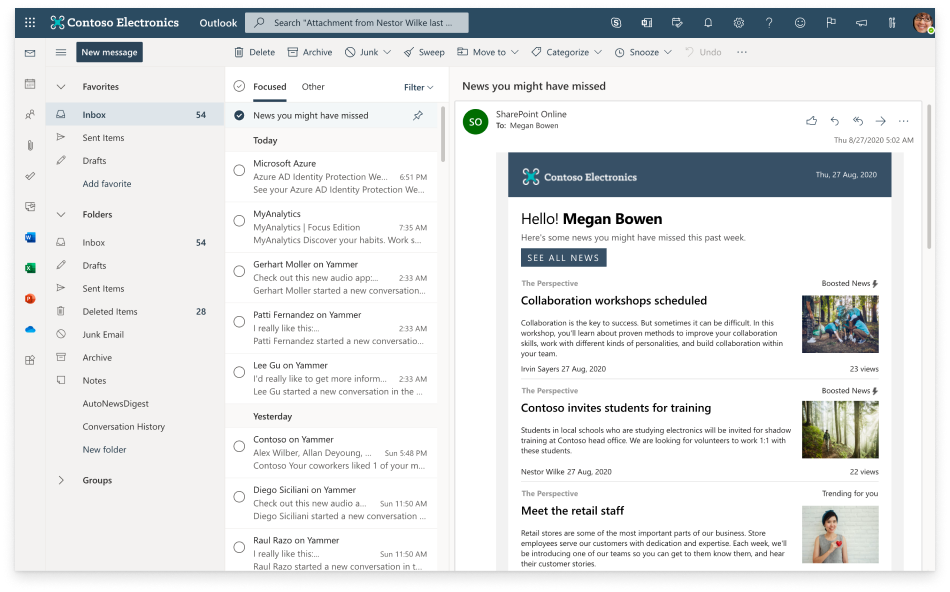
SharePoint: news digest
Keeping up with all the all the news and information can be harder than it seems. With the automatically generated news digest you will receive an email summary of the news articles you have missed. This will ensure that everybody will be well informed. The news digest can be customized with your organization’s branding.
Teams: Dynamic view
Dynamic view makes uses of AI to optimize shared content and video participant, it intelligently arranges the elements of your meeting for an optimal viewing experience. The viewing experience will change when people join, turn on video, start to speak or when starting to present. You will still be able change the layout based on your preference.
SharePoint spaces
SharePoint spaces is a very powerful new tool for 3D interactions. SharePoint spaces enables you to make immersive and engaging mixed reality experiences for 3D content, models and 360° imagery.
The updates for Office 365 keep coming and coming, Microsoft is not sitting still! I am very excited for the following new features. Note that some of these features are already live, being rolled out or still being developed.
Microsoft Viva
Microsoft Viva is an employee experience platform, helping you create a work environment that puts people first, driving better business results.
It consists of Topics, Connections, Learning and Insights which are (partly) modules based on Microsoft Project Cortex technology. It brings together people, knowledge, e-learning using Microsoft Teams and SharePoint. And it also brings a Viva Insights app into Teams, utilizing data from Workplace Analytics.
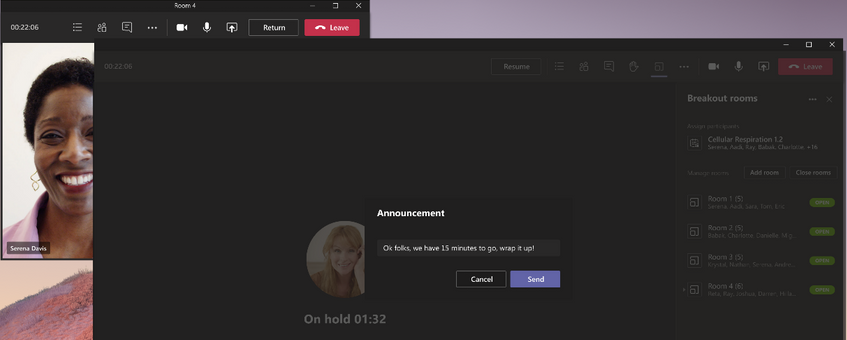
Teams: Virtual Breakout Rooms
The virtual break out rooms are here! The meeting owner can create break out rooms to be used by the meeting participants for smaller group discussion. Participants can be assigned to a room and call them back to the larger group when the breakout is complete.
Teams: End-of-meeting notification
Microsoft Teams will notify the meeting participant when there is 5 minutes left in the scheduled meeting time. This will help users to be on time for the next meeting or shorting meetings that might drag on for too long.
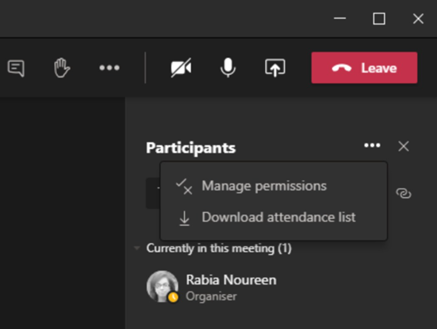
Teams: Attendee Dashboard
Download the attendance list with a simple button.
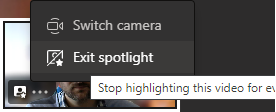
Teams: Spotlight
It’s now easier to see if you are in the spotlight and to remove yourself from the spotlight.
SharePoint: 250GB file size support
The new upload limit for large files is now 250 GB for Teams, SharePoint, and OneDrive
SharePoint: Image Lightbox
Users can click on an image web part while in view mode, to see a larger version of the image.
Most of use have been working from home for months and use Teams on a daily basis. Working remotely can be challenging especially if you just started working with Teams. The following 20 tips and tricks should help you get more out of Teams even if you are an experience user.
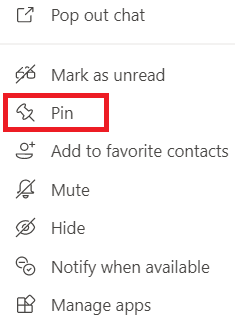
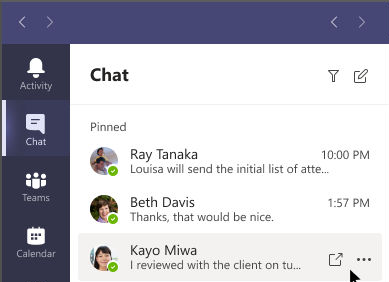
By default, the most recent chats are shown under chats. This means that all the chats with users and your meetings are mixed together. This can be a bit confusing since is changes all the time. You can pin frequent conversations to the top of your chat list, to create a clear and use full overview.
Open the chats in Teams.
Click on the … or right click on the chat you want to pin.
Click on Pin.
The pinned chats will be grouped above the recent chats.
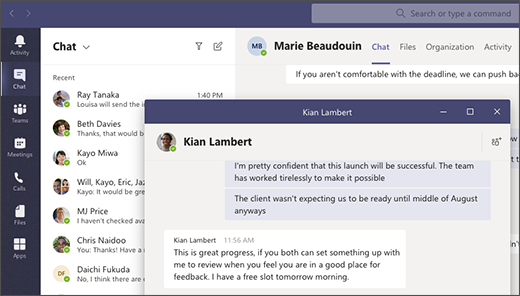
Pop out chat
When working with Teams you might feel stuck with one screen, but this is not the case. When you hover over one of your chats, you’ll see the Pop out icon. Choose that option and the chat will be opened in a new pop out window.
Pop out list
When working in Teams you might feel stuck with one screen, but this is not the case. You can pop out a connected SharePoint list.
Select the pop out icon.
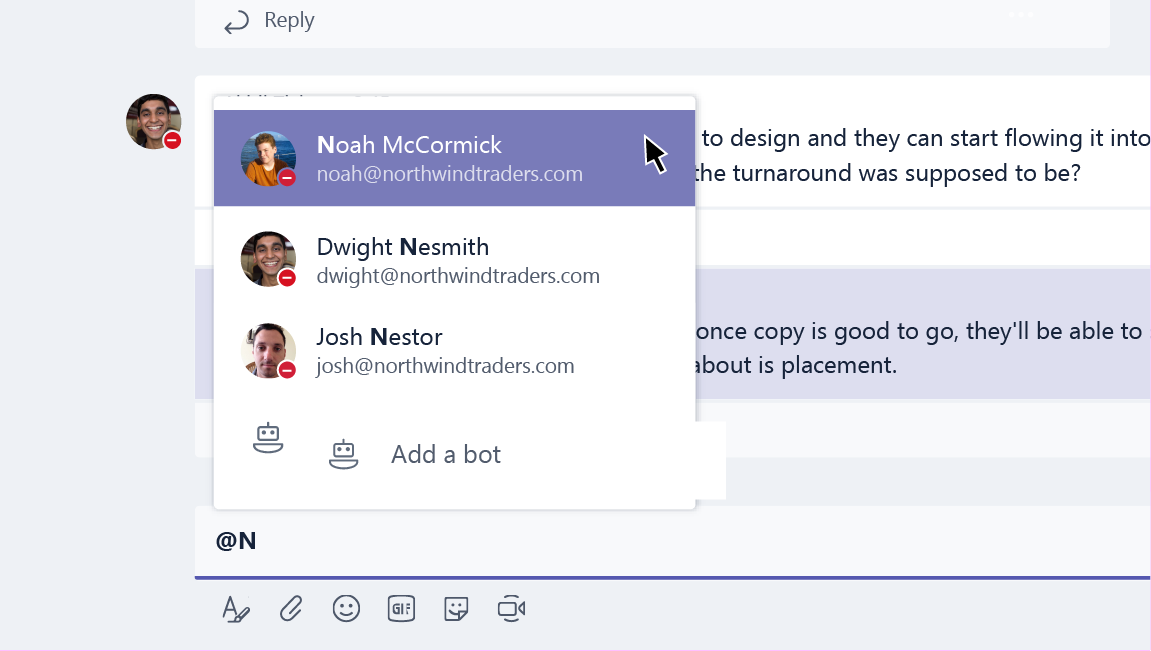
Use mentions in chat messages
To make sure a specific colleague in a group chat or channel reads your message, use the mention option.
In a chat window type @ and fill in or select the correct colleague.
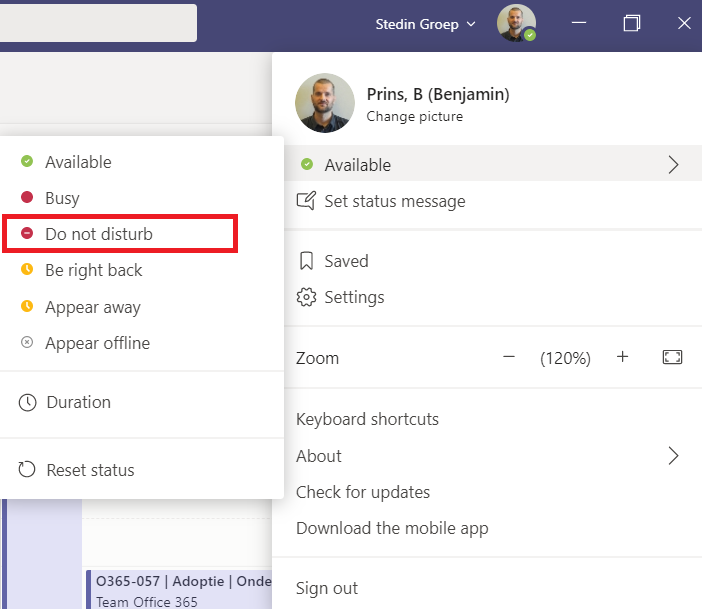
Turn on do not disturb
Constant messages and alerts are a productivity killer when you’re trying to focus. You can turn off those messages by enabling the do not disturb mode.
Click in teams on your profile picture.
Click on the > next to the current availability.
Select Do not disturb.
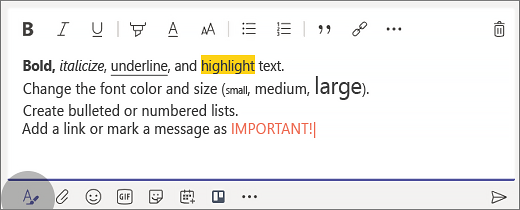
Create rich-text messages
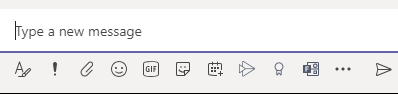
Some messages need rich formatting to be more effective. In a chat message click on the format icon for all the options.
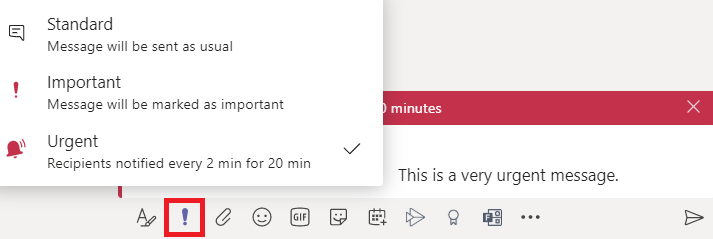
Send urgent chat message
If you need an immediate reply on a message, tag the message as urgent. The recipient will get notifications every two minutes for the next 20 minutes or until it’s read.
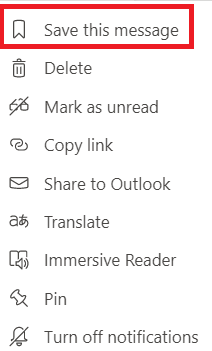
Save / bookmark a post for later
No time to read an important post? Save the message to make sure it does not get lost. Use the slash command /saved to access all the saved messages.
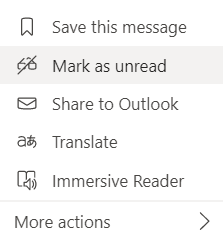
Click on the … of a message and select Save this message.
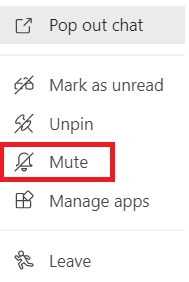
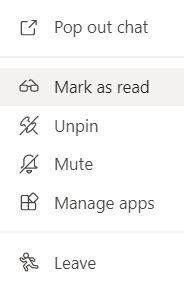
Mute a chat
Chat messages from meetings can be a bit noisy, mute them if you are not involved in the conversation. When you mute a chat, you’ll still be included in the conversation, but won’t get notifications from it.
Click on the … of the chat and select Mute.
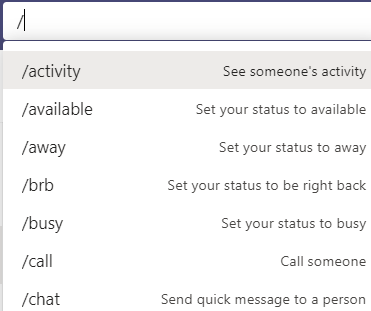
Slash commands
Slash commands are command you use in the search bar and all start with you quested it a / (slash). These commands will help you be as efficiency as possible.
Type / in the search box to see all the available commands.
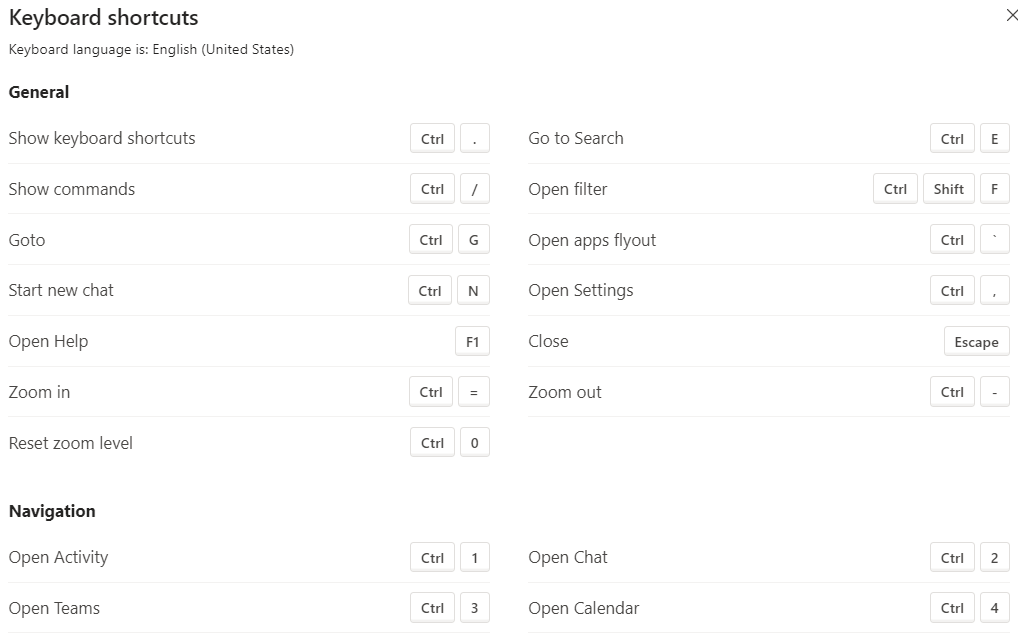
Shortcuts
Microsoft Teams has a lot of useful shortcuts. Use the slash command /keys to see all the options.
Expand tabs
Most tabs can be expanded to focus on the content and hide the navigation.
Click on the expand icon, the two arrows.
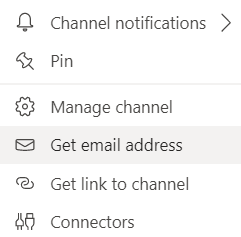
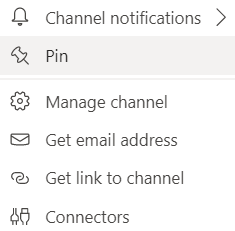
Send an email to a channel
If you want to send an email to a channel in Teams, you can use the channel email address. Once an email is part of a channel, anyone can reply to it to start a conversation.
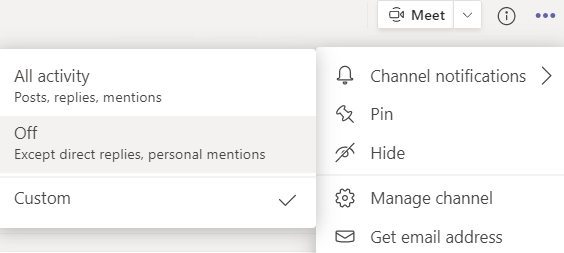
Click on the … of the channel and select Get email address.
Click on copy in the popup window.
Change the order of the teams
The order of the teams can be changed, simply drag and drop the teams in the preferred order.
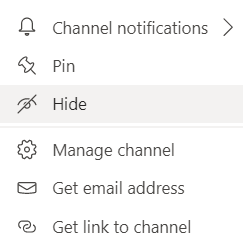
Hide teams or channels
If you don’t want a team or channel to show in your teams list, because you almost never use it you can hide it.
Click on the … of the channel or team and select Hide.
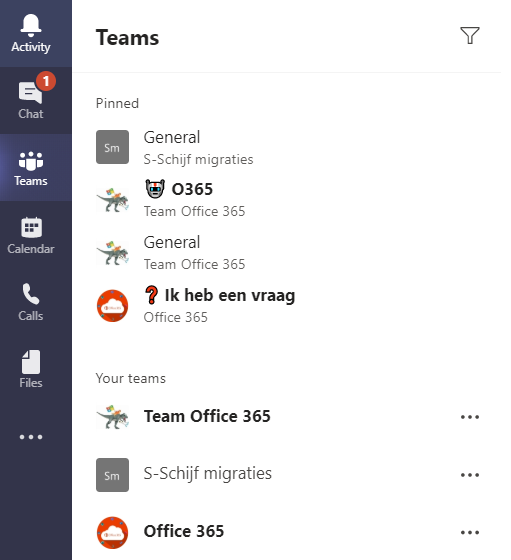
Pin a channel
Pin your favorite channels for fast and easy access. Pinned channels stay at the top of the list so you don’t have to hunt them down.
Click on the … of the channel and select Pin.
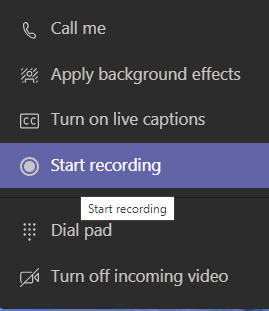
Record meetings
Recording meetings can be incredibly helpful. You can watch the discussions, find out what the decisions where, listen to the training again or watch a meeting you missed (recorded by someone else).
During a meeting click on the … followed by Start recording.
Mark messages as read
Chat messages from meetings or chat conversions you did not take part in or from a while back might not be that interesting. You can simply mark them all as read and ignore them.
Click on the … of the chat and select Mark as unread.
Mark messages as unread
In Teams you can mark a message as unread so you can come back to it later. Use the slash command /unread to see all the unread messages.
Click on the … of the channel and select Mark as unread.
Change channel notifications
Not all channels are equally important. Reduce the notification noise by customizing the notifications for specific channels.
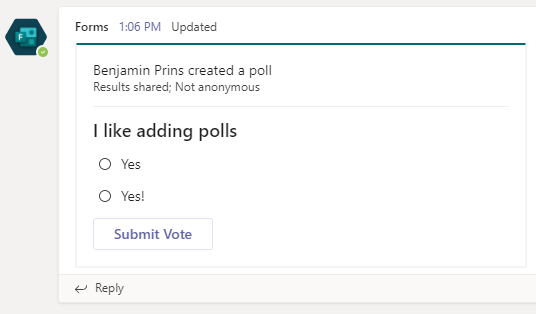
Want to start a survey or poll during a meeting or in a Team channel? With Microsoft Forms, you can create a survey or poll in seconds in Microsoft Teams. Its easy, simple and extremely fast.
How to create the poll
Go to a chat, channel or meeting chat where you want to add the poll.
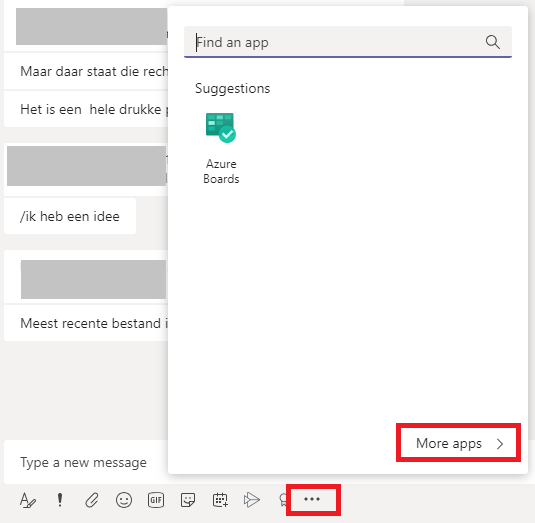
On the bottom of the window there is a Forms icon, click on the icon.
If you don’t see the Forms icon press on the more option (the three dots).
Click on More app and then on Forms.
Click on open, this will add the Forms icon to the chat and open a screen to create a new poll.
Create the poll, by adding questions and answers.
Click on save and on send.
You have now created a poll that is automatically posted in the chat.
Lists in Office 365 is a powerful tool and it integrates perfectly in Teams or your personal OneDrive. You can use one of the list templates provide by Microsoft or create your own. The best way to use Lists is with Teams, then you can work together in real time with conversation and lists side by side. Track what matters most to your team using rules, reminders, and comments.
The bonus is that you can also create a Power App directly from the list. Now you can really use the list anywhere and anytime. The Power App can also be connected to the Team for easy access.
Lists in Teams
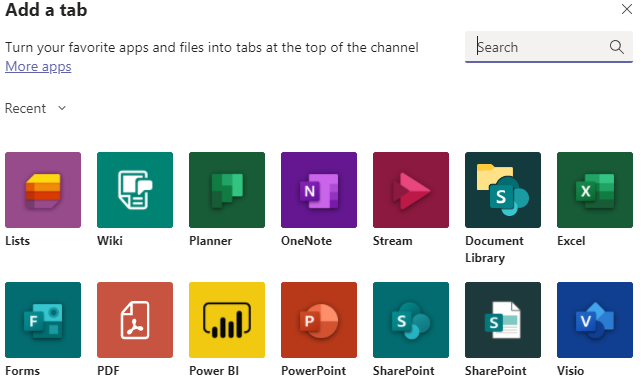
Add a Tab in Teams and select the List and click on save.
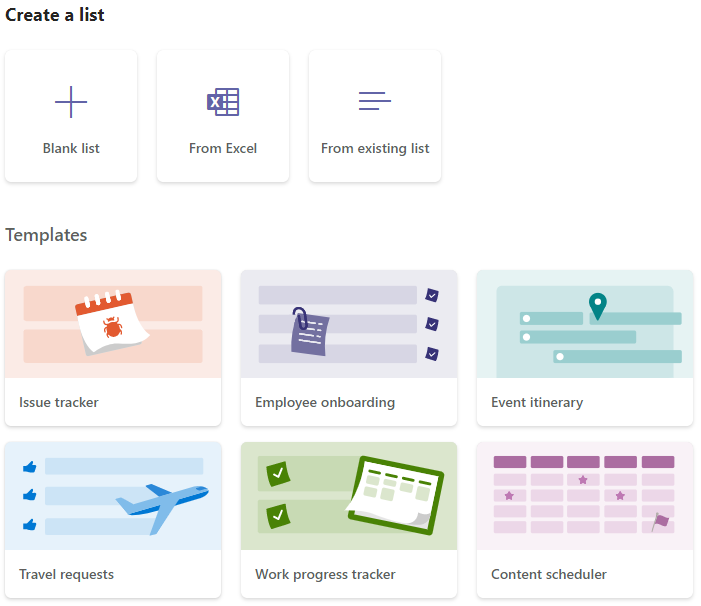
Create a new list.
You can use a template or create a blank list.
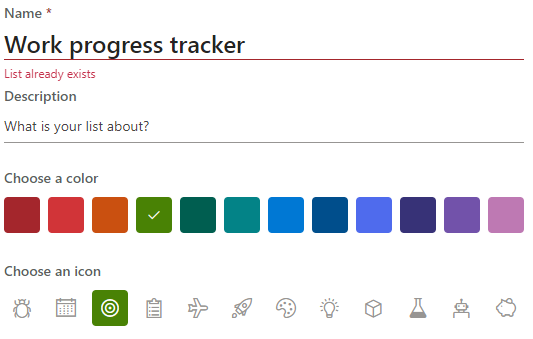
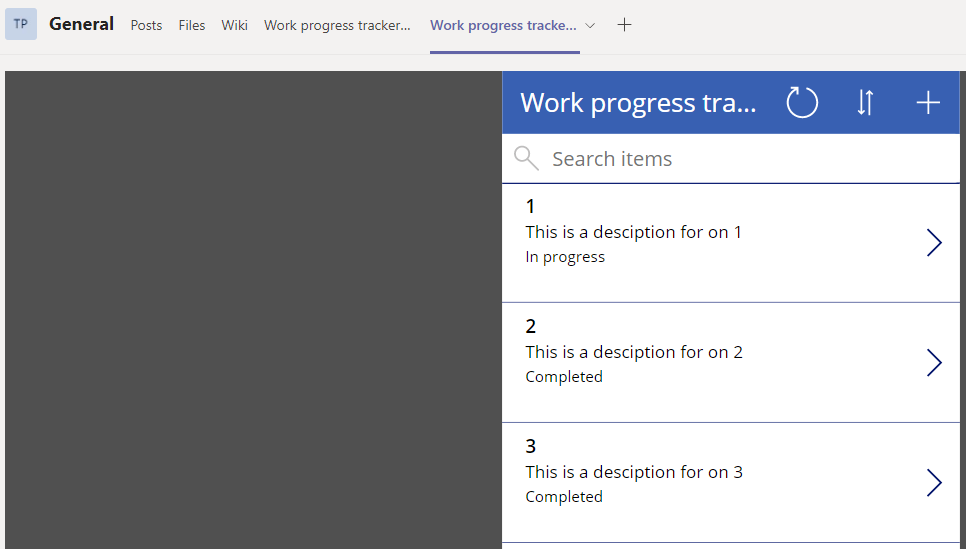
Click on the Work progress tracker template and click on Use template.
Fill in the name and description.
You have now create the List in Teams.
List with Power App in Teams
Its very easy to create a Power App based on a list. This Power App can also be added to Teams to be as productive as possible.
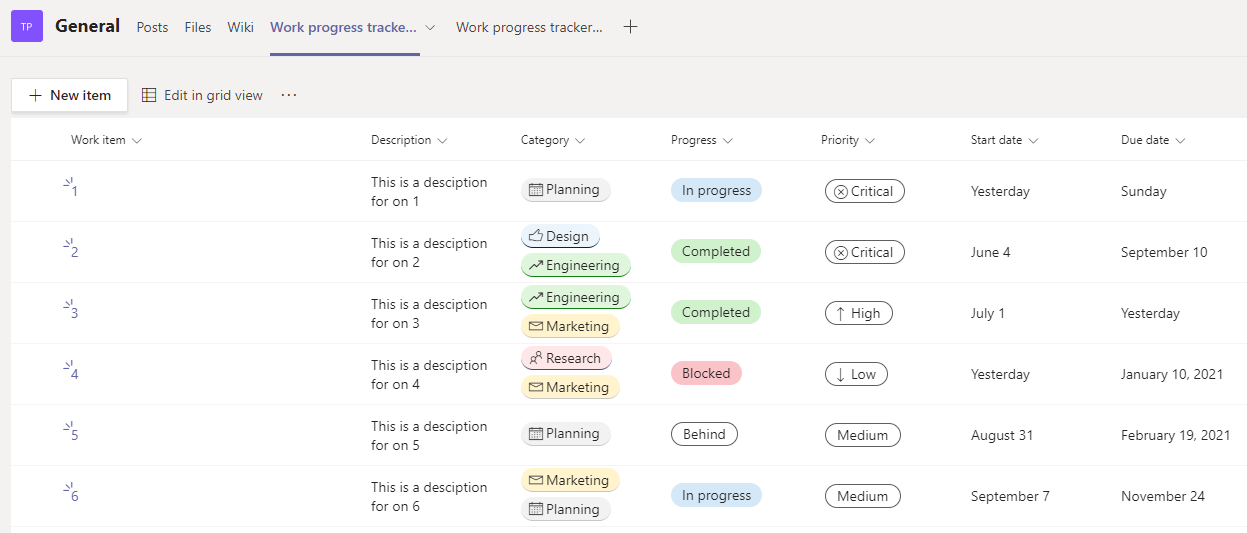
Navigate and open the Work progress tracker list.
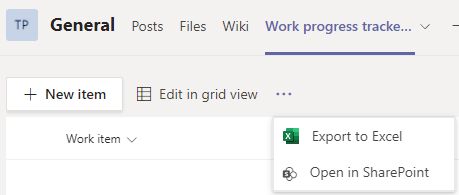
Open the list in SharePoint, this is the SharePoint site that is connected to the Team.
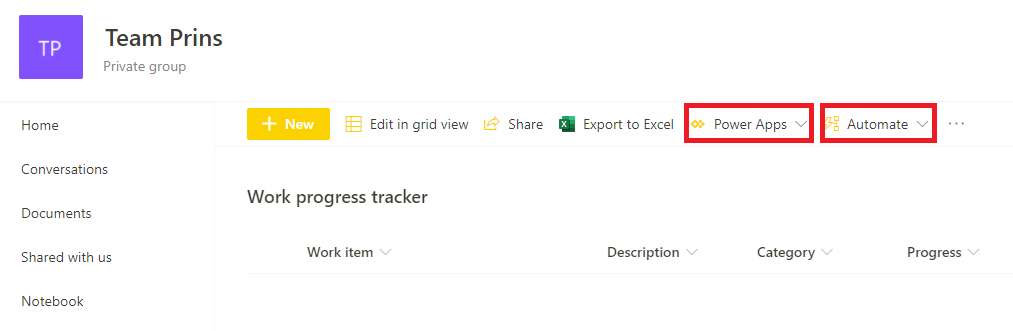
Click on Power Apps and Create an app.
Note that you can also create a Power Automate Flow for the list.
Fill in the name of the Power App and click on Create.
The app will be created, this process takes a few moments.
If required, you can change the Power App.
In this example I don’t change the Power App.
Navigate to the Team and add a Tab.
Find the Power App and click on Save.
You can now use the Power App in Teams.
Lists in OneDrive
Open Lists and click on New.
Select a template or create a blank list.
3. Select the Work progress tracker and click on Use template. 4. Fill in the name and description. 5. The Save to location for your OneDrive is My lists.
With Microsoft Power Automate we can now create flows that start based on specific columns being updated in SharePoint! This is a feature I have been waiting on for years! The action is called Get changes for an item or a file. The action returns a boolean for each field, whether it was just changed or not. Based on this boolean you know if a field was changed.
Creating the flow
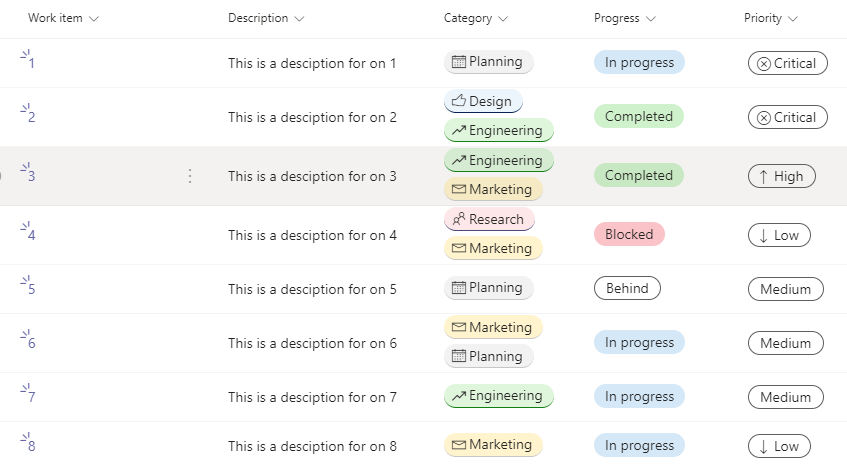
Create a SharePoint list, I created the following project list.
Enable versioning on the list.
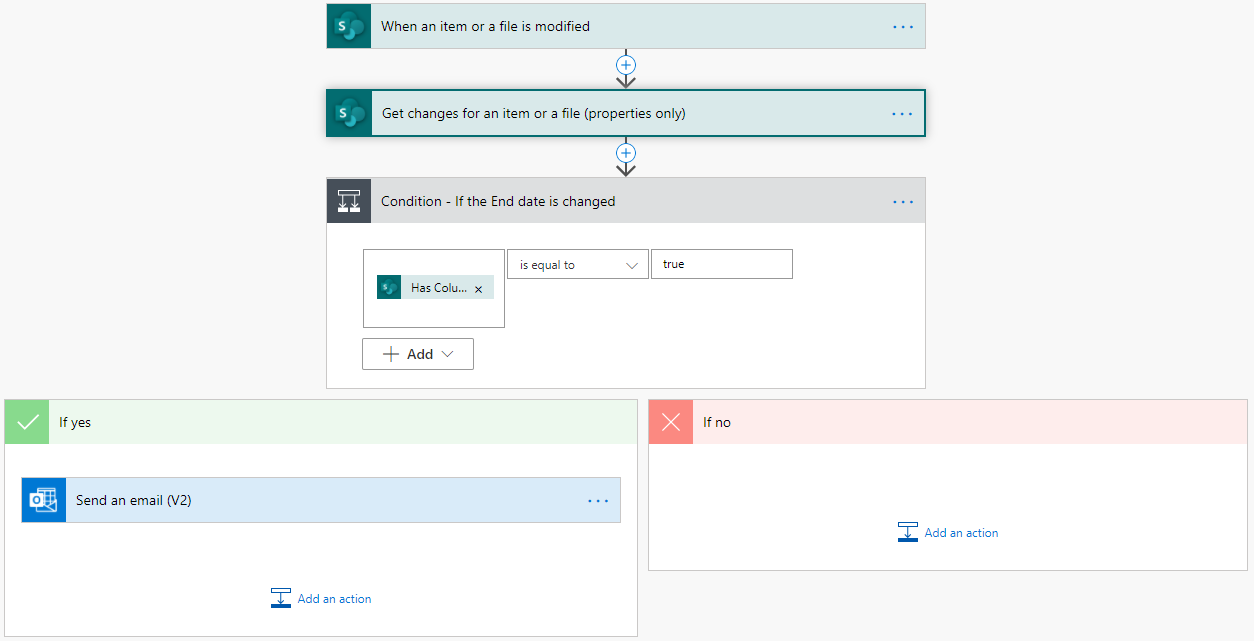
Create a flow and use the trigger When an item or a file is modified.
Select your site and list.
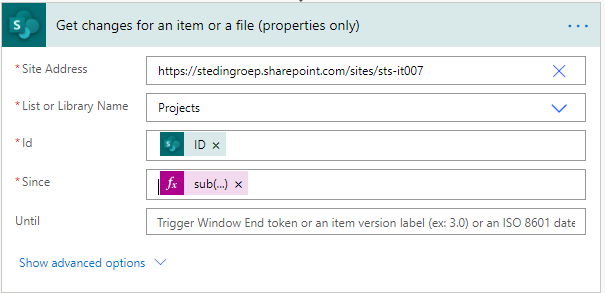
Add the action Get changes for an item or a file (properties only).
Fill in the site address, library name and the ID of the item that was triggered.
The field Since is used to get the changes we need to make a comparison. If you use 1.0 you will compare the current item version with version 1.0. But we want the latest changes so we use the following expression.
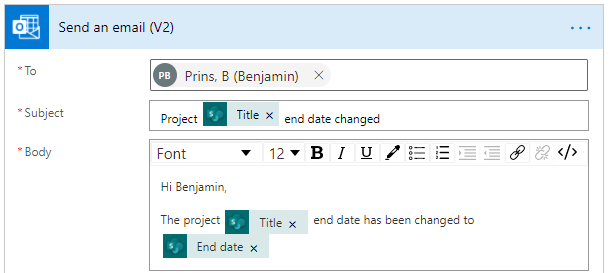
I want to send an email when the end date of a project changes.
Add the action Conditions to check if the end date was changed.
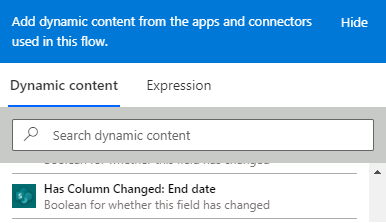
Add the dynamic content Has Column Changed: End date. This returns a boolean value.
Put the required actions in the If yes section after the condition. In my example I am sending an email.
Add the action Send an email (V2) and fill in as follows.
This website uses cookies to improve your experience. We'll assume you're ok with this, but you can opt-out if you wish.AcceptRead More
Privacy & Cookies Policy
Privacy Overview
This website uses cookies to improve your experience while you navigate through the website. Out of these, the cookies that are categorized as necessary are stored on your browser as they are essential for the working of basic functionalities of the website. We also use third-party cookies that help us analyze and understand how you use this website. These cookies will be stored in your browser only with your consent. You also have the option to opt-out of these cookies. But opting out of some of these cookies may affect your browsing experience.
Necessary cookies are absolutely essential for the website to function properly. This category only includes cookies that ensures basic functionalities and security features of the website. These cookies do not store any personal information.
Any cookies that may not be particularly necessary for the website to function and is used specifically to collect user personal data via analytics, ads, other embedded contents are termed as non-necessary cookies. It is mandatory to procure user consent prior to running these cookies on your website.